If you're a fan of rustic, warm, homespun looks, here's something you have to try ... embroidering on burlap! Also known as hessian, this rough woven fabric is made of vegetable fibers known as jute. It's often made into sacks to ship coffee beans and other foods around the world ... and you may even have a few of these basic bags in your possession. With a bit of special treatment, this fabric can be a fun surface for cozy-yet-worldly embroidery. Read on for tips and tricks!
Choosing Your Materials
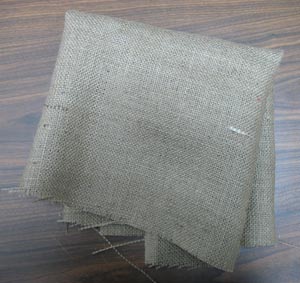
FABRIC: Burlap is available in many fabric stores -- we found ours near the "utility fabrics" such as Insul-Bright, interfacing, and plain canvas. If you have actual burlap sacks, feel free to use those, too! Burlap in general is a very rough, loosely woven fabric. If you can find some on the finer, tighter side, it will probably display embroidery better than the coarse kind.
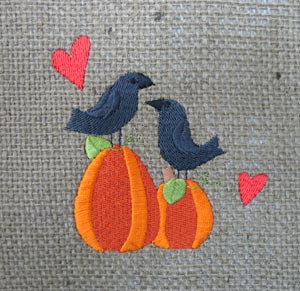
DESIGN: Solid, stitch-filled designs will work best with burlap. Avoid redwork or similar running-stitch designs, and designs with thin areas of stitching, as these will easily "disappear" into burlap's very rough weave. Primitive and country style designs work well with the look, but let your imagination run wild and try out all kinds of possibilities!
NEEDLE: Use a 75/11 sharp sewing needle to make sure the design stitches out as neatly as possible.
STABILIZER: Use a medium-weight cutaway stabilizer, attached with temporary spray adhesive to the back of your burlap fabric. This is absolutely necessary because of burlap's extremely coarse, loose weave. Depending on how loosely woven your particular fabric is, the stabilizer may show through a bit. Be prepared for this and plan ways to deal with it, such as backing your project with a light-colored fabric. Tear-away stabilizer will not provide the necessary support to keep the embroidery looking nice. Also, use a water-soluble topping such as Sulky Solvy over the top of the fabric while embroidering -- this will help keep the stitches from "sinking in" to the fabric and becoming less neat and visible.
Embroidering on Burlap
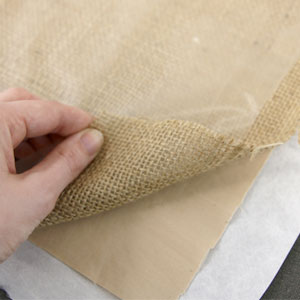
LAYERING FABRIC: Make sure to attach stabilizer to the wrong side of the burlap using spray adhesive, and lay a piece of water-soluble stabilizer on the right side of the burlap with no adhesive. If your burlap has large holes, you can place a similar colored fabric in between the burlap and the stabilizer. This way the stabilizer will not be seen behind the fabric.
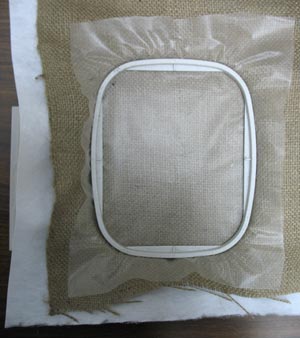
HOOPING: Spray a piece of medium weight cutaway stabilizer with temporary spray adhesive, and smooth the fabric on top. Lay a piece of water-soluble topping over the top, and tightly hoop the whole sandwich.
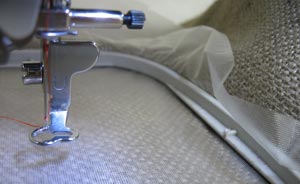
Embroider the design.
FINISHING: Tear away as much of the water-soluble topping as possible, then dab some water on the remaining bits to remove them.
Remember, because of burlap's loose weave, you may be able to see the cutaway stabilizer through the little holes in the fabric. You might want to make this work with your project by using a light-colored fabric behind the burlap, or not trimming the stabilizer and leaving it behind the whole burlap fabric piece.
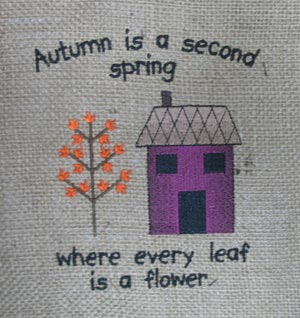
Here's another design we tried stitching on burlap. It has some thin areas of satin stitching for the letters and the tree. This design turned out better than we expected -- the cutaway stabilizer and water-soluble topping get the credit for that.
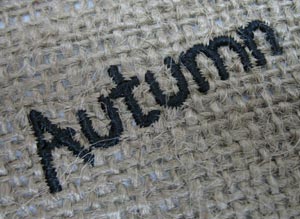
Here's a close-up of the lettering. As you can see, some of these areas of stitching are almost as small as a single "thread" in the burlap weave. This is why the stabilizer and topping are so important to keep the stitches where they should be.
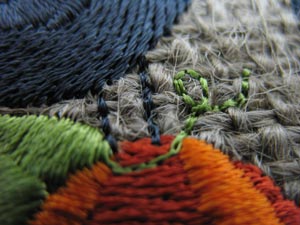
Here's a close-up of a tiny bit of running stitch in the first design. It sinks into the fabric so you can barely see it unless you're looking at it very closely. That's fine for this design -- just keep in mind that embroidery will show up best on burlap if it's mostly solid.
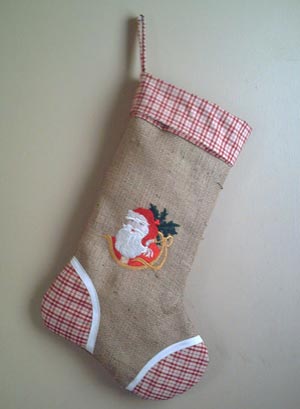
This Santa stocking in the Stitchers Showcase is made mainly out of burlap. The Victorian Santa Claus design combines with the rough, homespun fabric to make a pretty and nostalgic look.
That's all there is to it! Enjoy creating warm and rustic looks by embroidering on burlap.


