We are always happy to receive inspiring projects from stitchers like you! When Pat sent us pictures of her beautiful totes, we posted them on Facebook. People just loved them, and wanted to know how she made them. Click here to see Pat's bags in the Stitchers Showcase!
Due to popular demand, and because they are so fabulous, we modeled this project after her bag design. The photo on the left shows Pat's beautiful creations. Read on to make one of your own!
Supplies
Supplies Needed:
**1/2 yard faux suede upholstery fabric (for handles and front and back of outer shell)
**1/2 yard faux suede fabric (for inner lining)
**Medium weight cutaway stabilizer
**Temporary spray adhesive
**Air-erase pen
**4" in diameter round object (for tracing; I used a ribbon spool)
Special Project Notes:
I used faux suede for my tote, but many fabrics would work. Choose one you love!
Designs used:
For my faux suede tote, I used the medium size of the Spring Hummingbird Oval, along with the Simply Hummingbirds Accents. Designs from the Springtime in Bloom Design Pack or from the Spring into Art Nouveau Design Pack would be lovely as well.
Finished size: 12 1/2" wide by 10" high by 3" deep
Designs Used
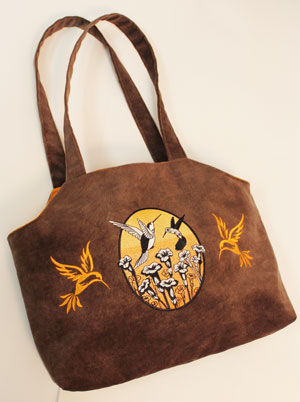
The tote is a wonderful blank canvas for embroidery, and this design in particular gives you a lot of room for stitching a favorite design (or designs!)
Whether you use faux suede or some other fabric, you'll be delighted with this classic and stylish bag. With one or more embroidery designs of your choice, it becomes that much more unique.
Read on for project instructions for creating this lovely bag!
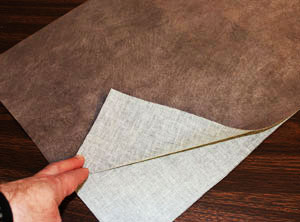
First, to prepare the fabric for the front and back outer shell portion of the bag, cut two pieces of fabric (we used faux suede upholstery fabric) to 13" wide by 17" high. Align the fabric pieces together and pin in place.
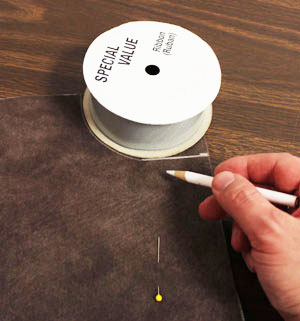
Next, mark and cut the curved top edges. To do this, mark 2 1/2" down from the upper right corner along the right edge of the fabric. Then draw a 2" horizontal line in from the mark you just made on the fabric. Also, mark 3 1/2" in from the upper right corner along the top edge of the fabric.
Place the 4" in diameter round object (we used a ribbon spool) with the bottom edge along the line you just drew and with the left edge aligned with the mark on the top edge of the fabric. Trace the shape from the top edge of the fabric down to the horizontal line.
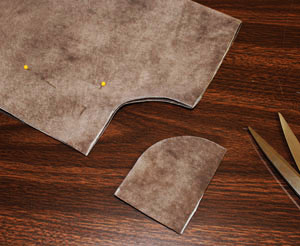
Fold the fabric widthwise (bring the short ends together, and pin in place.) Next, cut out the shape at the corner; cut through all four layers of fabric.
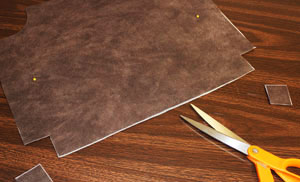
Unfold the fabric, but leave the pins in place holding the two layers of fabric together. Draw a 1 1/2" square at each bottom corner. Cut out the shapes, cutting through both layers of fabric.
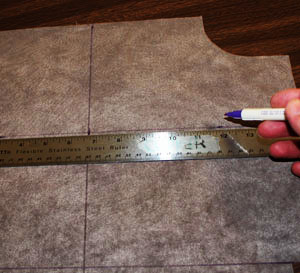
Using an air-erase pen or other marking tool, draw a horizontal line across the bottom of the fabric using the top of the square cut-outs as guides. The area below this line is the bottom of the bag; the area above the line is the embroidered area.
Measure and mark the center of the bottom line you just drew and the top edge of the fabric by measuring and dividing by two. Measure and mark the center of the side edges by measuring the top corners down to the bottom line then dividing by two. Draw lines connecting the marks. Where the lines meet is the exact center of the fabric.
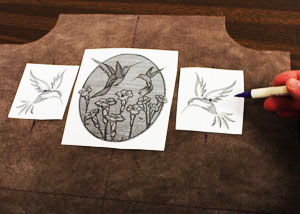
Create paper templates of the designs by printing them at full size using embroidery software. Poke a hole in the center of the center design and align it with the center point on the fabric. Make sure it fits well within the shape. There should be at least one inch of space between the top edge of the design and the top edge of the fabric, and at least one inch of space between the bottom edge of the design and the bottom edge of the fabric.
Position poke holes in the centers of the side designs and align them with the horizontal line on the fabric. I positioned the designs about 3/4" apart and with the outer edges of the side designs about 3" from the outer side edges of the fabric. Mark the vertical axis points of the side designs, remove the templates, and draw lines connecting the marks.
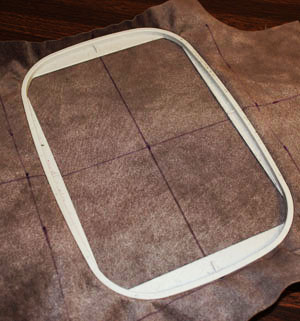
Spray a piece of medium weight cutaway stabilizer with adhesive and smooth the fabric on top. Hoop the fabric and stabilizer together for the center design by aligning the marks on the hoop with the lines on the fabric. Attach the hoop to the machine and load the first design. Move the hoop so that the needle is directly over the center point on the fabric. Embroider the design.
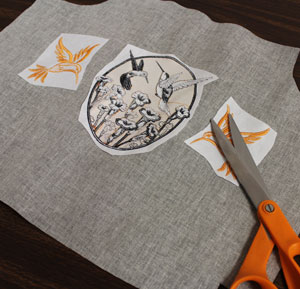
When the first design has finished, repeat the hooping and embroidering process for each of the side designs. The center design may be hooped over in the process, and this is okay as the design will not be harmed by the hoop. When all the designs have finished, carefully trim away the excess stabilizer on the backside of the embroidery.
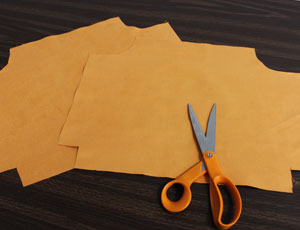
To prepare the fabric for the inner lining, lay the front or back outer shell fabric piece on top of the fabric, pin in place, trace the shape, and cut out the shape. Cut two pieces total: one for the front and one for the back of the inner lining.
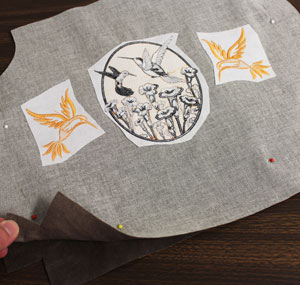
Now it's time to assemble the bag! Align the front and back outer shell piece together, right sides together, and pin in place. Sew a 1/2" seam along the side and bottom edges. Leave the entire top edge and the square cut-outs open.
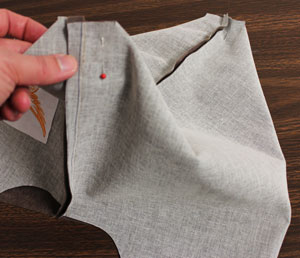
Pinch the fabric at each bottom corner bringing the side and bottom seams together. Pin in place and sew a 1/2" seam along each corner.
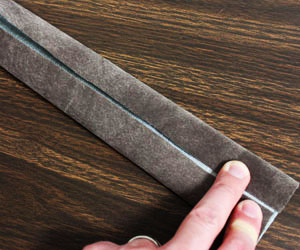
To prepare the fabric for the handles, cut two pieces of fabric to 4" wide by 25" long. Fold the edges of the long sides in to meet in the center. Finger press or press with an iron (use a low setting and a pressing cloth if using faux suede).
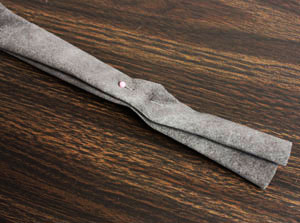
Fold the long folded edges together, pin in place, and sew a 1/4" seam along each long side.
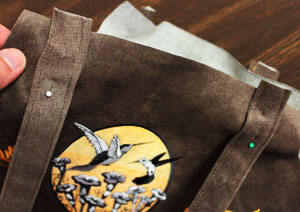
Turn the outer shell right side out. Place the ends of the handles along the top edges of the fabric about 1" from the top corners (on the front and back of the outer shell). Allow about 1/4" of excess to extend out past the edge of the fabric and pin in place.
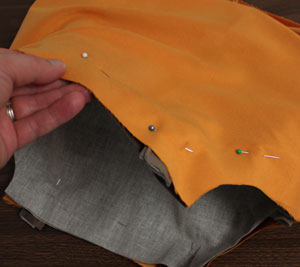
Insert the outer shell with handles inside inner lining portion, right sides together, align the side seams and top edges and pin in place. Sew a 1/2" seam along the top edge leaving an opening in between the ends of the handles on one side of the bag. Sew back and forth over the handles to reinforce the hold.
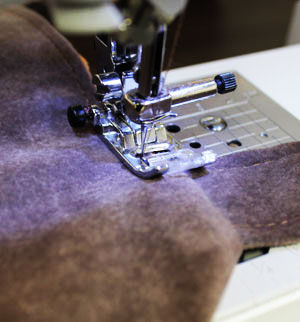
Turn the bag right side out through the opening. Insert the inner lining inside the outer shell. Turn the fabric of the opening in 1/4" and press. Also press the top edge of the bag. Then top stitch a 1/8" seam along the entire top edge of the bag.
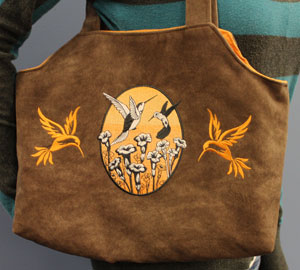
And now your beautiful tote bag is complete! A new bag is always so nice. Make one for yourself, and for a friend!


