Transform your favorite in-the-hoop quilt blocks into a stylish nine-patch pillow with this quilting tutorial! Steps demonstrate how to embroider each quilt block, then transform them into a cushion for your home.
Supplies
Project Needs & Notes:
- 18" x 18" pillow form
- 1/2 yard quilter's cotton (two colors of 1/4 yard each; for quilt block bottom fabric)
- 20" x 20" piece of quilter's cotton (for bottom layer of pillow front)
- 3/4 yard quilter's cotton (for back of pillow)
- Small pieces of quilter's cotton (for quilt block pieces)
- Sheer mesh cutaway stabilizer (we prefer Sulky Soft 'n' Sheer)
- Cotton batting
- Temporary spray adhesive
- Double sided fusible web (optional -- for adhering quilt block pieces)
- Cutting mat
- Quilting ruler
- Rotary cutter
- Curved safety pins
- Nylon monofilament thread
The designs featured in this tutorial include:
- Y5066, Winding Ways Quilt Block (In-the-Hoop)
- M15214, Quilting Accents - Small Flowers
Special Notes:
Be sure to wash and dry all fabric before starting to pre-shrink it.
Designs Used
When you download an in-the-hoop quilt block design you will see three files. One is the embroidery file, one is the dieline file (marked with the letters DL, and one is the printable planning sheet (marked with .PDF).
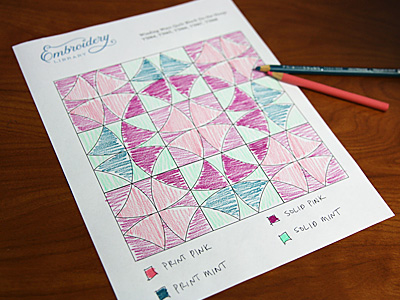
Print the planning sheet (the files ending in .PDF) and use colored pencils to plan your project.
Color color keys on the bottom of the page help for cutting the fabric pieces for each block. This pillow will use a total of nine blocks.
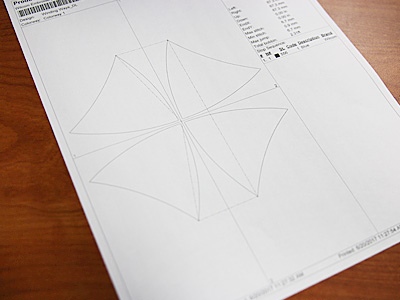
Dielines are used to cut the fabric to the right shape and size. Open the dieline files with embroidery software, and print them.
If you do not have embroidery software, Wilcom TrueSizer is a free program to use.
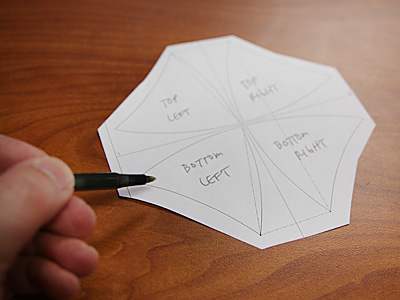
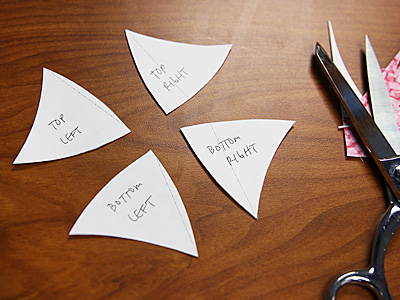
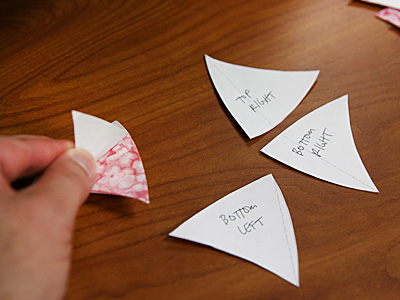
Cut around the dieline shapes leaving a bit of space around each piece.
Label the paper dielines with "top" and "bottom", as well as "left", and "right" to show their order on the quilt block.
This will keep the pieces in order and prevent them from being mixed up while embroidering.
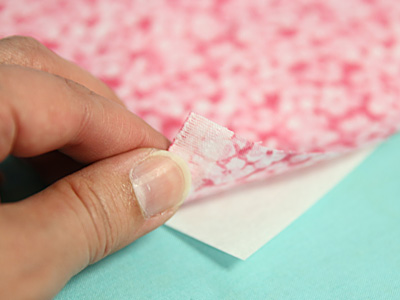
Spray the backside of the paper with a bit of temporary spray adhesive and smooth it onto the fabric. Then, cut out the shapes but do not remove the paper.
For another option, add one piece of double sided fusible web to the fabric before cutting out the shapes.
Add the fabric to the fusible web and press it with an iron.
Follow the instructions on the fusible web packaging for best results.
Then, add the paper dielines on top, cut out the shapes, and remove the back of the fusible web (but do not remove the dieline paper).
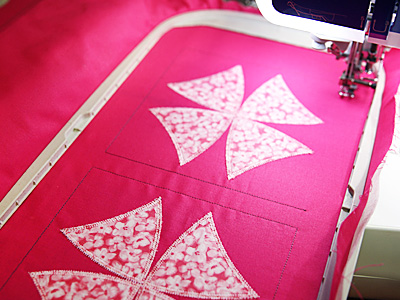
Next, hoop a piece of fabric with one piece of sheer mesh cutaway stabilizer.
Sheer mesh cutaway stabilizer works great with in-the-hoop quilt blocks because it keeps the blocks nice and light.
Attach the hoop to the machine and load the design.
Move the hoop so that the needle is directly aligned with the center point on the fabric.
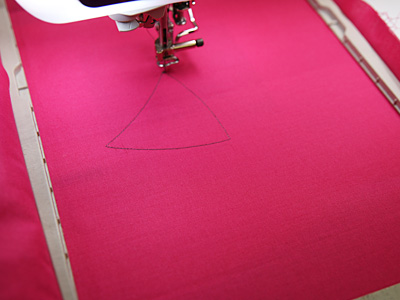
Embroider the design -- a dieline, or outline, will sew first.
After the dieline has sewn, remove the hoop from the machine, but do not unhoop the fabric.
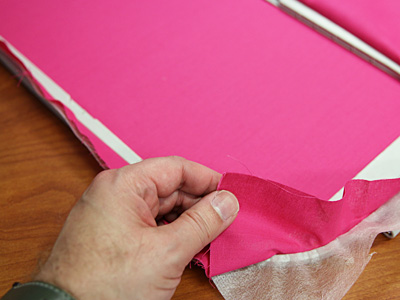
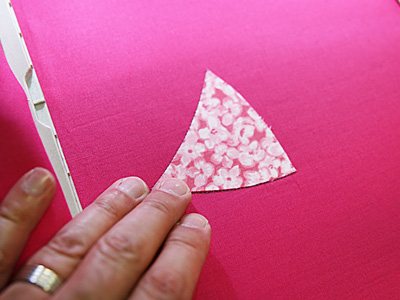
Spray the backside of the fabric with adhesive, remove the paper, and place the fabric piece right inside the dieline shape.
If you are using fusible web, remove the paper and press the fabric in place (no need for adhesive).
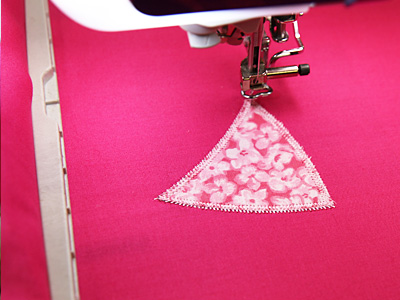
Attach the hoop back onto the machine and match the top thread to the fabric piece color.
Continue embroidering the design. A tack down stitch will sew next, this binds the fabric piece to the bottom fabric.
The dieline for the next fabric piece will sew next.
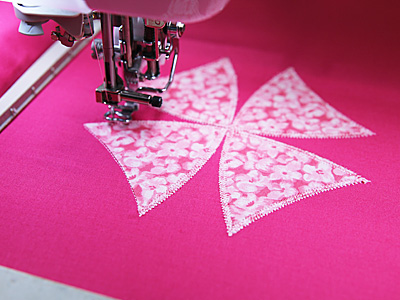
After each dieline sews, remove the hoop from the machine (but do not unhoop the fabric)
Add the fabric piece, attach the hoop back onto the machine, and continue with the design.
Match the color of the top thread with each fabric piece as you sew.
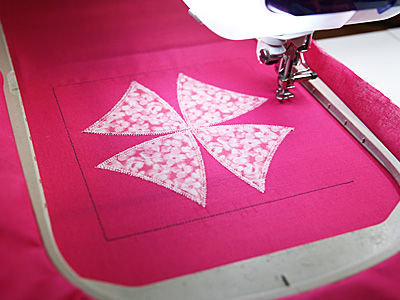
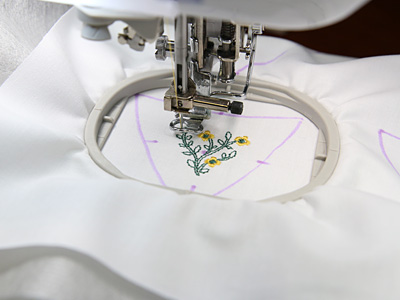
After the fabric pieces have sewn, a cutting line will sew last.
This line will be used to cut the quilt block.

When the design has finished, unhoop the fabric.
Print a template of the full embroidery file at full size to place the next block.
Position the template on the fabric leaving about 1" of space between the edges of the design and the first block.
Mark the center point with an air-erase pen.
Hoop the fabric and attach the hoop to the machine.
Move the needle over the center point of the next block, and embroider the block as you did in the previous steps.
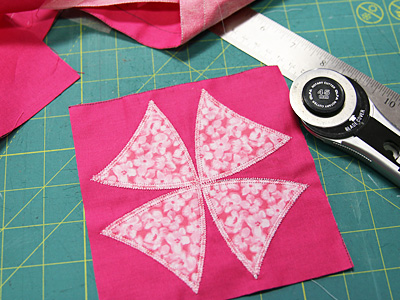
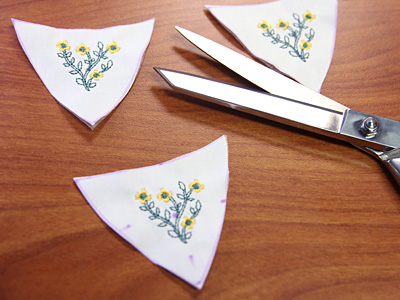
After the blocks have sewn, place the fabric onto a cutting mat.
Using a quilting ruler and rotary cutter, cut right along the sewn cutting lines of each block.
You can add a special touch to the quilt blocks by embroidering accent designs onto the fabric pieces before adding them to the block.
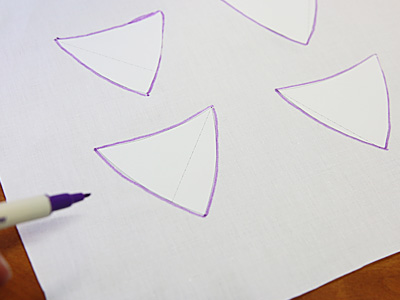
Place the cut dieline pieces onto the fabric and trace the shapes with an air-erase pen.
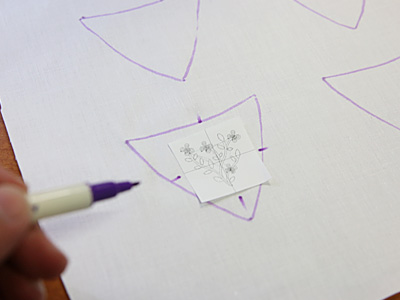
Print templates of the accent pieces.
Cut them out, and center them inside the dieline shapes.
Mark the center point and the horizontal and vertical axis lines.
Spray a piece of sheer mesh cutaway stabilizer with adhesive and smooth the fabric on top.
Hoop the fabric, aligning the lines on the first fabric shape with the marks on the hoop.
Attach the hoop to the machine, load the accent design. Move the hoop so that the needle is directly over the center point on the fabric, and embroider the design. Repeat this for each fabric piece.
When all accent designs have sewn, cut out the pieces.
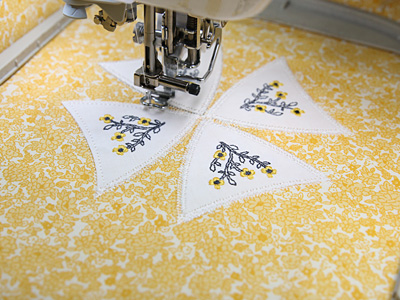
Load the full embroidery design, hoop the bottom fabric with sheer mesh cutaway stabilizer, and embroider the block as instructed above.
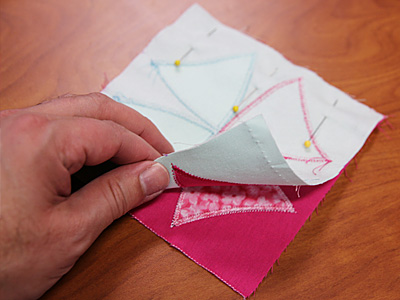
Assemble the blocks row by row, starting with the top row first.
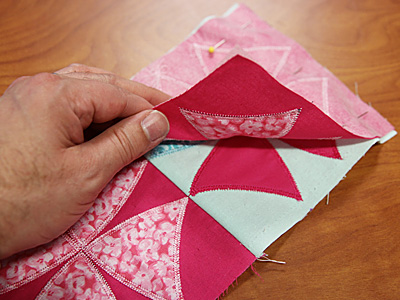
Align the block on the far left on top of the middle block, right sides together, and pin in place along the left side.
Sew a 1/4" seam along the pinned edge only.
Then, press the back seam using a hot, dry iron. Do not use steam when pressing quilt projects as the steam can distort or shrink the fabric.
Next, align the far right block on top of the middle block, right sides together, and pin in place.
Sew a 1/4" seam along the pinned edge, and press.
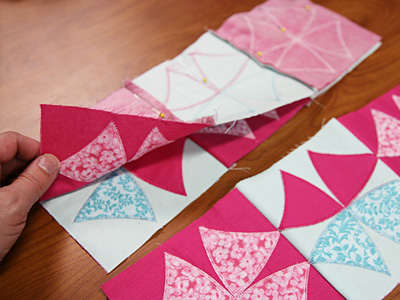
Repeat this for each row.
Then, align the top row on top of the middle row, right sides together. Pin in place, and sew a 1/4" seam along the pinned edge, and press the seam.
Add the bottom row on top of the middle row, align the seams, pin, sew a 1/4" seam, and press.
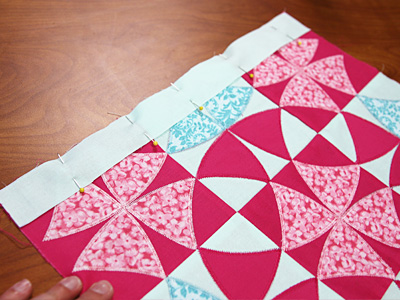
For the top and bottom borders, cut two pieces of fabric to 16" x 1 3/4".
Align the pieces along the top and bottom edges of the pillow front, right sides together. Pin in place and sew a 1/4" seam along the pinned edges, and press.
For the side borders, cut two pieces of fabric to 1 1 3/4" x 18 1/2". Align the borders along the side edges of the pillow front, right sides together. Pin, then sew a 1/4" seam, and press.
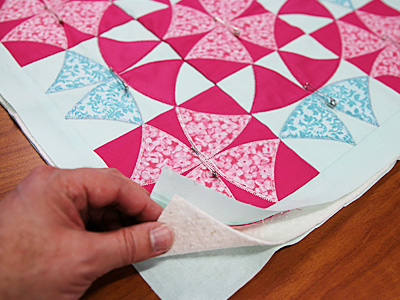
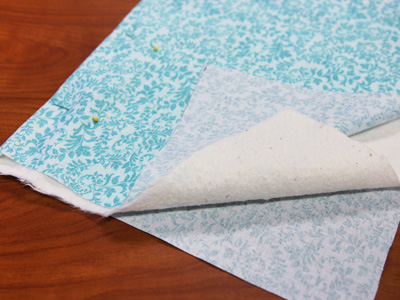
Cut a piece of fabric and cotton batting a bit larger than the pillow front.
Layer all the layers together:
First lay the bottom layer flat, wrong side facing up. Place the batting on top of the bottom layer fabric then the pillow front on top of the batting, right side facing up. Pin all the layers together.
Curved safety pins provide the best results when pinning through all the layers. Trim the bottom fabric and the batting along the shape of the pillow front.
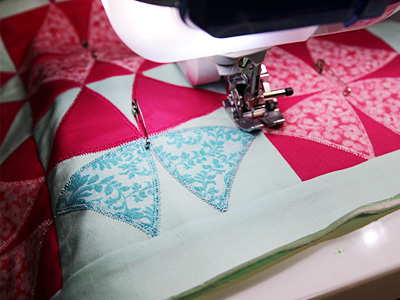
Quilt through all the layers.
In this tutorial, we used nylon monofilament thread in the needle and sewing thread in the bobbin, making sure the bobbin thread matched the color of the backing fabric.
Drop the feed dogs, and sew along the existing seams using a walking or free motion foot.
For the back pieces, cut two pieces of fabric to 24" x 18 1/2".
Then, cut two pieces of backing to 12" x 18 1/2". Fold each fabric piece in half widthwise, wrong sides together.
Insert the batting in between the layers on each fabric piece. Pin in place, and sew a 1/4" seam along the entire outer edges of the fabric.

Next, lay the pillow front flat with the right side facing up.
Align the back pieces on top with the folded edges facing in and the raw side edges aligned with the side edges of the pillow top -- the back pieces will overlap in the center. Pin in place and sew a 1/2" seam along the entire outer edge of the fabric.
Turn the fabric right side out and insert the pillow form inside in between the opening at the back.


