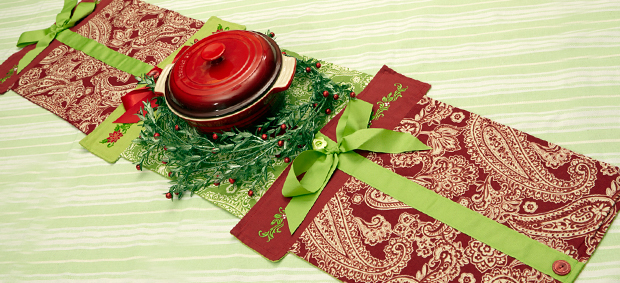
This table runner looks like a stack of Christmas gifts, but if you take a closer look you'll see the "gifts" are actually a series of placemats buttoned together! Use the table runner to update your holiday table setting, or unbutton the placemats and use on their own.
Supplies
Project Needs & Notes
Make as many placemats as you'd like to button together into the table runner. The fabric amounts listed below are for each placemat.
- 15" x 15" piece of lightweight print canvas for each placemat
- 17" x 5" piece of lightweight solid-colored canvas for each placemat
- 20" x 20" wide piece of lightweight solid-colored canvas for each placemat
- 1 3/4 yards of 1 1/2" wide ribbon for each placemat
- Temporary spray adhesive (like Gunold KK100)
- Medium-weight (2.5 ounce) cutaway stabilizer
- Air-erase pen for marking
- Medium-sized buttons
- Craft knife and cutting pad
- Needle and thread for some hand sewing
For this tutorial, I used the Damask Poinsettia Border and Damask Mistletoe Border. Browse through our other Christmas border designs to find something that matches your preference and decor.
Finished Size: One placemat is 16" x 17 1/2". Three placemats buttoned together makes a table runner that is 16" x 50".
This project was featured in the following:
Crafty Christmas Trunk Show Video
Designs Used
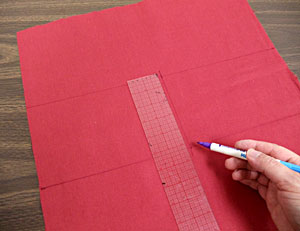
Prepare the fabric for the tops of the placemats by dividing a rectangle into quadrants so the border designs can be stitched evenly on the placemat.
On the solid-colored canvas, draw a 17" x 5" rectangle.
Leave a few inches of excess fabric around the edges of the rectangle.
Mark the center of the two horizontal lines of the rectangle. Then, draw a line connecting the marks, bisecting the rectangle. Mark the center of this line.
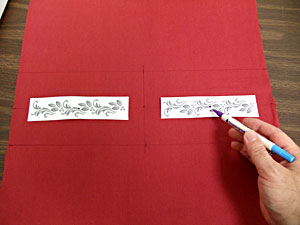
Measure and mark the center point on each side of the rectangle. Draw a horizontal line connecting the marks. Measure and mark the center of the horizontal lines to the left and right of the vertical center line.
Print a template of the border design from embroidery software. If you do not have embroidery software that makes templates, Wilcom's TrueSizer is a free program to use.
Arrange the templates on the rectangle so that the center points are in the center of each quadrant. There should be at least 1" of space between the edges of the designs and the outer edges of the rectangle.
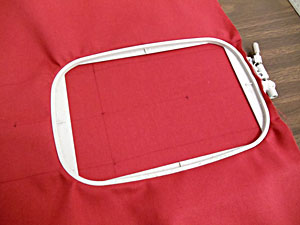
Spray cutaway stabilizer with temporary adhesive and smooth the fabric on top.
Hoop the fabric and stabilizer together to stitch one of the designs, and align the marks on the fabric with the marks on the hoop.
Embroider the design.
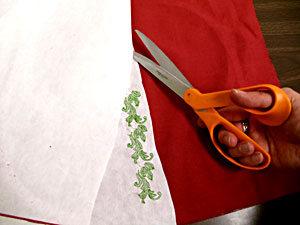
When the design has finished, trim the stabilizer away from the back.
Hoop the fabric for the second design, and embroider.
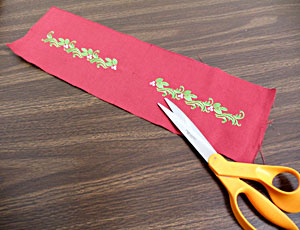
After the second design has finished, trim away the excess stabilizer from the back.
Cut out the rectangle shape.
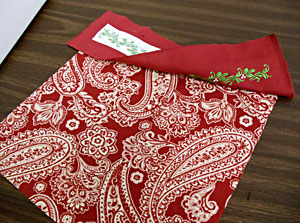
Cut a piece of lightweight print canvas to 15" x 15".
Align the bottom edge of the rectangle shape with the top edge of the print canvas. Place right sides together.
Pin in place and sew a seam along the pinned edge only. This is the assembled front piece.
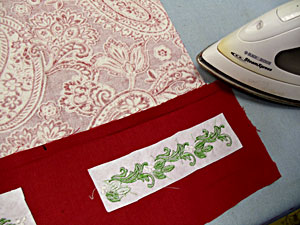
Fold the back seam down with the top piece fabric facing up; press.

Next, add the ribbon strip. Cut a piece of ribbon 18" and pin it in place along the center front of the assembled front piece.
Sew a 1/4" seam along each long edge of the ribbon.
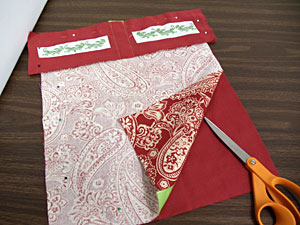
Place the assembled front piece on top of the solid-colored canvas, right sides together. Pin in place.
Cut around the shape.
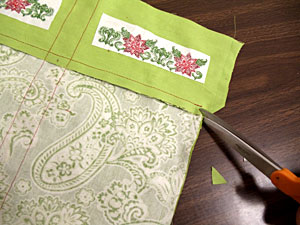
Sew a 1/2" seam along the sides and bottom edges. Leave the top open for turning.
Trim the corners under the rectangle shape.
Cut a 1/2" slit at each inner corner, being careful to not cut the seams. When turned right-side out, the slit allows the fabric to lay better.
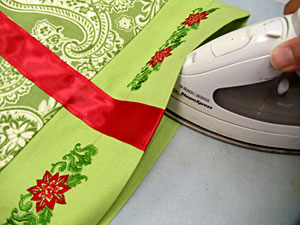
Turn the placemat right side out and press the seams. Then, fold the fabric of the top edges in 1/2" and press.
Top stitch a 1/4" seam around the entire outer edge of the placemat.
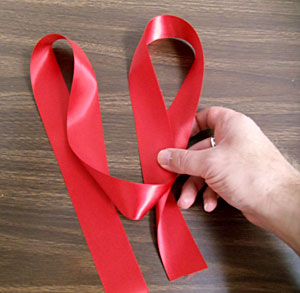
To make the bow, cut 40" of 1 1/2" wide ribbon.
Form two equal-sized loops.
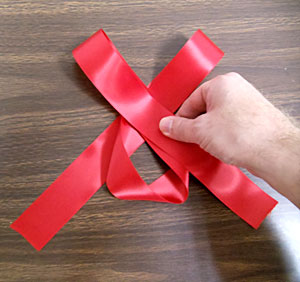
Bring the right loop over the left loop.
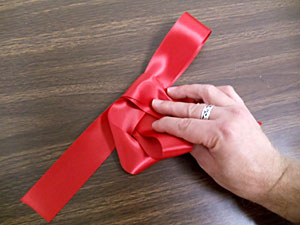
Then, bring the right loop around the back of the left loop and then through the bottom opening.
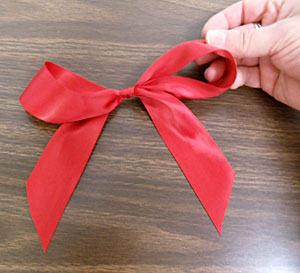
Pull the loops tight, adjust by pulling on the tails, and trim the tails to the length you want.
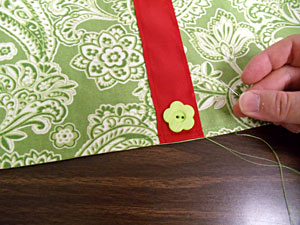
Next, add the buttons and button holes.
Place a button at the top center of the placemat, about 1/2" from the top edge. Mark the bottom of the button.
Sew a buttonhole starting at the mark that you made. Cut it open with a craft knife and cutting pad.
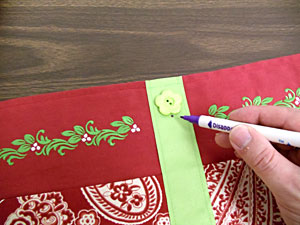
Sew the button on the bottom center of the placemat, about 1/2" from the bottom edge.
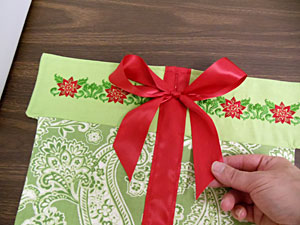
Add the bow just under the buttonhole. Hand sew it in place.
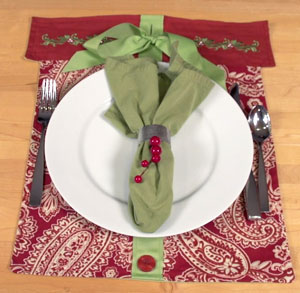
The embroidered sections of these placemats and ribbon detail mimic the look of a bow on a gift box.
Use the gifts buttoned together as a table runner, or unbutton to use as placemats on their own.


