Technology has added amazing depth and dimension to our lives. For most of us, the days of treadles and wooden embroidery hoops are a thing of the past. We now have computers and the Internet and all the newfangled things that come with it, making designs, tutorials, information, and instructions instantly accessible.
At times it seems like new technology is far outpacing my ability to organize it. I resisted the transition from film to digital photography because I had no idea how to organize digital photos! Now that I have that figured out (sort of), I have a deeper understanding of how wonderfully convenient digital photography can be.
And so it is with embroidery designs, color change sheets, PDFs, and all the other accoutrements that accompany embroidery designs. Easy to find, easy to download -- but then what? How can it all be organized so that when we're ready to begin a project we know where everything is?
Today I'm going to share my method of organizing with you. It's a good one. But like all methods of organizing, it might work for you, or you might need to tweak it and refine it to get it exactly the way that you'd like. Or, you might use a different method altogether. But if you're just getting a start in embroidery or are looking for a new system for easier location and retrieval, then try this!
The process shown below is demonstrated with Windows XP and Internet Explorer 8. If you use a different operating system or web browser, you might have different clicks or clacks to create folders and download.

First, I'm going to demonstrate how to make a primary folder for embroidery designs. I'll do this on my computer's main drive, which is called a C drive.
Right click on the Start button, then left click on Explore.
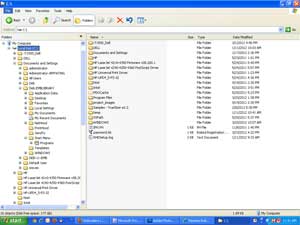
That'll bring up a string of folders, each labeled. I'm going to make a new folder here.
Left click on the drive that says C.
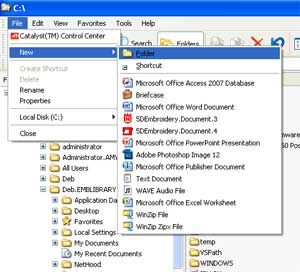
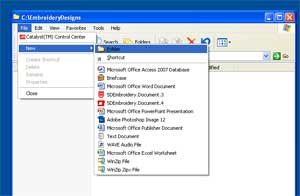
Then, on the top toolbar, click File. That brings up a submenu; select New. Then another submenu will appear; click on Folder.
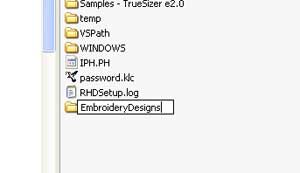
A new folder will appear! Give it a name that you like. For the sake of ease, I've named mine "Embroidery Designs."
Now I'm going to make this folder easy to access by putting a shortcut on my desktop.
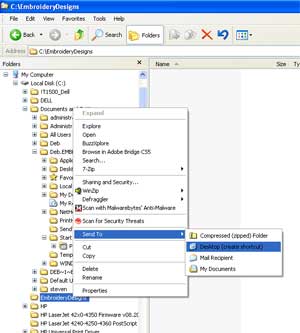
Right click on the folder that says Embroidery Designs. Left click on Send To; select Desktop. This creates a shortcut on your desktop so it's easy for you to find this folder and work with it.
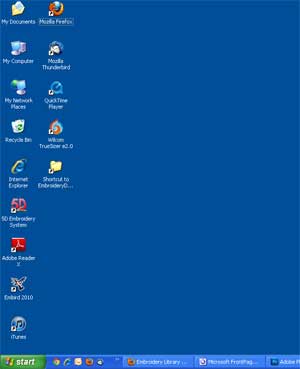
Take a peek at your desktop. You should see a new folder there called Shortcut to Embroidery Designs.
Success!
Next I'll make subfolders in the Embroidery Designs folder.
Double-click on the Embroidery Designs folder on your desktop to open it. Then click on File, New, and Folder. That will create a new subfolder in your main designs folder.

I created six subfolders and named them according to the designs that I use most often. My subfolder titles are Animals, Borders & Corners, Flowers, Tattoo & Tribal, One-Color, and Redwork.
The names of your subfolders will be different depending on what kind of designs you prefer, or how you think of them categorically.
Now that I have the subfolders set up and named the way I like 'em, it's time to start sorting out the designs and accoutrements.
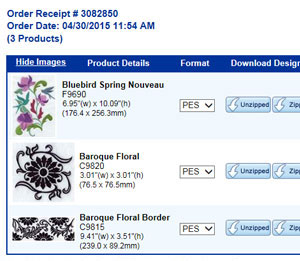
Here's a screenshot of an order in my order history. The first design listed is a floral and bird design, so I'm going to put that in a "flower" subfolder.
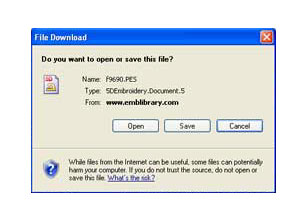
Click on a button to download the design. A window will pop up asking if you want to Open or Save. As always, click on Save.
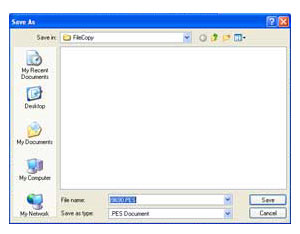
Then a window pops up asking me what I want to save it as. But wait a minute! That's not the folder where I want to save the design!
Sometimes web browsers try to "help" by assuming where you want to put things. No worries -- in just a couple of clicks you'll be bossing your web browser around and telling it where things should go.
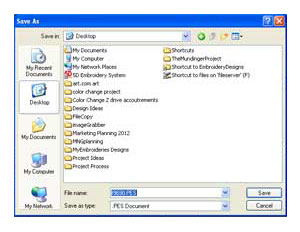
Remember how I made a shortcut to the designs folder on the desktop? I click the Desktop icon on the left side of that window so that the web browser will know that I want to put the designs somewhere there....
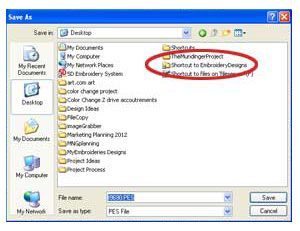
Now I see the Embroidery Designs folder! I double-click on that folder to get to my subfolders...
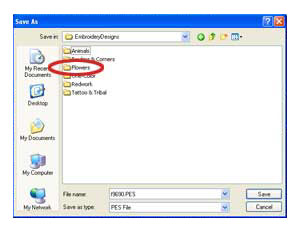
...and double-click on the Flowers folder. This is where I want the design to go.
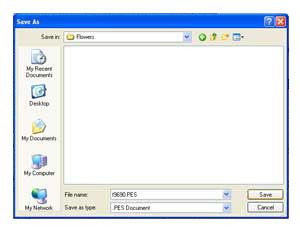
Now that my design is headed toward the right folder, I click Save.
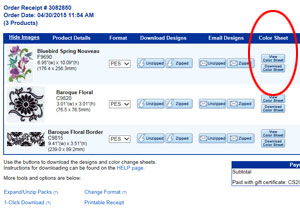
For every design, there's a color change sheet. That sheet not only shows the thread that we used in the stitchouts at the website, but it also shows size, stitch count, thread weight, and any special notes. It's a handy-dandy tool to have.
I'm going to keep the design AND the color change sheet in one spot so that when I'm looking for one, I'll find the other.
Click the PDF button to start downloading the color change sheet.
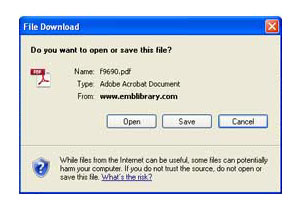
When asked if you'd like to open or save, click Save.
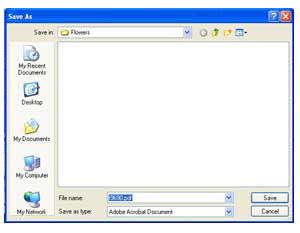
Your web browser should remember where you saved the last file, so it will default to the same subfolder as last time. Double-check that, and click Save.

When you want to find your embroidery designs, go to your desktop and double-click on the folder for your design files.
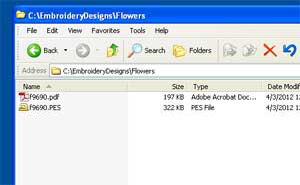
Click your way into the subfolder, and presto! The .pdf and design file are grouped together. If your design has any special project instructions, you can download those to this folder too.
And, if you've stitched a design and want to keep notes about what you made and who it was for, you can create a Word document or Text document, name it the same as the other files, and store them all together here.
It's good practice to back up your embroidery designs every so often. I generally back mine up every month; some people will back up more often.
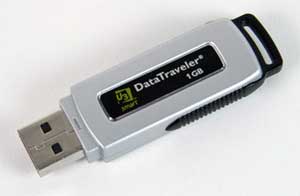
To do that, get a USB stick / travel drive / thumb drive (it's known by many names). Insert it into a USB drive on your computer. Then, right click on your Embroidery Designs folder, choose Send To and send it to your USB drive. That will make a copy of the folder.
If your computer crashes and you lose files, or if you clack instead of click and end up sorting ladybugs in with lions, it'll be easy for you to restore the data from your USB drive.
You can also download designs from your order history, but it'll be faster to work from a backup drive like this.
Once you have your folders and subfolders set up and you become comfortable with the clicking and clacking, organizing is a breeze. It took a little less than two minutes for me to download an order of 6 designs into their appropriate folders; it took me 12 seconds to back them up on a USB drive (having more designs and files will take a little bit longer to back up).
Organizing design files can seem time-consuming, especially if you're ready to start stitching. But in my experience, taking the time to organize designs really saves time when trying to find things later.
I hope you found this article helpful! Do you have a variation of the above method, or a different method altogether? I'd love to hear about it and share your ideas and tips with others! Send me an email - the address is support@emblibrary.com. Please keep your ideas and tips non-software specific, as many embroiderers do not have software programs.


