Let your passion greet visitors as soon as they hit the front door. Using a combination of embroidery, ribbon, pine boughs, chenille, and miniature ornaments, you can welcome visitors with color, warmth, and friendship. Designs for this project feature pets and pet accessories, but you can apply different designs to the concept: flowers, red hats, snowflakes, antique ornaments - let your fancy take flight!
Supplies
-
Fabric - For sewing the designs I used a white woven blend. For the welting on the center pillow I used paw prints.
-
Piping- Conso
-
Chenille stems
-
Ribbon- 2 1/2" wired burgundy/plaid
-
Polyester fiber fill
-
Pellon Fusible Fleece
-
Wreath 26" pine
-
Assorted mini ornaments
-
Additional helpful tools- Olfa rotary cutter and large crochet hook
The main design of the fireplace was sewn and trimmed to a 9" square. I cut a piece of fusible fleece the same size and ironed it onto the back of the design.
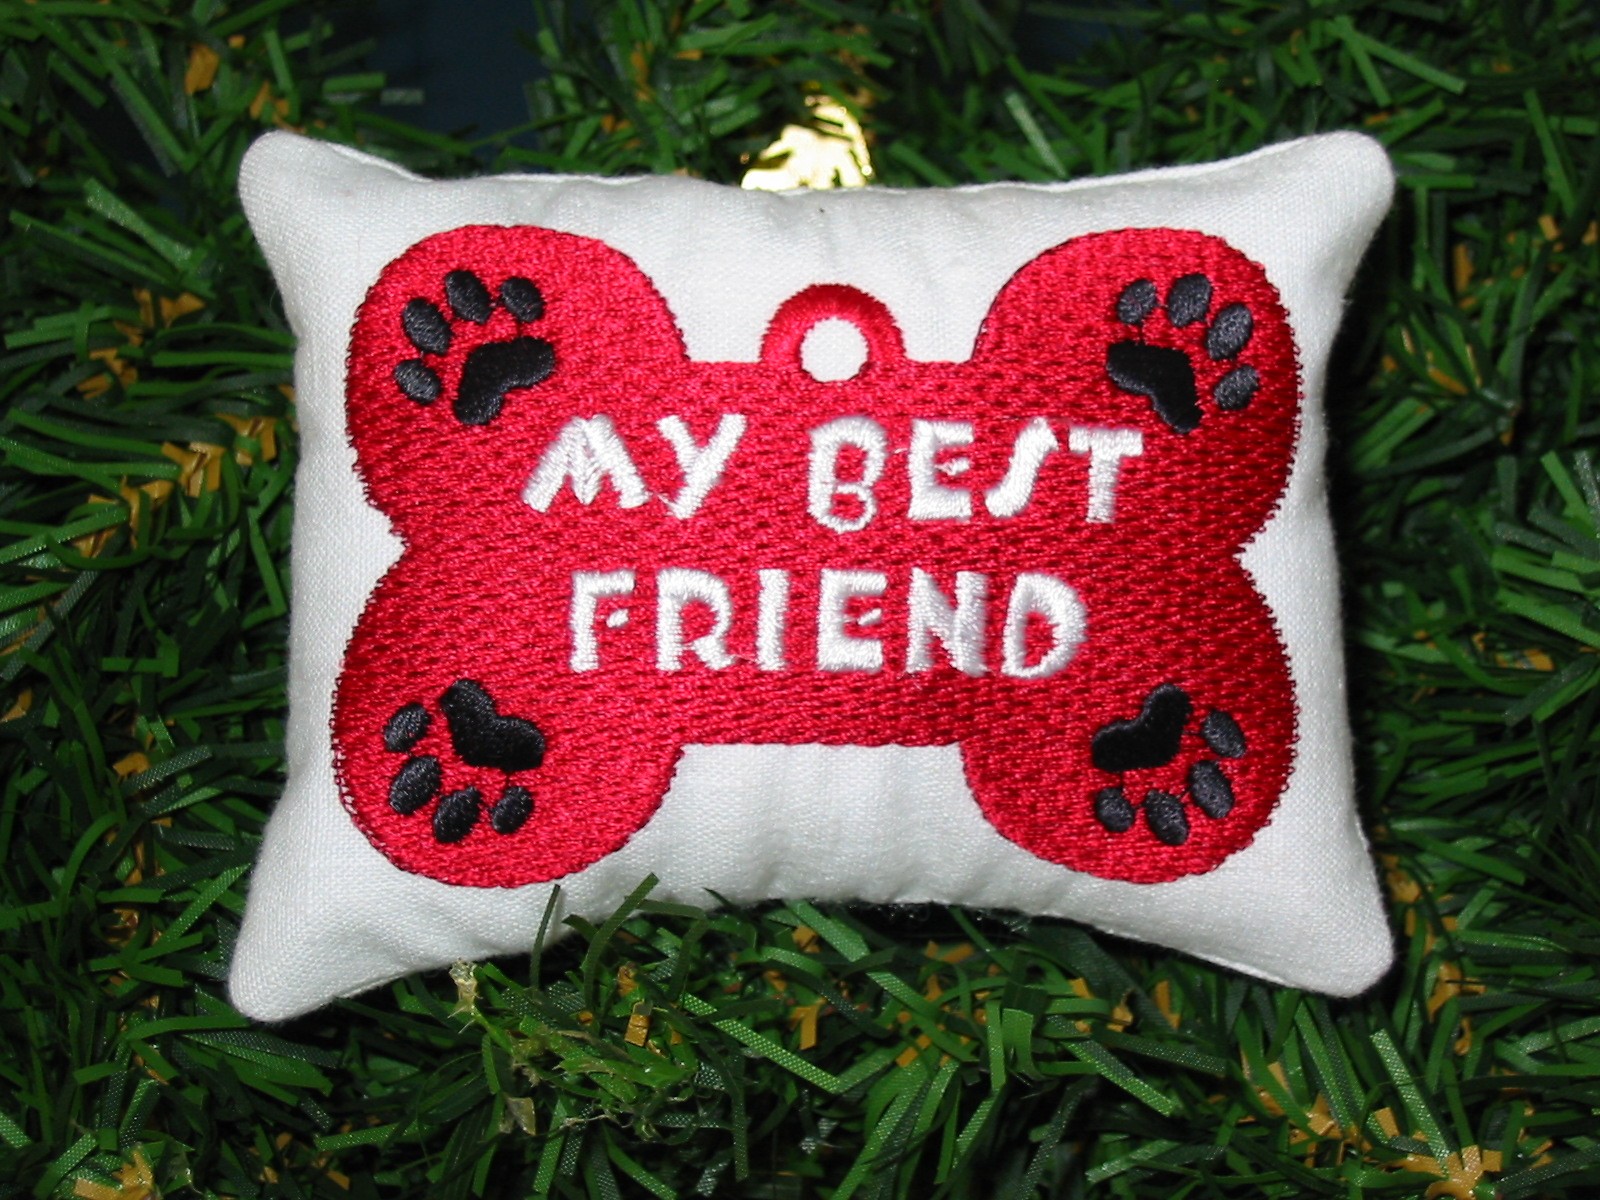
Designs Used
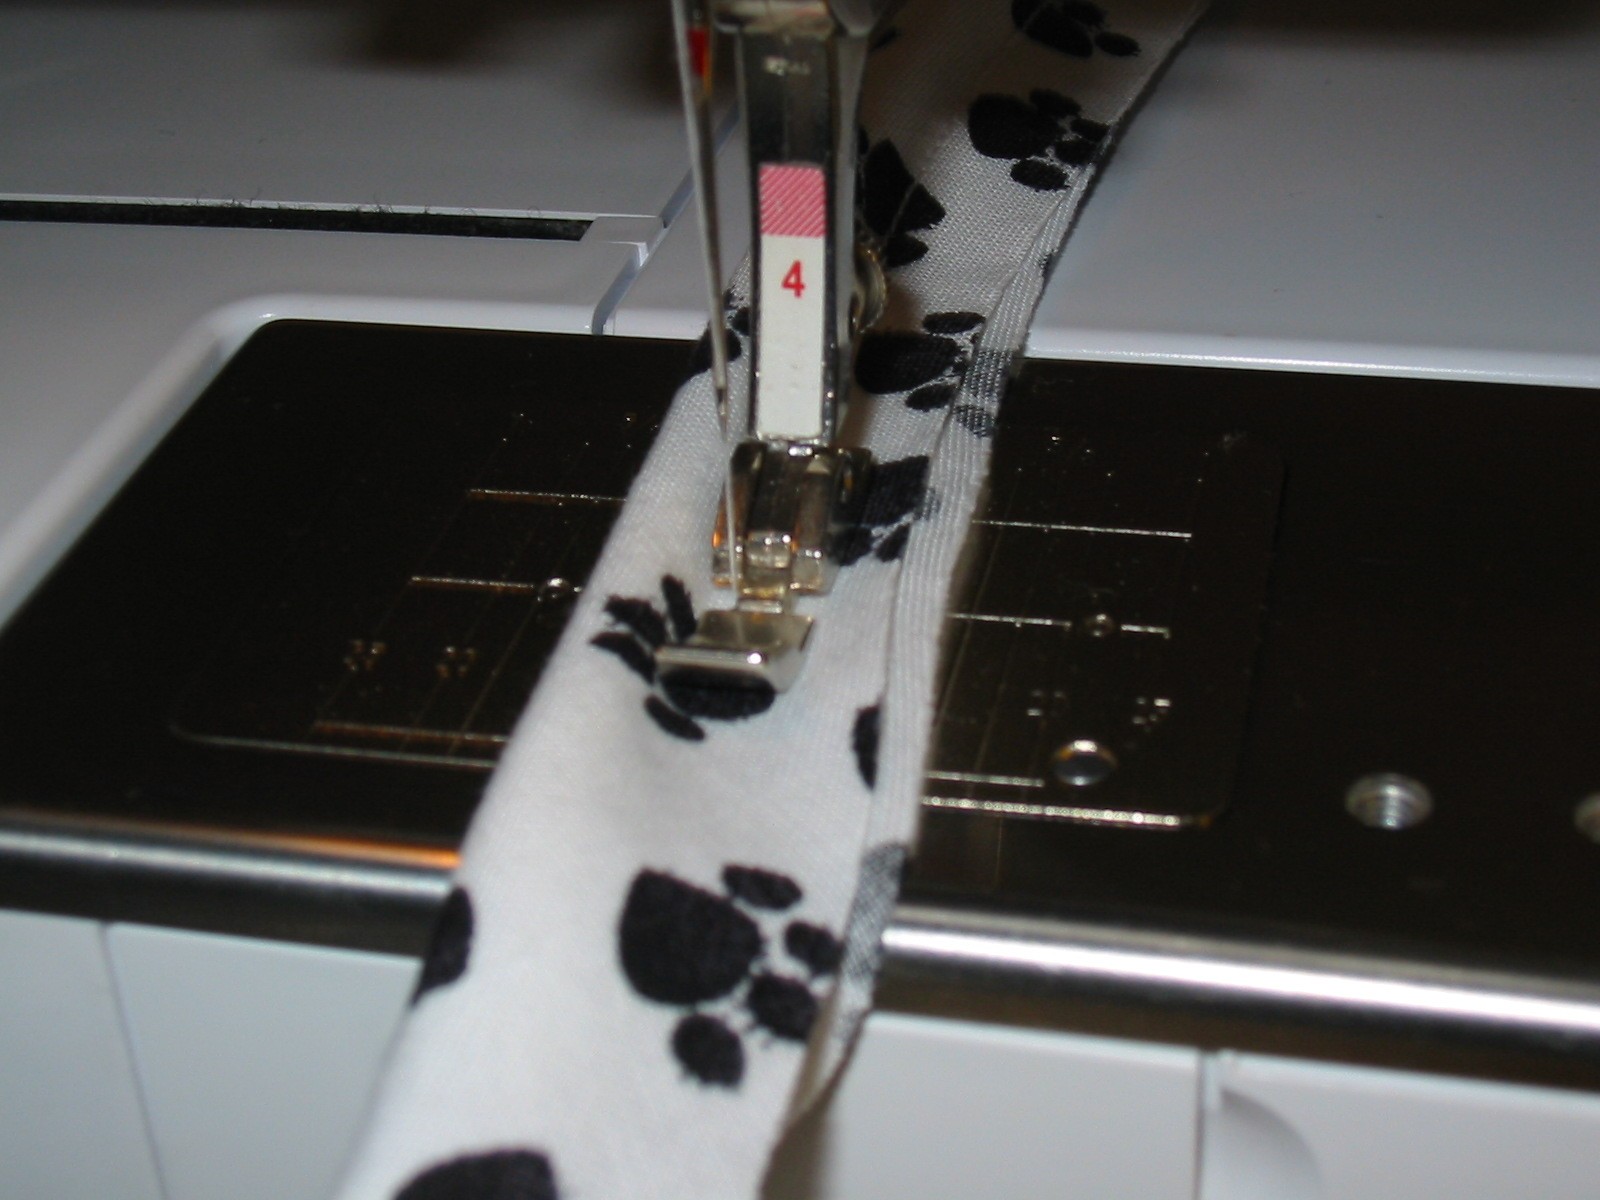
I cut the paw print fabric into several 1 1/2" strips on the bias. I cut these with a rotary cutter on a 45 degree angle and attached two strips together. Wrapping the cording with the fabric strip, I created the welting by sewing along the cording using a zipper foot.
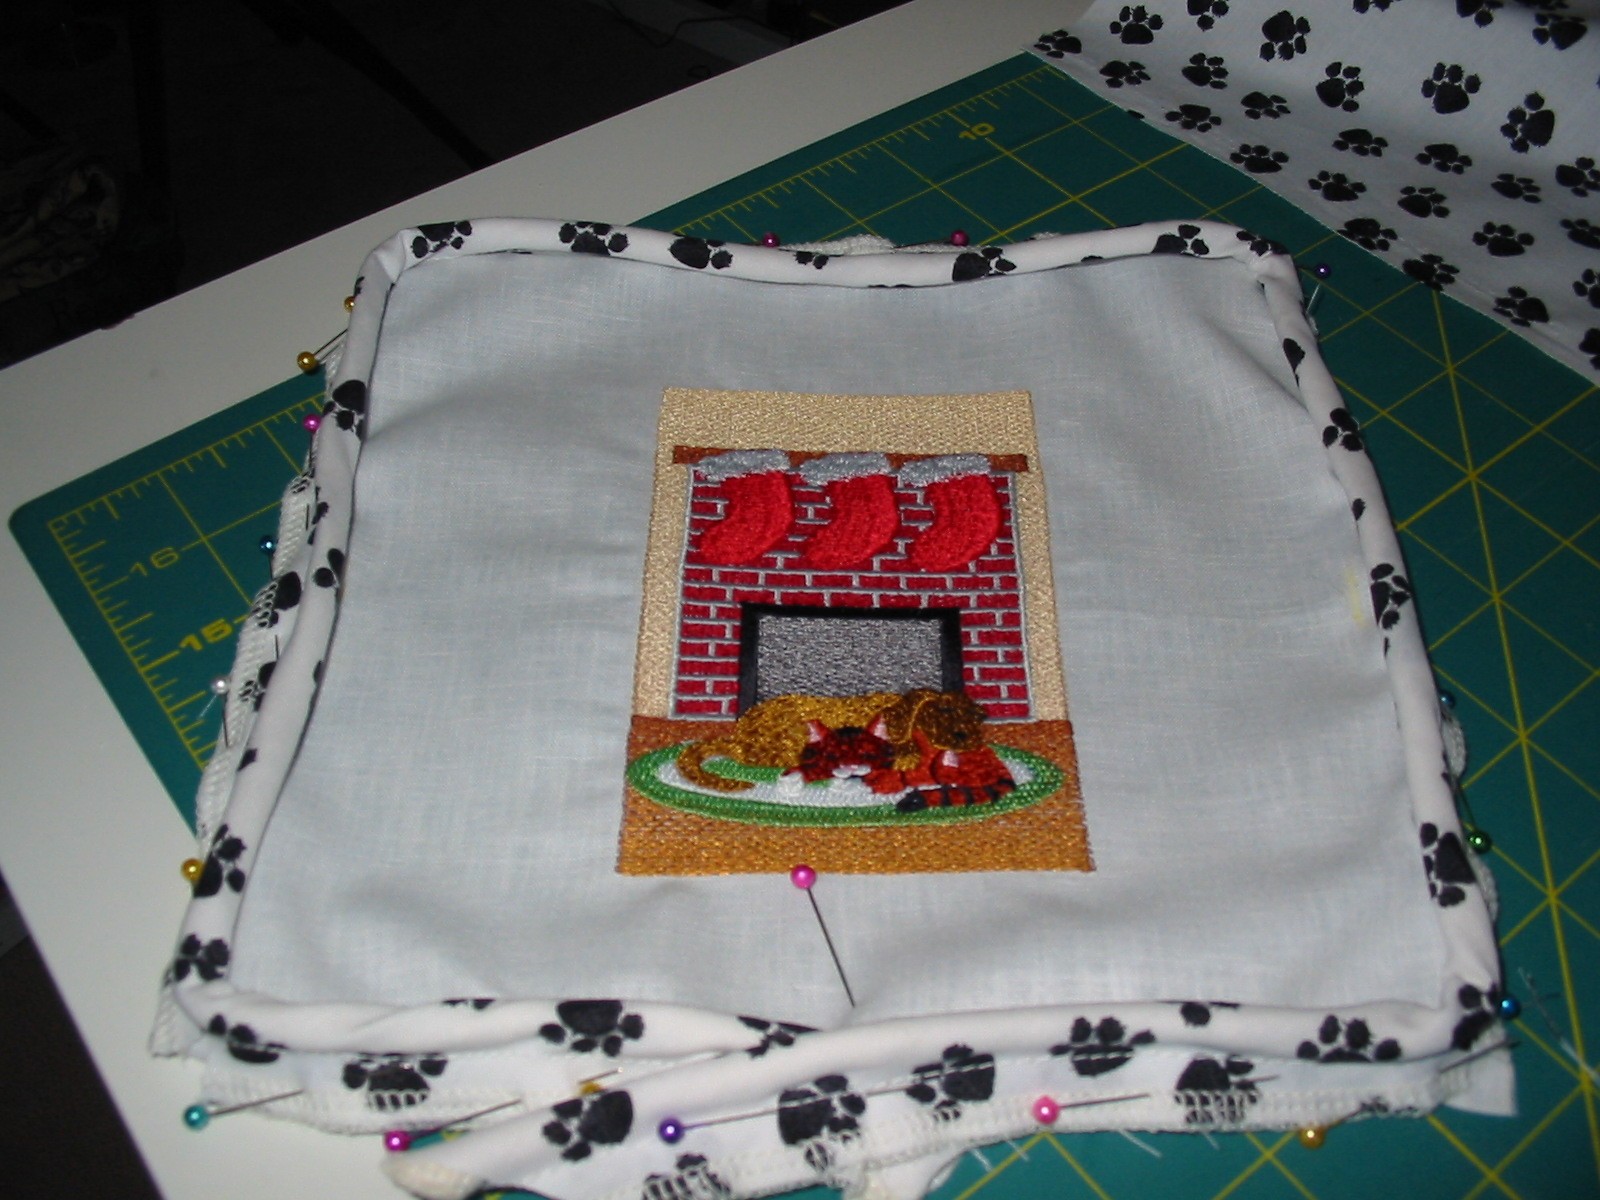
Then I attached the welting to the front of the pillow. The backing was cut the same size as the front, and with right sides together, I stitched them together, leaving the bottom open a few inches in the middle for turning.
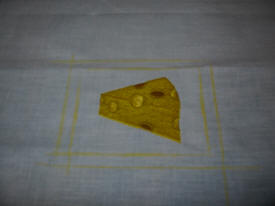
The other designs were sewn onto the fabric and then trimmed to 3/4" from the design, and I applied the fusible fleece to these also. These were then sewn to the back fabric in the same fashion- without the welting.
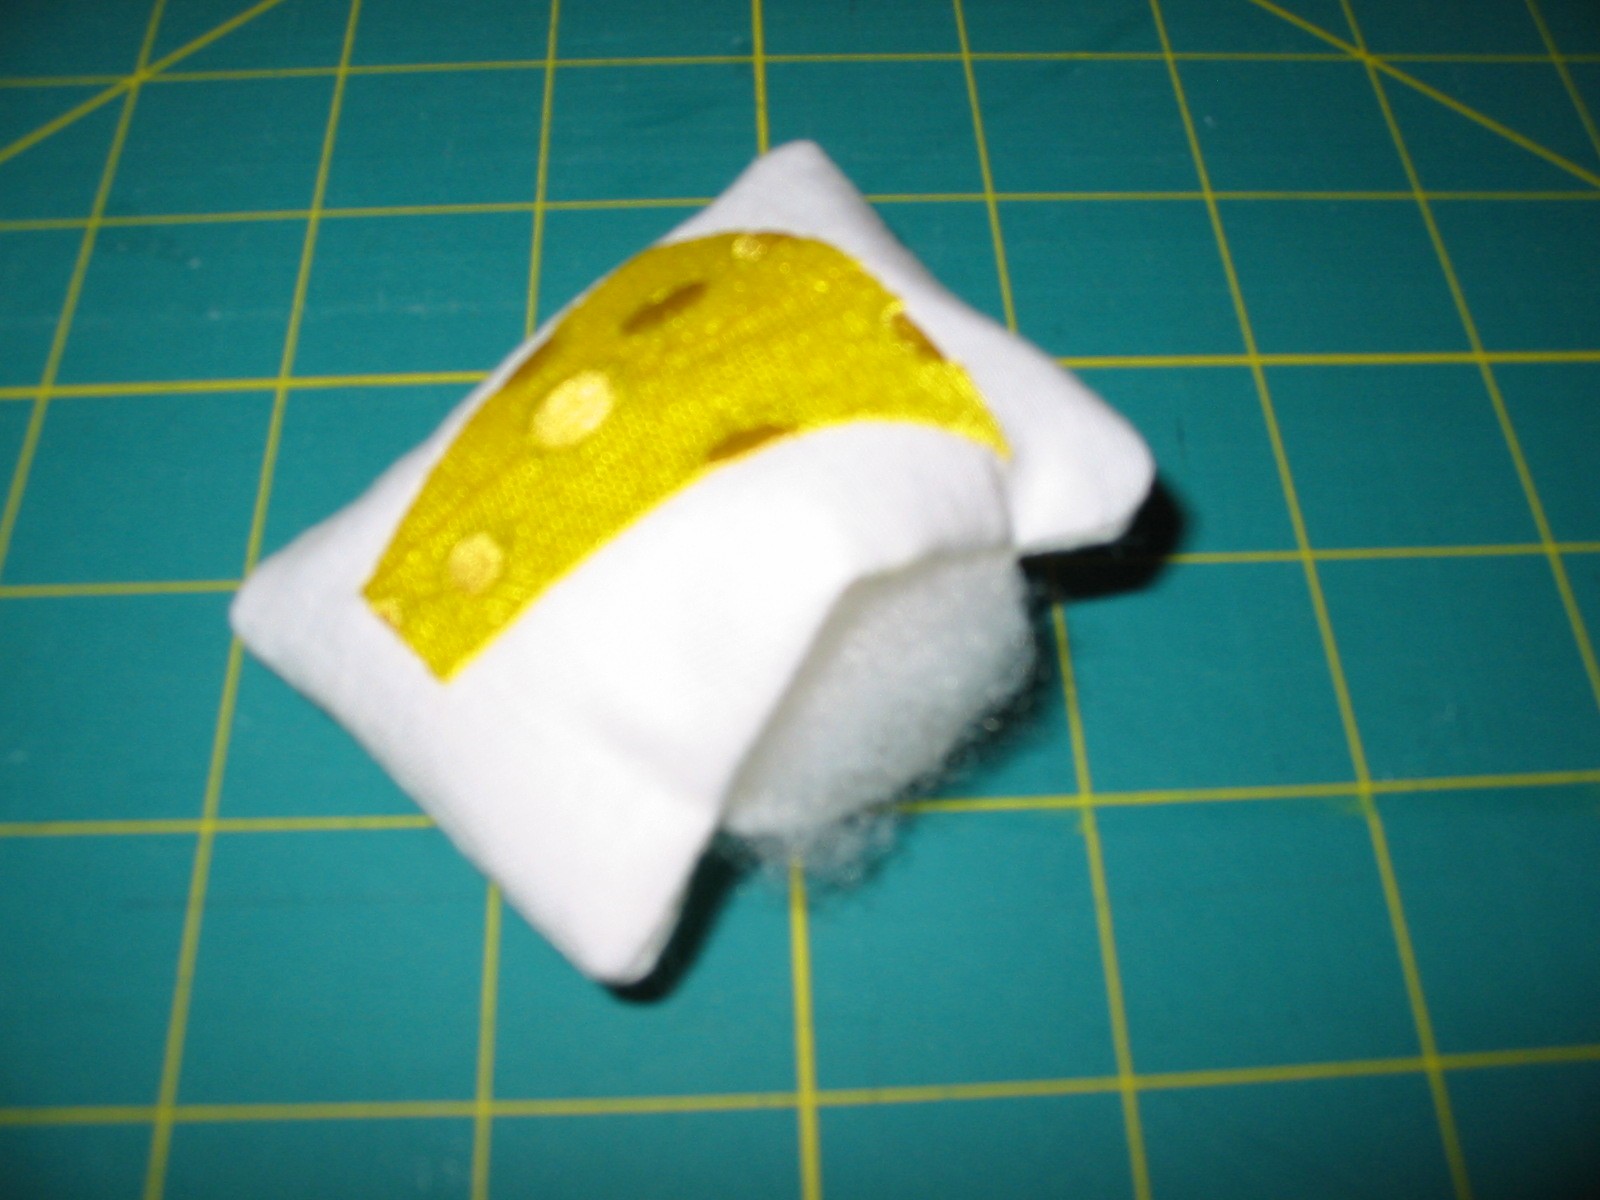
After all the designs were sewn together I trimmed the corners (to remove the bulk) and then turned them inside out. I find that by using a large crochet hook to push out the corners, they come out neater.
Fill each design with fiber fill until plump. Close the opening with slip stitches.
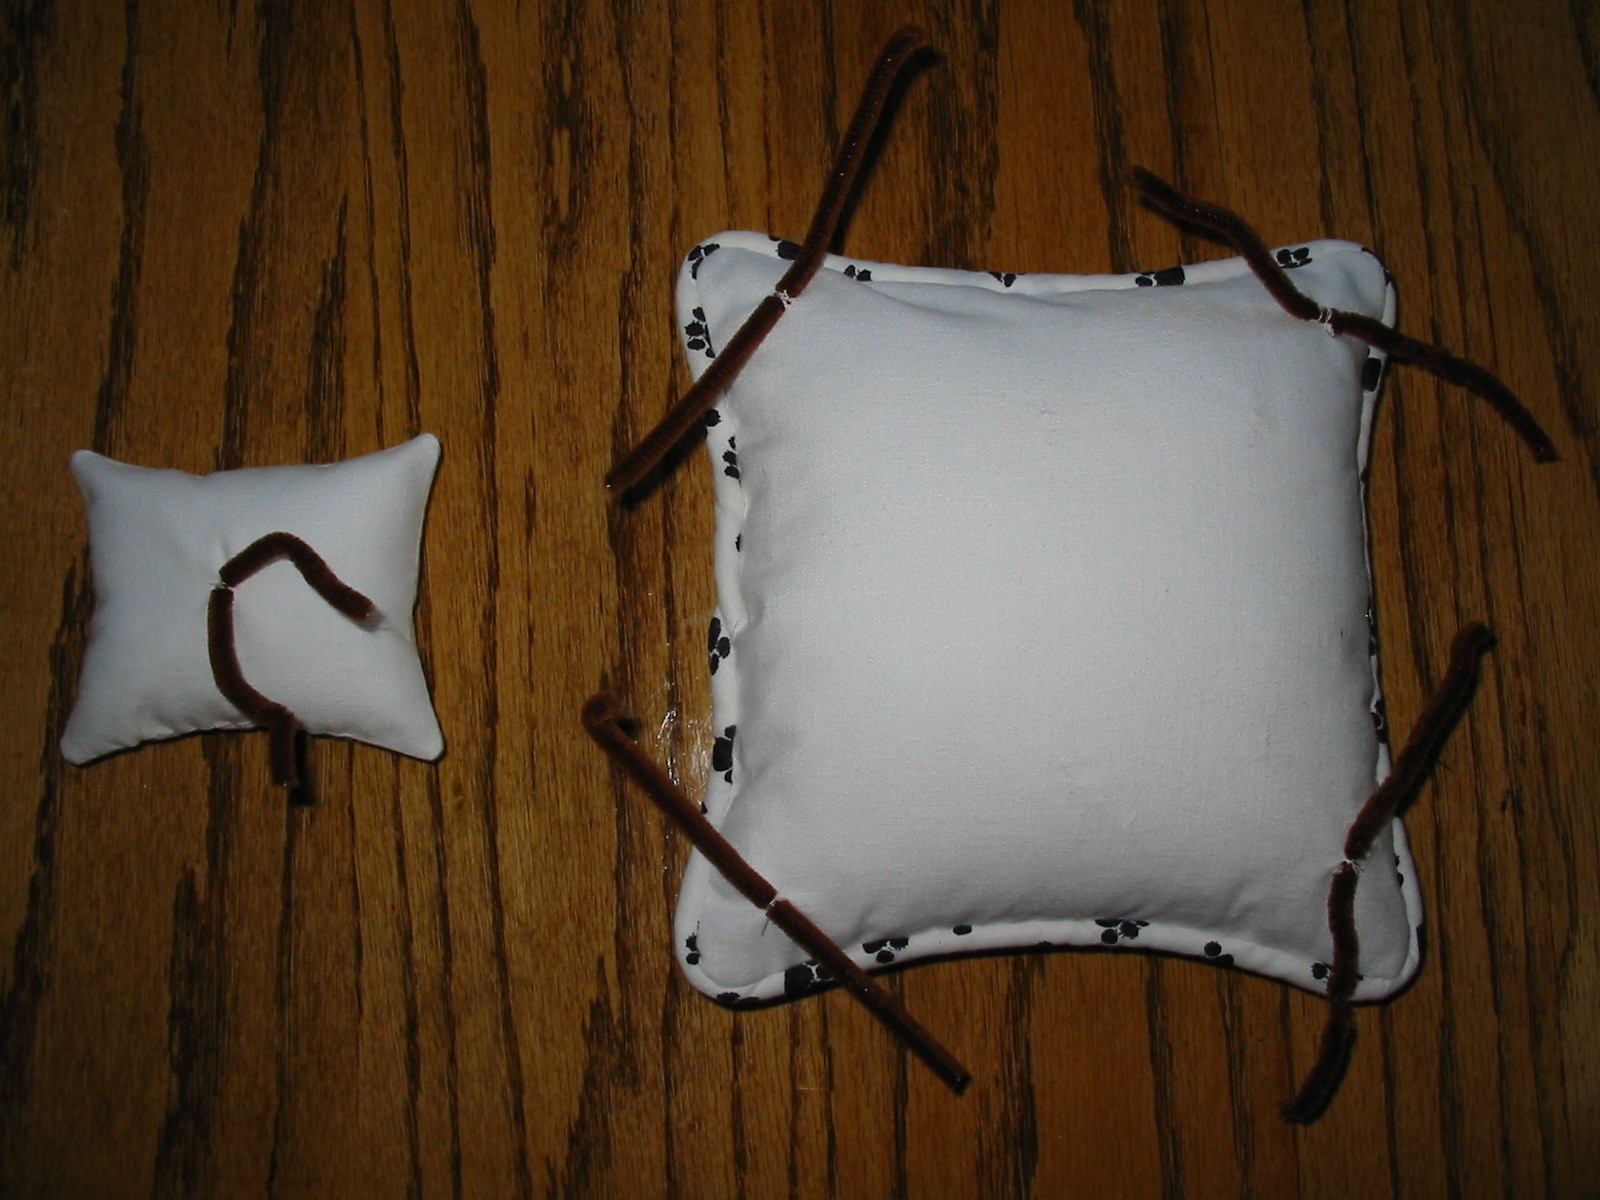
Then, to the back of the pillows, I sewed pieces of chenille stems, so I could attach them to the wreath (one on each of the small pillows and one on each corner of the large pillow).
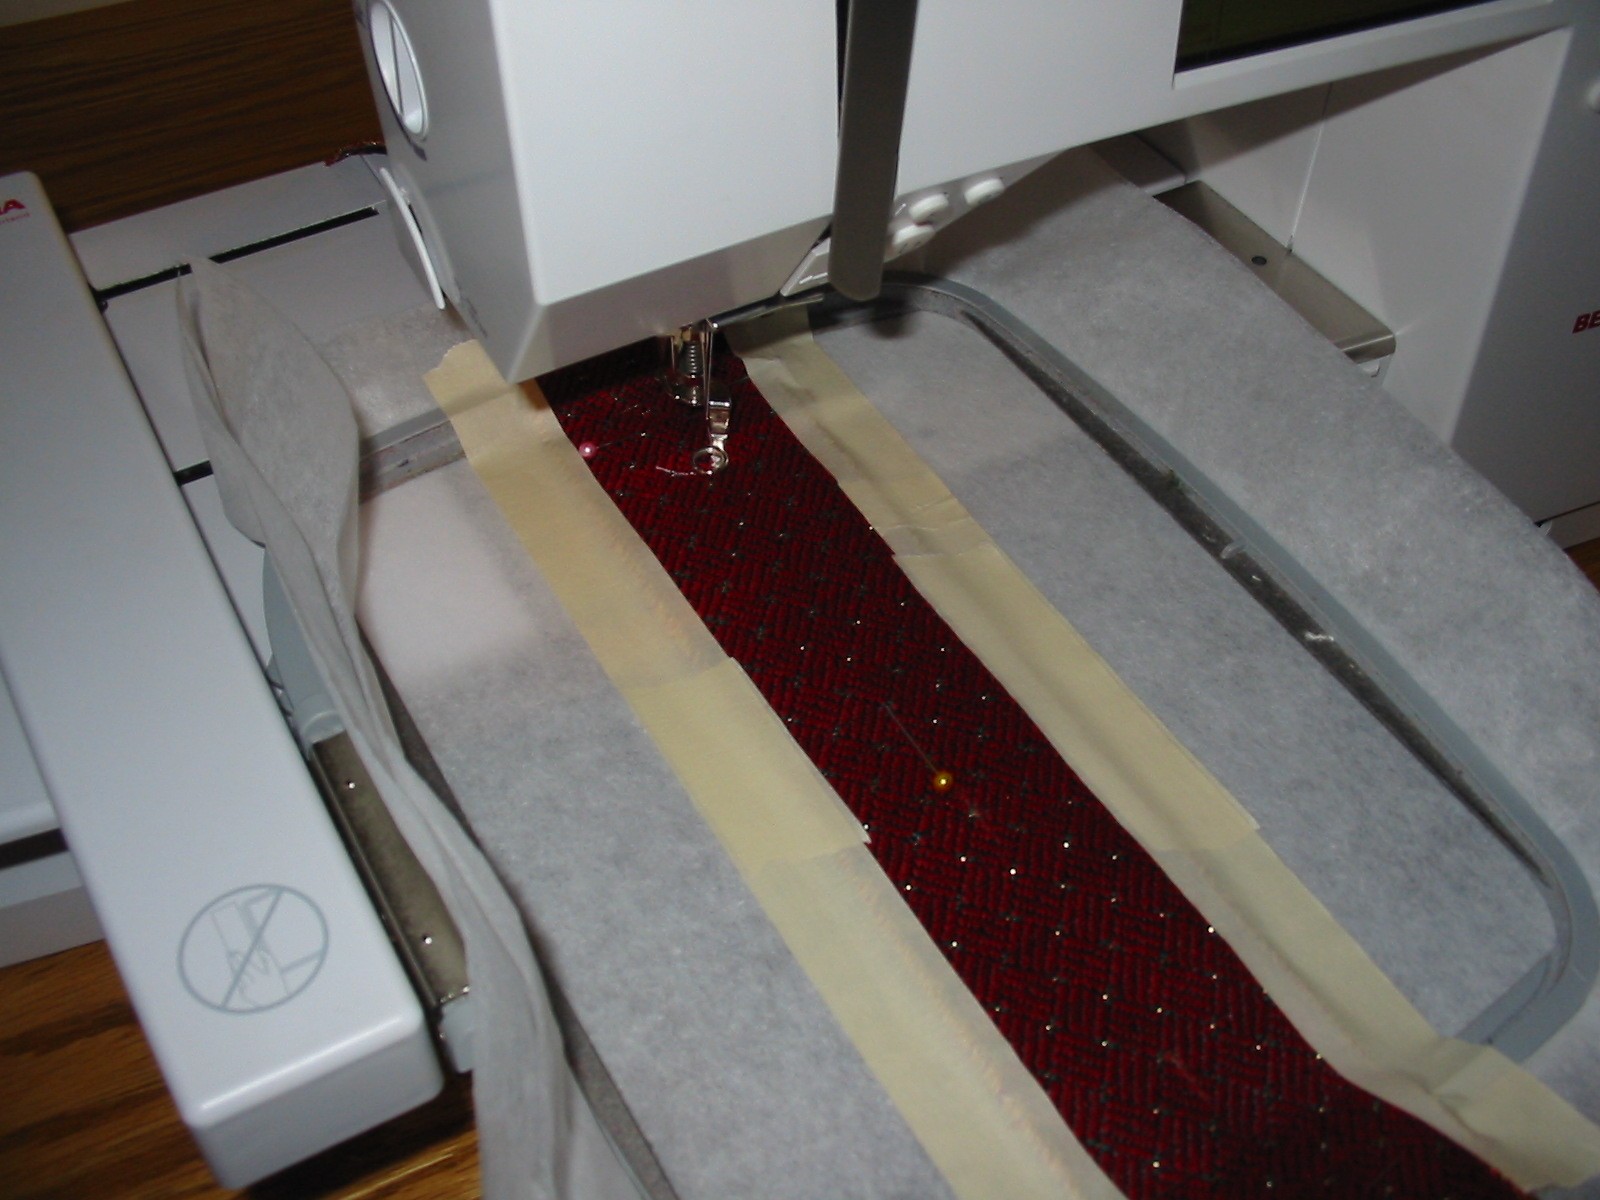
Then I attached ribbon to the pre-hooped stabilizer. I marked the center of both with chalk, used a light spray of Sulky KK 2000 adhesive, aligned them, then secured the edges with tape. I had to re-hoop once for the whole design.
The designs were attached to the wreath with the stems and I hand-stitched the ribbon in a few places to the wreath. With the help of my son Benjamin�s eye and a little tweaking, we came up with the final placement. With the addition of some mini ornaments, the wreath was ready to hang.
