Welcome friends and family to your home with a beautiful embroidered garden flag! Colorful fabric, charming embroidery, and decorative birds give this flag a spring style; adapt for summer, autumn, or holidays, too!
Supplies
- 1/2 yard solid-colored outdoor canvas for front and back panels
- 1/4 yard solid-colored outdoor canvas for side panels
- 1/4 yard print outdoor canvas
- Medium weight (2.5 ounce) cutaway stabilizer
- Air-erase pen
- Two decorative pieces to hang on bottom of flag (wooden birds are used in this example)
- Water based indoor/outdoor acrylic paint and paint brush for painting decorative items
- Needle and heavy weight thread
- Flag yard stake (the one used in this example is 17" x 39")
Designs Used
To help prevent fading from sun and weathering, place the flag in an area where it will be shaded from peak sunshine hours and choose fade-resistant fabrics like Sunbrella brand outdoor fabric. You can also try a weather guarding spray, such as Scotch Guard for the outdoor fabric.
Finished size: 14 1/4" x 20"
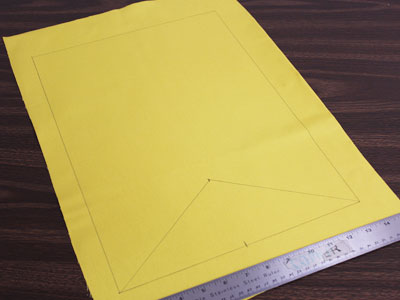
Begin by preparing the fabric for the front panel of the flag. Draw a 12" x 16 1/2" rectangle on the fabric. Measure and mark the center of the bottom. Measure and mark 4" up from the center point. Draw lines that angle out to the corners, as shown.
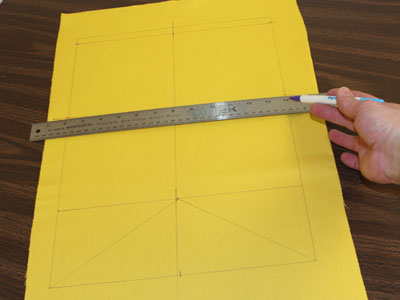
Draw a horizontal line at the top of the triangle. Measure and mark down 1/2" from each top corner along the right and left sides of the rectangle. Draw a horizontal line connecting the marks. The area between the top and bottom lines you just drew is the area for the embroidery design. Mark the center of the top and bottom line and each side of the shape. Draw lines connecting the marks. Where the lines meet is the exact center of the area to be embroidered.
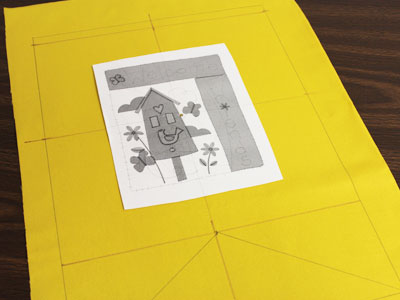
A template, or printout of a design, is an excellent tool to help with placement. Print a template of the design from your embroidery software. If you do not have embroidery software, If you do not have embroidery software, you can use a square of paper in the same size. Place the template in the center of the area to be embroidered. Make sure there is at least 1" of room between the edges of the design and the edges of the embroidery area. With an air-erase pen, mark the center point and the vertical and horizontal axis lines.

Remove the template. Hoop the fabric and stabilizer together, aligning the marks on the hoop with the marks on the fabric. Attach the hoop to the machine and load the design. Move the hoop so that the needle is aligned with the center point on the fabric. Embroider the design.
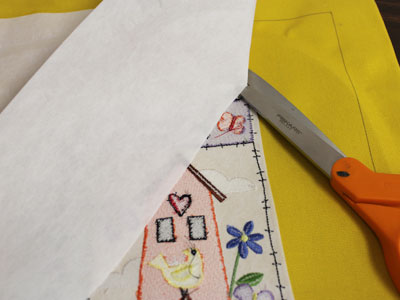
After embroidering, cut the excess stabilizer away from the back.
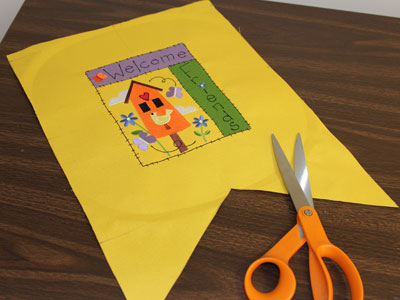
Cut out the shape.
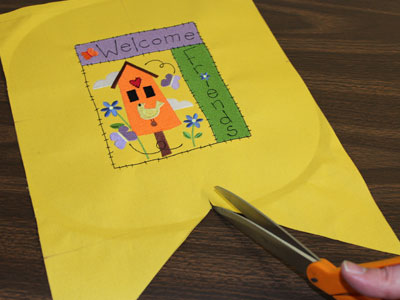
Cut a 1/2" slit at the top of the "v" shape.
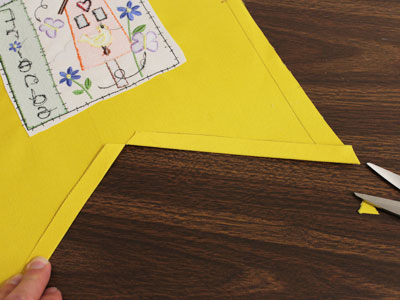
Flip the fabric wrong side up and fold the bottom edges of the fabric over 1/2" to the wrong side. Press with an iron. Trim the excess fabric at each bottom corner. To make the flag double-sided, prepare the back panel of the flag just as you did the front.
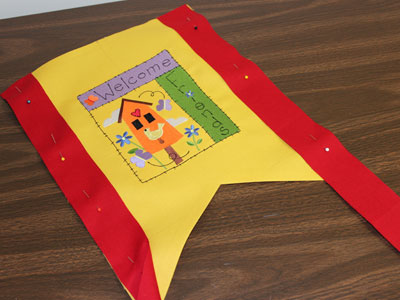
To prepare the side panels, cut four pieces of fabric to 2 1/2" x 20". Two of the pieces will be for the front; two will be for the back. Lay the embroidered panel flat with the right side up. With the top edges aligned, align the side panels with the right and left sides of the embroidered panels, right sides together. Pin in place. Sew a 1/2" seam along the side edges only.
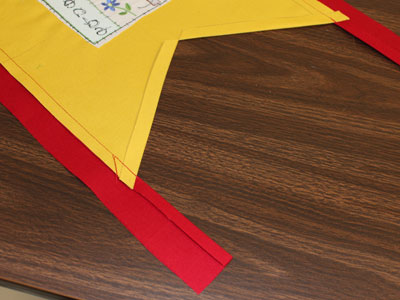
Fold the side panels flat and press the back seams. Fold the inner sides of the side panels over 1/2" to the wrong side and press.
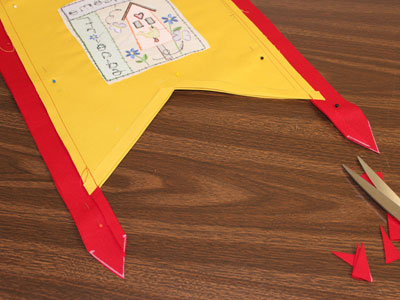
Align the front and back panels together, right sides together, and pin in place. Measure and mark the center of the bottom edges of the side panels. Then, measure and mark 1 1/2" up along each side of the side panels starting at each bottom corner. Draw lines connecting the bottom center mark and the side marks. Trim the fabric along the lines, cutting through both layers of fabric. Sew a 1/2" seam along the outer edges of the side panels. Start at the top corners, sew around the bottom edges, and stop when you meet the bottom of the embroidered panel. Leave the entire top and bottom edges of the fabric open.
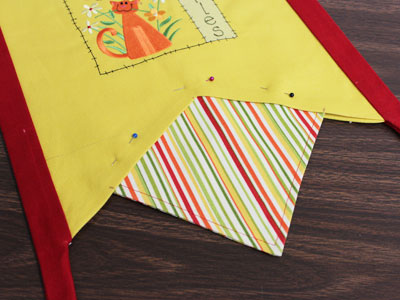
Turn the fabric right side out and press the seams. Cut two pieces of patterned fabric to 6 1/2" x 6 1/2". Align the fabric pieces together, pin in place, and sew a 1/2" seam around the two adjacent sides only. Turn the fabric right side out and press the seams. Measure and mark 2" up along the bottom edges of the embroidered panels starting at the inner edges of the side panels. Tuck the square in between the fabric with the raw edges inside and the finished point facing down. Align the edges of the square with the marks on the fabric and pin in place.
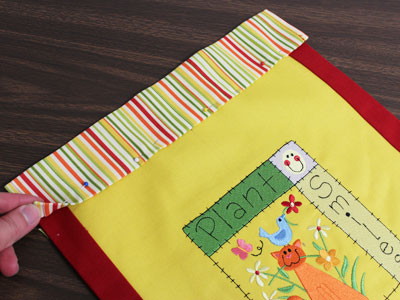
Cut a piece of patterned fabric to 15 1/4" x 6". Fold the short ends in 1/2" to the wrong side, press, and sew a 1/4" seam along each fold. Also, fold the long edges in 1/2" to the wrong side and press. Fold the fabric in half, wrong sides together, with the long folded edges aligned. Press. Insert the top edge of the flag 1/2" inside the bottom of the top panel and pin in place. Sew a 1/4" seam along the fold of the top panel only; leave the side edges open.
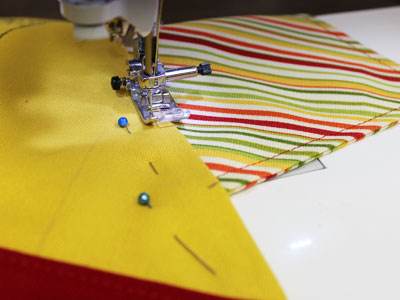
Next, top-stitch a 1/8" seam along the entire outer edges of the side panels and along the bottom edge of the embroidered panels.
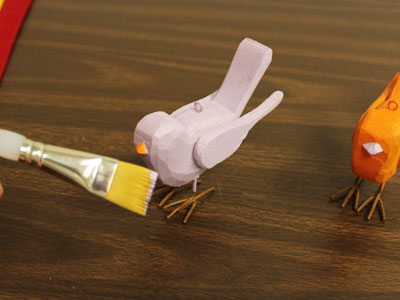
Decorative wooden birds are eye-catching additions to the bottom of the side panels. If the birds are unfinished, paint them with water-based weatherresistant acrylic paint.
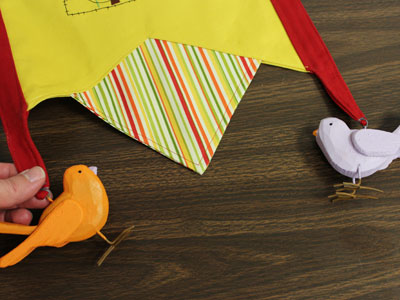
The birds have metal loops on their backs. Use a needle and heavyweight thread to attach them to the side panels.
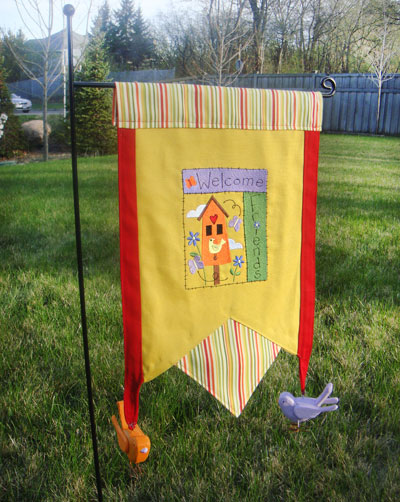
A welcoming addition to any outdoor decor! Hang this garden flag from a flag stake to add color to your backyard. Plus, you can add designs on both sides of the flag for double the embroidered fun.


