Adding ribbon to your door hangers offers a touch of elegance and allows you to hang them from any size doorknob!
These instructions will also show you how you can turn your favorite in-the-hoop magnets and Sun-sational Stitches designs into door hangers as well!
Read below for these free project instructions.
Supplies
Supplies Needed:
**Sturdy fabric such as craft felt, twill, denim, or lightweight canvas
**Medium weight cutaway stabilizer
**Temporary spray adhesive
**Masking tape
**1/4 inch to 1/2 inch wide ribbon
**Craft knife and cutting pad (optional)
**3/16 inch grommets, grommet tool, and hammer (optional)
Designs used:
Princess' Palace Door Hanger (large)
Princess' Palace Door Hanger (small)
Prince's Kingdom Door Hanger (large)
Prince's Kingdom Door Hanger (small)
These designs can also be used for this project:
In-the-Hoop Magnets
Sun-sational Stitches (large)
Sun-sational Stitches (small)
Designs Used

In these instructions we will show you how to attach the ribbon hanger to the in-the-hoop door hanger designs. To create the in-the-hoop door hangers, follow the instructions for the in-the-hoop refrigerator magnets by clicking here.
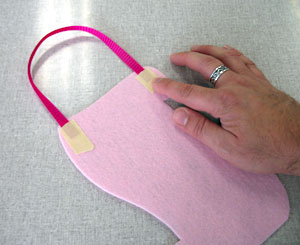
Add the ribbon to the backside of the back fabric piece and it will then be sewn into the hanger. To do this, cut a 12 inch length of ribbon and tape the ends to the upper corners of the backside of the back fabric piece. Then, add the back fabric piece as instructed in the refrigerator magnet project. Tape the ribbon hanger to the outside edge of the hoop on the backside of the embroidery so that the loop of ribbon does not get sewn over.

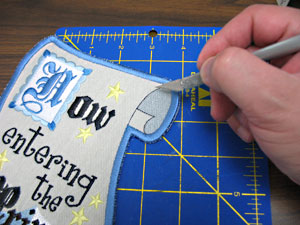
If you would like to add the ribbon after the design has sewn, first cut an 18 inch length of ribbon. Then, using a craft knife and cutting pad, cut a small "x" in the upper left and right corners of the hanger just under the outer satin stitch border.

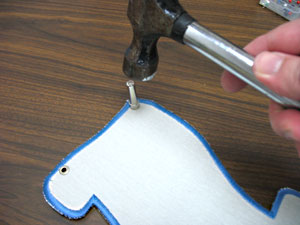
Add the grommets.

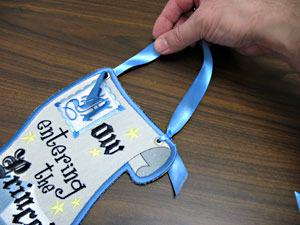
Finally, thread the ends of the ribbon through the grommets and tie a knot at each end.


