Keep your tea warm and stylish with this elegant drawstring tea cozy!
Features include a ribbon drawstring closure and an insulated lining. You can also custom-fit the cozy to the size of your teapot.
Read below for these free project instructions.
Supplies
Supplies Needed:
**Small round teapot (we found
our teapot at Target - it's
about 10 inches long from the
tip of the spout to the outer
edge of the handle, and about
6 inches wide.)
**3/4 yard fabric (for outer shell -
we used brocade)
**3/4 yard Insul-bright insulated
lining
**3/4 yard quilter's cotton (for
lining)
Supplies Continued:
|
**5/8 inch wide ribbon **Medium weight cutaway stabilizer **Air-erase pen or dressmaker�s pencil **Safety pin **Tape measure **Large piece of paper or tag board Designs used:
This design is available in the following design packs: |
Designs Used

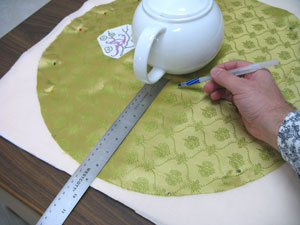
First, we will measure the teapot. Using a tape measure, measure the teapot starting at the top rim...
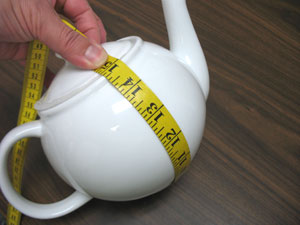
...then, wrap the tape measure around the bottom up to the top rim on the opposite side (ours measures 15 inches).
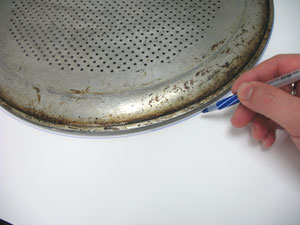
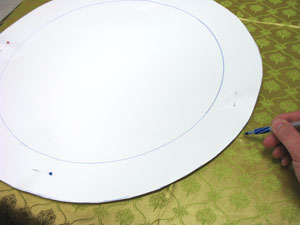
Take that measurement and add 6 inches - this is the allowance for the top ruffle (ours is 15 inches plus 6 inches, for a total of 21 inches). Trace the pizza pan shape (or other large circular item) onto a large piece of paper or tag board.
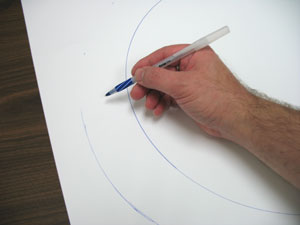
Our pan was not quite large enough, so we will need to add to the shape. To do this, take the size of the pan (ours is 16 inches) and subtract it from the total size you need (ours is 21 inches, so 21 inches minus 16 inches equals 5 inches). Then, take that number and divide by two (ours is 5 inches, so 5 inches divided by 2inches equals 2 1/2 inches). Using that measurement (ours is 2 1/2 inches), measure and draw marks out from the original shape. Then, draw a curved line connecting the marks.
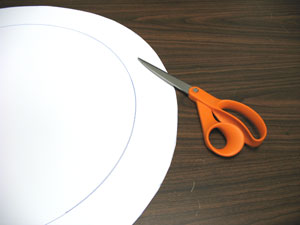
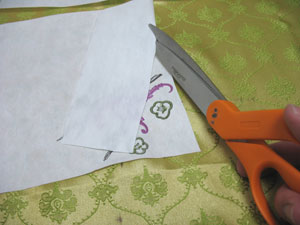
Cut out the shape along the outer line.
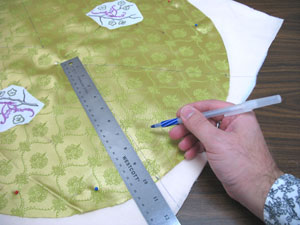
To prepare the fabric for the outer shell, lay the pattern piece onto the fabric (we are using brocade), pin in place, trace, and cut out the shape.
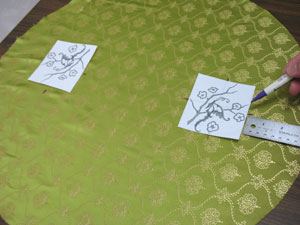
Create paper templates of the designs by printing them at full size using embroidery software. If you don't have embroidery software, you can cut a piece of paper the shape and dimensions of the designs to help with placement and centering. Cut around the designs to make them easy to arrange. Place the templates with the tops of the designs facing out to the outer edges of the fabric and directly opposite to one another. Doing this will allow the designs to be positioned upright when the cozy is complete. Position the top of the designs about 3 inches from the outer edges of the fabric. Using an air erase pen or other marking tool, poke holes in the center of the templates and mark the fabric. Also, mark the horizontal and vertical axis points.
Remove the templates and draw lines connecting the axis points.
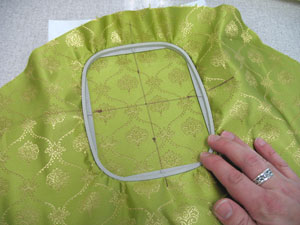
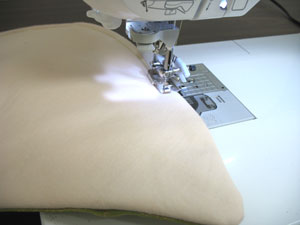
Spray a piece of medium-weight cutaway stabilizer with adhesive and smooth the fabric on top. Hoop the fabric and stabilizer together by aligning the marks on the hoop with the lines on the fabric. Attach the hoop to the machine and load the design. Move the hoop so that the needle is directly over the center point on the fabric. Embroider the design.
Repeat the hooping and embroidering process for each design. After the designs have finished, carefully trim away the excess stabilizer from the back of the embroidery.
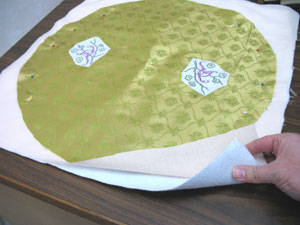
Cut a piece of the Insul-bright insulated lining and the quilter's cotton a bit larger than the embroidered outer shell piece. Lay the Insul-bright down first (shiny side facing up), then lay the quilter's cotton on top, right side facing up, then lay the embroidered outer shell piece on top with the right side facing down. Pin the layers together.
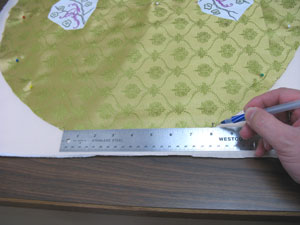
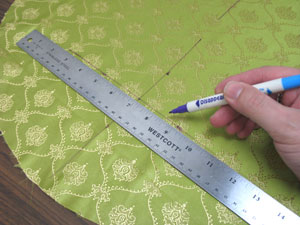
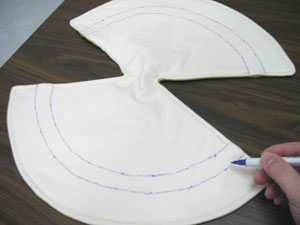
Now we will measure and cut the fabric to create the front and back of the cozy. First, find and mark the center of each side of the circle opposite to the embroidered sides (we eyeballed the centers). Then, measure out 4 inches to the right and left of each of the side marks you just made.
Starting at the side marks, measure in about 8 inches towards the center of the circle.
Then, draw lines (creating a triangle shape) connecting the outer side marks with the inner marks. Do this on each side of the circle.
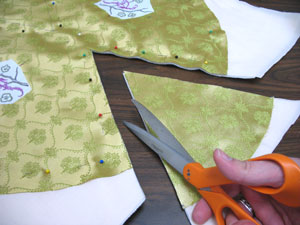
Pin the layers together just to the outside of the lines. Then, cut out the triangle shapes. Also, trim the Insul-bright and quilter's cotton along the outer edge of the outer shell fabric.
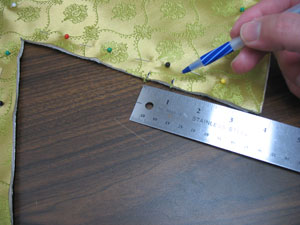
To create openings for the ribbon drawstring, first measure in 2 3/4 inches starting at each outer point of the fabric. Then, measure and mark in another 3/4 inch from the marks you just made. Sew a 1/4 inch seam along the inner edges of the triangles leaving the 3/4 inch space open for the drawstring. Also, leave a 4 inch space open along the inner edges of the triangles for turning. Then, sew a 1/2 inch seam along the entire outer edges of the shape.
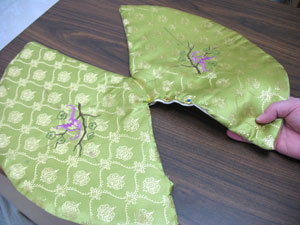
Turn the cozy right side out and press the seams with an iron (on the cotton side). Turn the fabric of the opening in 1/4 inch, press, and pin in place.
Top stitch a 1/4 inch seam along the outer edge of the shape. Stop and start at each drawstring opening - do not sew them closed!
To create the drawstring pockets, on the cotton lining side of the cozy, measure and draw marks 2 inches in from the outer edges of the fabric. Then, measure and draw marks 3 inches in from the outer edges. Draw curved lines connecting the marks. Then, sew seams along the lines.
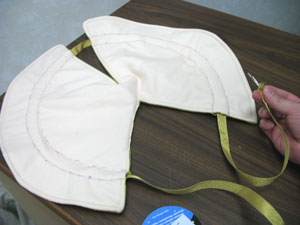
Attach a safety pin to the end of the ribbon. Thread the ribbon though the drawstring pockets as shown. Then, trim the ribbon leaving a few inches of excess at each end.
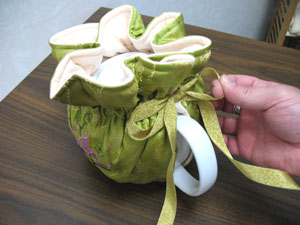
To add the cozy to the teapot, lay the cozy flat with the cotton lining side facing up. Then, set the teapot on the cozy with the handle at the open end (the end with the ribbon tails). Wrap the cozy around the teapot, cinch the ribbon around the top, and tie the ribbon into a bow.


