Neckline designs are a fashionable way to update your wardrobe. Embroider a beautiful neckline on a T-shirt with these helpful tips and tricks regarding placement, stabilizer, and hooping!
Project Needs & Notes:
- Medium-weight (2.5 ounce) cutaway stabilizer
- Temporary spray adhesive (like Gunold KK100)
- T-shirt
- Air-erase pen for marking
Find the wide variety of stylish neckline embroidery designs from Embroidery Library right here.
You'll see that some designs are marked with the word "split." That means the file is split into two pieces. For those that have smaller hoops, but wish to embroider designs on a larger shirt, the split designs are useful. Project instructions below demonstrate how to work with whole and split versions.
Sizing Notes:
Embroidery Library has a neckline designs for crew neck and V-neck shirts. Each is offered in three sizes:
The largest size of the neckline designs fit a women's medium to 3X
The medium size of the neckline designs fit a child's small to women's small
The smallest size of the neckline designs fit 0-3 months to child's x-small
This project was featured in the following:
Embroidering on T-Shirts Lookbook
Designs Used
Begin by washing and drying the shirt to remove shrinkage.
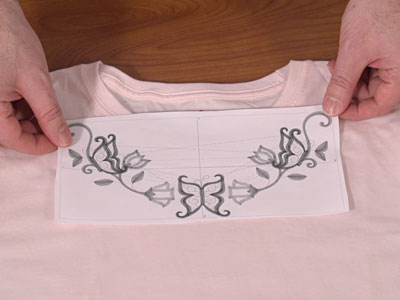
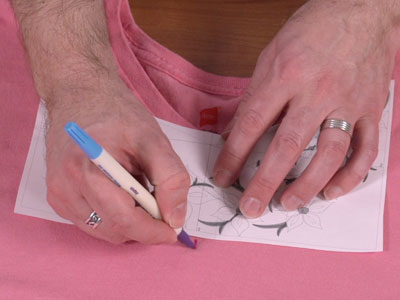
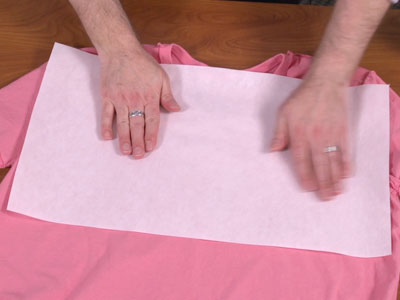
A template, or printout of a design, is an excellent tool to help with placement.
Print a template of the design from your embroidery software. If you do not have embroidery software, Wilcom's TrueSizer is a free program to use.
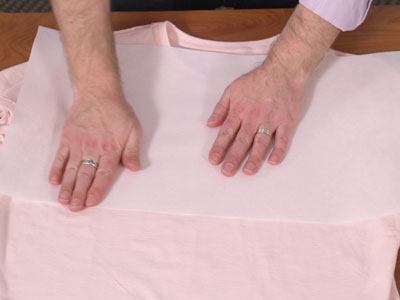
Arrange the template on the shirt so the neckline is about 2" down from the top shoulder seam, and centered between the sides.
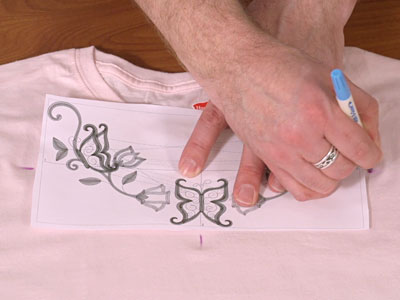
After the template is in the right spot, mark the center point and the vertical and horizontal axis lines. Those marks help to hoop the shirt straight.
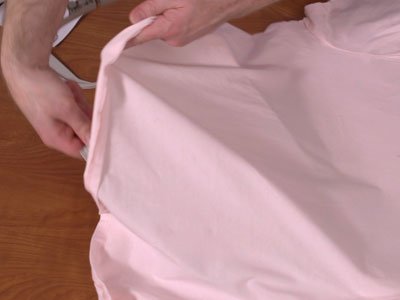
Turn the shirt inside out.
Spray a piece of medium-weight cutaway stabilizer with temporary adhesive.
Smooth the stabilizer on the inside of the shirt, on the back of the area that will be embroidered.
Turn the shirt right side out again. Slide the outer hoop inside the shirt.
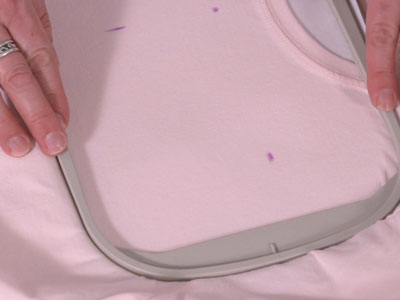
Press the inner hoop in place, lining up the marks on the shirt with the marks on the hoop.

Roll the excess shirt up and clip it so nothing gets caught when the hoop is moving around.
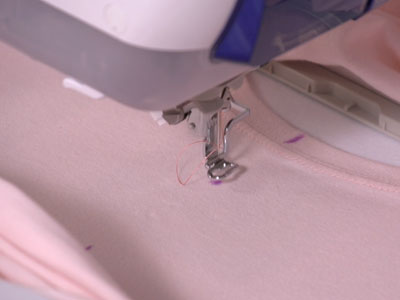
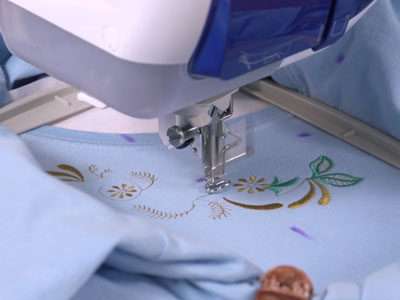
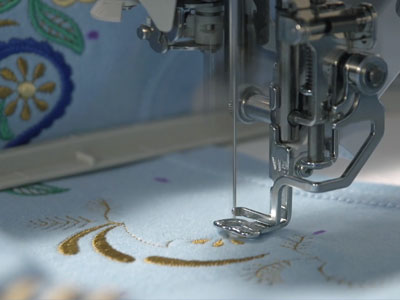
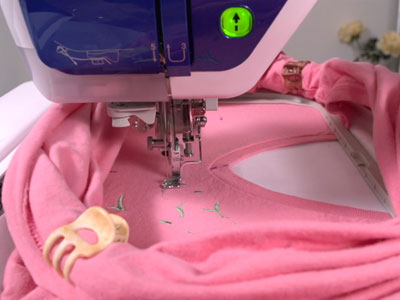
Attach the hoop to the machine and load the neckline design. Move the hoop so the needle is right over the center point.
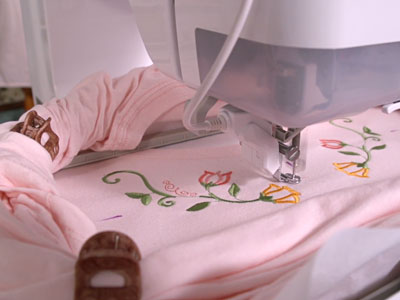
Embroider the design. For best results, use a size 11 or 75/11 embroidery needle to embroider on T-shirts. A ballpoint needle works well, too.
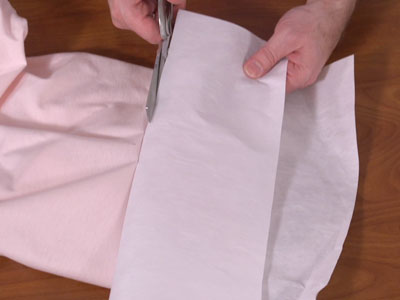
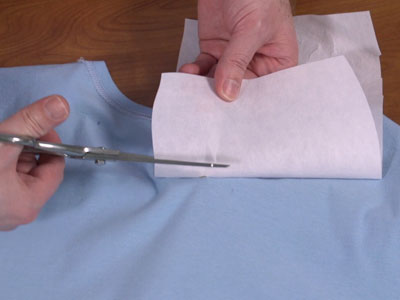
After embroidering, turn the shirt inside out and cut the excess stabilizer away.
The stabilizer might look stiff at first, but it softens after a wash or two.
Some neckline designs have coordinating pieces that can be added to the back of the shirt, too.
Some neckline designs are marked with the word "split," and those are split into two pieces.
Those that have machines with smaller hoops but wish to embroider onto larger shirts will find the split files helpful.
When working with a split design, print a template of each design.
Arrange both templates on the shirt so they're lined up.

Mark the center points and axis lines for each design.
Embroider the first design (or one side of the neckline).
After embroidering, cut the stabilizer away from the back.
Then, embroider the other design, or other side of the neckline.
Marking the center points and axis lines helps to get everything lined up properly.

The examples above were with crewneck shirts. There are many neckline designs for V-neck shirts, too.
The steps are very similar. Use a template, or printout of the design, to plan where to stitch.
Line up the V of the design with the V on the shirt.
Mark the center point and the axis lines.
Spray a piece of cutaway stabilizer with adhesive, and smooth that on the inside of the shirt.

When hooping, line up the marks on the shirt with the marks on the hoop.

Roll the excess up and out of the way.
Attach the hoop to the machine, load the design, and move the hoop so the needle is right over the center point.
Embroider the design.

Cut the excess stabilizer away.
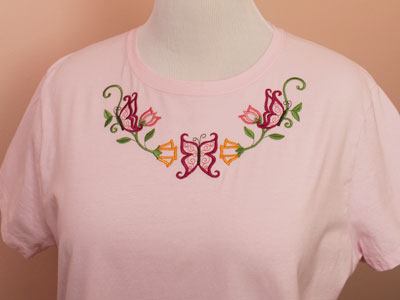
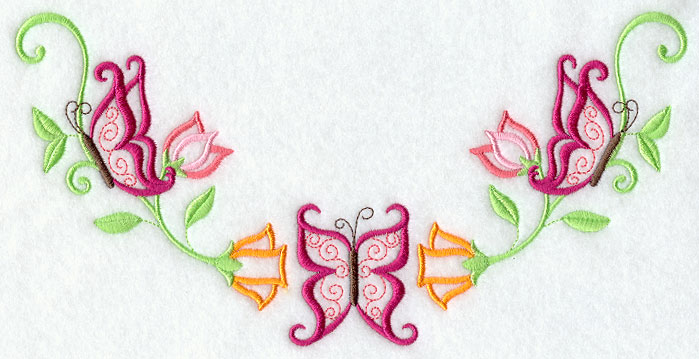
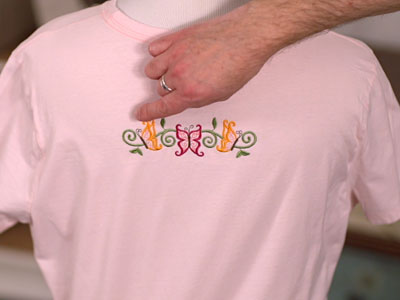
This Bold Butterfly Neckline design pops against the light pink background. What a gorgeous addition to any closet!
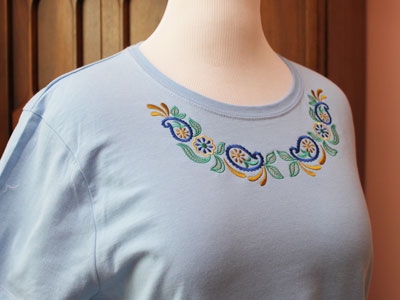
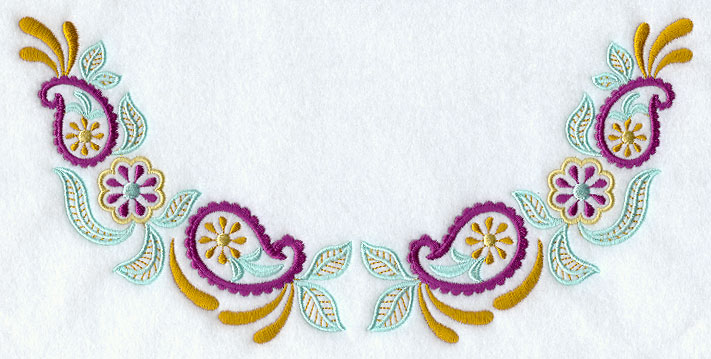
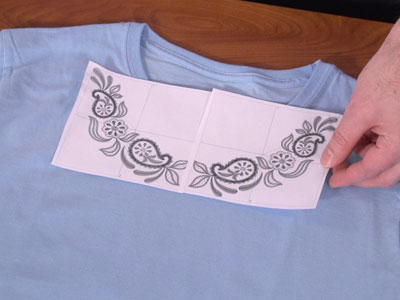
Neckline designs are a beautiful way to dress up an ordinary shirt. The Daisy Paisley Neckline design stuns on this light blue shirt.
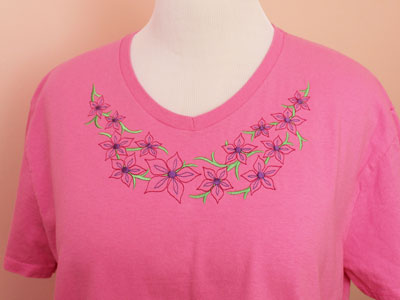
V-neck shirts are a very popular style -- add this Blooming Blossoms Neckline (V-neck) design to really make your outfit stand out!
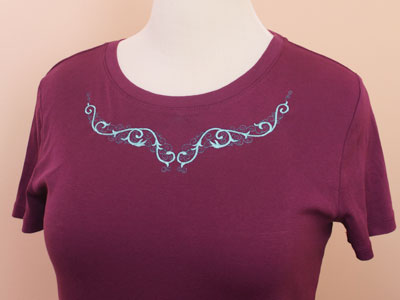
Experiment with color combinations to add a unique look to your wardrobe, like the blue Ornate Swirls Neckline design on this deep burgundy shirt.


