Embroidery Library is known for having the widest variety of designs, in both subject and in style.
Those that enjoy quick and light designs enjoy Redwork and vintage styles. Others are drawn to realistic designs, such as animals, Audubon's birds, and flowers. Those designs are what we call "complex."
Embroiderers that are new to working with complex or realistic designs seek tips and tricks
to get good-looking embroidered pieces. This tutorial demonstrates our tried-and-true techniques for achieving picture-perfect results!
Beautifully detailed embroidery
Complex designs are composed of stitches that are layered in a way that is detailed, adding dimension to the design. The level of detail makes the designs seem photo-realistic. These types of designs have shading and highlights; darker or lighter thread is stitched over a base layer to achieve that effect.
Designs Used
Fabric choices
Shading, highlighting, and layering of stitches is what gives a design a highly-detailed, realistic look. And, you'll find that complex designs have more stitches than simpler, cartoon-like designs. The more stitches in a design, the more times the fabric is penetrated by the needle.
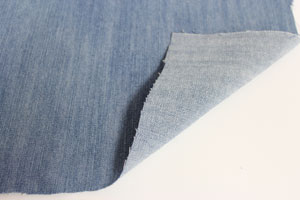
When embroidering a high stitch count design, choose a sturdy, non-stretch fabric. Examples include denim, canvas, duck cloth, faux suede, linen (heavy), and twill. Fabrics like these support the layering, highlighting, and shading in a complex design.
Avoid light fabrics (like quilter's cotton) or stretchy fabrics (like Jersey knit), as those don't have the qualities needed for complex designs.
Stabilizer
Providing a solid foundation for a complex design is a key ingredient in getting a good-looking stitchout.
We always - always - use one piece of stabilizer: cutaway, 2.5 ounce.
Some companies will recommend using multiple pieces of stabilizer - one piece per x thousand stitches. The idea behind this theory is that more pieces of stabilizer means more stability for the fabric.
However, we have not found that using more than one piece of stabilizer is beneficial. It is not necessary to use more than one piece.
Using more than one piece of stabilizer can be counter-productive. Using two or more pieces of stabilizer will negatively affect thread tension, cause excessive thread breaks, and may also cause looping in the stitches. Using more than one piece of stabilizer can dull the needle quickly, which results in large holes in the fabric.
If you've used more than one piece of stabilizer in the past and are happy with the results, then that is great - don't change a thing! But if you're looking to get better results, then use one piece of cutaway stabilizer, 2.5 ounce. That is sufficient for designs of any complexity.
Hooping
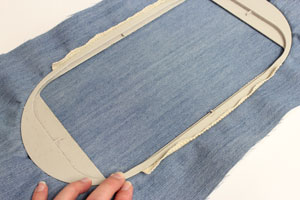
Making sure that the fabric is hooped nice and tight is especially important when working with complex designs. The fabric needs to be hooped tightly so it is completely flat and smooth. If the fabric is hooped too loosely, then the fibers can shift while the hoop is moving, and that leads to puckering, gapping, and misalignment of the stitches.
It is also important to keep the edges of the fabric from pulling away from the edges of the hoop while embroidering. Here's how to do that:
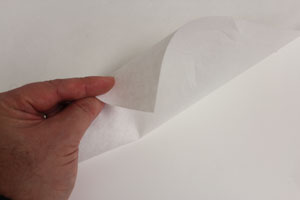
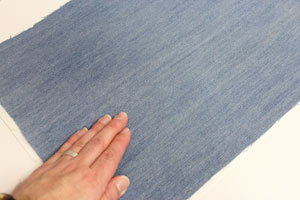
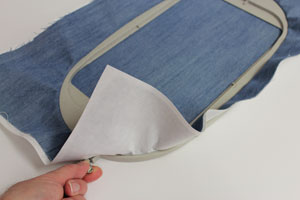
The first step to tightly hooping fabric is to cut a piece of medium weight (2.5 ounce) stabilizer slightly bigger than your hoop. Then, spray the stabilizer with temporary spray adhesive (I use Gunnold's KK100), and smooth the fabric on top. The adhesive keeps the fabric from sliding around on top of the stabilizer.
Hoop the fabric and the stabilizer together. Open the outer hoop with the hand screw so that the inner hoop slides in with a bit of resistance. Then, tighten the hand screw.
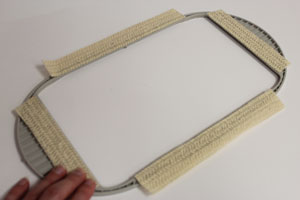
If you have an older hoop that doesn't hold the fabric as tightly as it once did - or maybe the screw is stripped or a little weak, here are two things to try:
1. Place strips of Wonder Tape (a double-sided tape) along the side edges of the underside of the inner hoop.
2. Use strips of rubberized shelf liner on the sides of the hoop (not the corners) to get an extra grip on the fabric and stabilizer.
After pressing the rubber gripper into place on the inner hoop, hoop the fabric and stabilizer together and tighten the hand screw. The rubber gripper helps the hoop grasp onto the fabric thus preventing it from pulling in along the sides.
(Anne Campbell and Joan Warr did an excellent demo in the Perfect Hooping article here!)
Embroidering the design
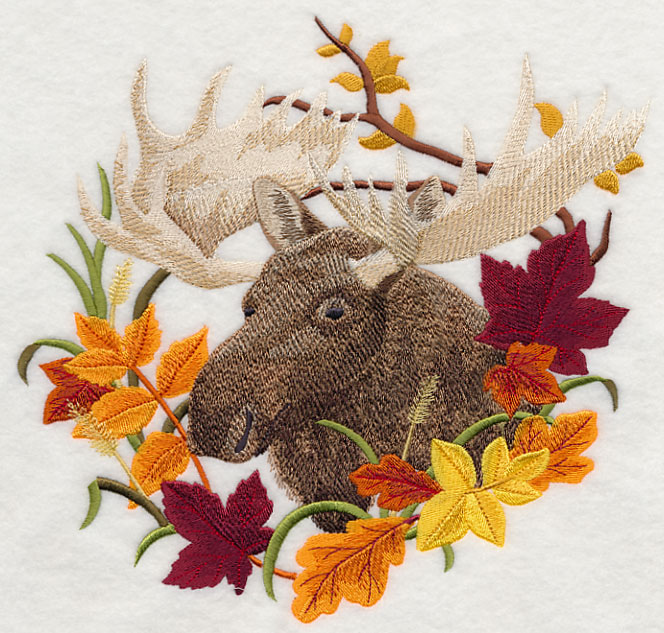
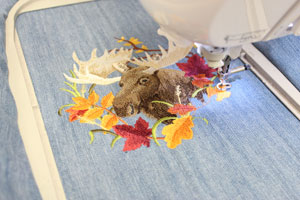
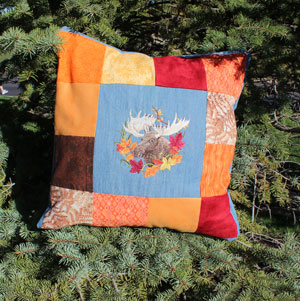
I embroidered the Moose in Autumn Leaves design with a size 75/11 sharp sewing needle. That has a finer, smaller point than an embroidery needle, so it is great for penetrating through the base thread, and the shading and highlighting stitches, too.
The result is clean, crisp edges and well-defined detail.
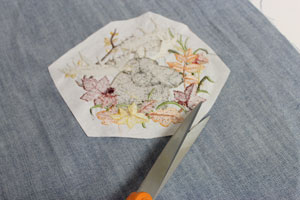
When the design has finished embroidering, trim away the excess stabilizer around the outer edges of the design, leaving about 1/2" of stabilizer all around the design. The excess stabilizer helps the design stand up to wear and tear.
Here it is in a nutshell:
1. Choose a sturdy, non-stretch fabric. Denim, canvas, duck cloth, linen, corduroy, and faux suede are great choices. Avoid light fabrics like quilter's cotton.
2. Use one piece of cutaway stabilizer (2.5 ounce); using more than one piece will be problematic.
3. Hoop the fabric and stabilizer together firmly, and use the Perfect Hooping tips if desired!
4. A size 75/11 sharp sewing needle has a small, fine point to yield crisp, professional-looking results.


