FREE Snowman with $5 order PLUS Double Reward Points! Click the deals tab for details.❄️
 FREE Snowman with $5 order PLUS Double Reward Points! Click the deals tab for details.
Jazz up your plain jeans with some sensational embroidery!
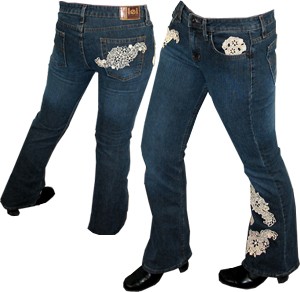
Embellished jeans are one of the hottest fashion trends this year. You have all the tools at your fingertips to put a lot of pizzazz into any plain pair of jeans.
Daughters and granddaughters will love helping you design a cool pair of jeans just for them, and you won't have to spend big bucks at the retail stores, either. These jeans came unadorned from a discount chain at a modest price, but with the addition of great embroidery, they look super hip!
Designs Used
Supplies needed:
-
A plain pair of jeans -- launder them first
-
Jeans thread to match the stitching on your jeans
-
Seam ripper
-
Water-soluble stabilizer (WSS)
Embroidery designs from Embroidery Library:
- Floral Lace: large and medium sizes, plus accessory.
Special Project Notes:
You can use either 40 weight rayon thread or 30 � 35 weight cotton thread.
I use Coats and Clark 30 and 35 weight cotton thread. It's labeled as Mercerized ELS Cotton for Machine Quilting & Crafts; Machine Quilting; or All Purpose. I find Coats and Clark cotton thread at JoAnn's. I've also used Madeira Cotona, which is a 30 weight cotton thread.
I use the 30 - 35 weight cotton thread both in the bobbin (I wind my own bobbins) and in the top (needle).
A note about water-soluble stabilizers and needles:
There are many, many different brands of water-soluble stabilizer available. Some are thin and light, some are fibrous, and some are thick and heavy. It can be confusing to pick the right one for your lace project.
We've digitized and stitched thousands of freestanding lace designs, and have consistently excellent results with Sulky Ultra Solvy (the heavy weight water-soluble stabilizer by Sulky) and Vilene, a fibrous water-soluble stabilizer. We order Vilene from www.pointetopointe.com.
Use a sharp needle (as opposed to an embroidery needle) when embroidering onto water-soluble stabilizer - especially if using the "plastic-looking" kind (such as Sulky Ultra Solvy). An embroidery needle has a larger point, which makes larger holes in the water-soluble stabilizer, leading to tearing and misalignment.
Instructions:
Prepare the lace for application to the jeans. Embroider 2 large pieces, 1 medium piece, and 2 accessories onto one layer of heavy weight water-soluble stabilizer. Soak in water to remove the stabilizer. Allow the embroideries to dry flat.
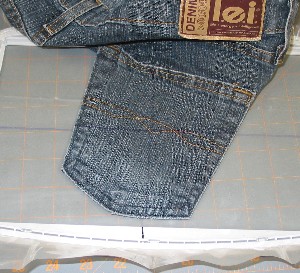
First we'll embroider the medium floral lace piece to the back pocket. (The other pieces will be applied later) Here's a great trick for embroidering designs onto pockets: Remove the bottom and side stitches from the pocket - keep the top corners intact. That way you can hoop the pocket, and then it's quick to attach again after the embroidery.
Hoop a piece of water-soluble stabilizer (WSS). Spray the back pocket with spray adhesive, and then lay the pocket on the stabilizer. Draw horizontal and vertical lines onto the stabilizer. You'll use these lines to determine the angle and placement of the design.
Using a paper template of the design, find the center point. Coordinate that center point with the markings that you drew on the pocket and stabilizer. After you load the design into your machine, you may have to rotate the design to match the layout that you have on the pocket.

Snap the hoop into your embroidery machine, and line the needle up with the marked center point on the pocket. Sew out the embroidery.

After the embroidery is finished, remove the excess stabilizer. Reattach the pocket with the jeans thread.
Using the same color thread that you used to embroider the lace, stitch a small, loose zigzag to attach freestanding sections to the seat of the jeans.

Examine the leg of the jeans. Usually one side seam on each leg is a flat-felled seam, and the other side is a regular seam.
It's easiest to work with the regular seam, because the flat-felled seam is difficult to close again. Open the regular seam.
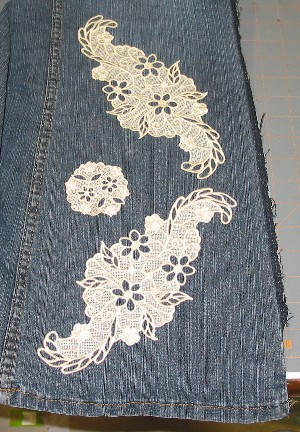
Find the front side of the leg, and lay it out flat. Lay one accessory and the two large lace pieces on the legs. Experiment with placement until you get the look that you want.
I used spray adhesive to keep the pieces in place for the next step, which is applying the lace to the fabric.
Using the same color thread that you used to embroider the lace, stitch with a small, loose zigzag to attach the lace around the outside edges. For the larger lace pieces, stitch a couple of lines through the center vertically and horizontally. It is really helpful to have an automatic lifting foot, or a foot lever to go around all the little corners.

On the front of the jeans, place the last two lace pieces near the pockets, but avoid stitching through the pockets (that makes them unusable). When I stitched the lace to these areas, I pulled the pockets to the outside, so they were out of the way of my stitching.
Using the same thread that you used to embroider the lace, stitch with a small, loose zigzag to attach the lace to the front of the jeans.
Now all you have to do is close up the leg seam and launder the jeans to remove any leftover water-soluble stabilizer.
I used the delicate cycle on my washer, and it worked great!


