Stitching over seams can be tricky, but some of the best embroidery designs lend themselves to these hard-to-embroider areas. So what's a stitcher to do? Do it anyway, of course!
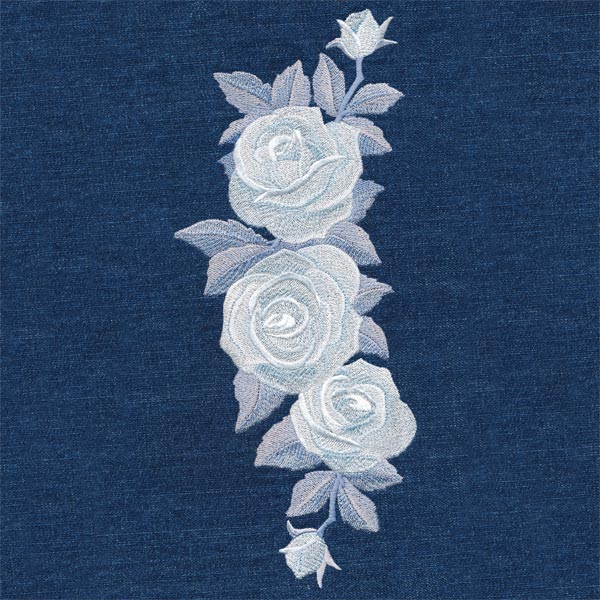
For this tutorial, we'll use a rose design and a pair of denim jeans to create a fresh over-the-seam look for you. This same technique can easily be applied to stitching over jacket sleeve seams, or denim jacket backs too!
Project Needs & Notes:
- Stretch denim jeans, jacket, or something with a seam (new or used)
- Medium weight cutaway stabilizer
- Temporary spray adhesive
- Printed templates of your design(s) for placement
- Thread for your embroidery
- Scissors
- Seam ripper
- Ruler
- Pins
- Air erase marker or tailor's chalk
Designs featured in this tutorial include:
- M18857, Whispering Rose Fashion Spray
Special Note:
Tailor's chalk is best for marking dark colored fabric, as it tends to last longer and show up better. However, this wax-based tool may leave residue if used on some synthetic fabric. It is best to test a small corner of the fabric before committing to chalk.
Designs Used
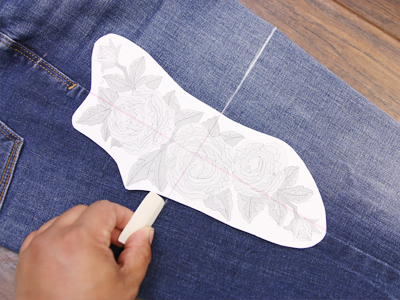
To get started, print a template of the design at full size using embroidery software. If you do not have embroidery software, Wilcom TrueSizer is a free program to use.
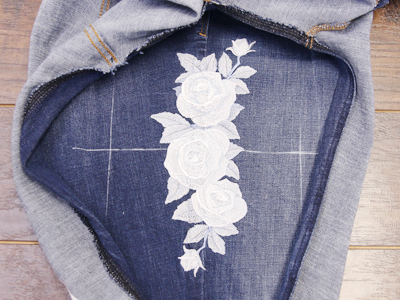
Place the printed template(s) of your design in the intended area for embroidery. This will make it easy to map out exactly where each embroidered piece will go. Use a ruler and tailor's chalk to mark the center point and the horizontal and vertical axis lines.
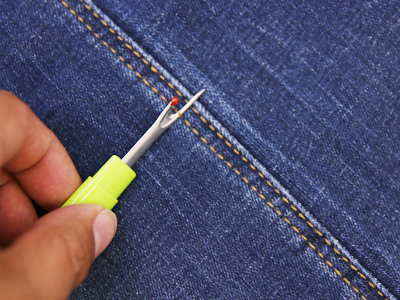
Open the opposite seam (the inseam) from where you will be embroidering (the outseam).
You want to open the inseam high enough to lay the embroidered area flat (making it easier to add stabilizer and hoop), so go up at least 2 inches past where your design ends.
Important note: The ideal pant to use for this project would be one that doesn't have any top stitching on the inseam of the leg -- if there is top stitching on the inseam, remove the top stitching at least 1.5 inches above the seam (this will make it easier to close).
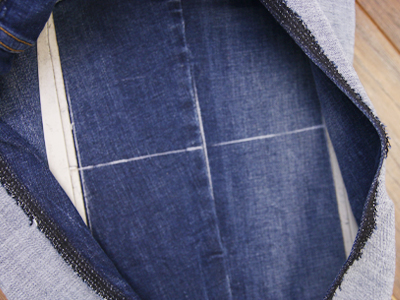
Turn the pant leg inside-out and lay the fabric as flat as possible, with your intended embroidery area facing up.
Using temporary spray adhesive, adhere the garment to your medium weight cutaway stabilizer. Line up the chalk lines with the embroidery hoop and make sure fabric and stabilizer are hooped together taut, for best results. (There should be excess stabilizer and fabric around all four edges of your hoop.)
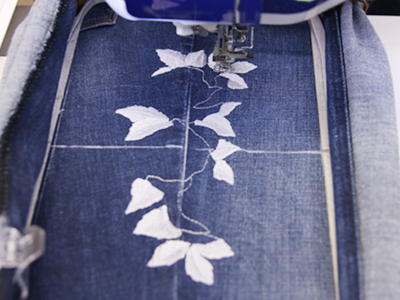
Center the design and begin stitching. Make sure that excess fabric from your garment is clear of the embroidery area.
Note: Sewing on the seam (through four layers of denim) can be hard on any machine. Thread and needle breaks should be expected.
This is how your finished embroidery looks over the denim pant seam.
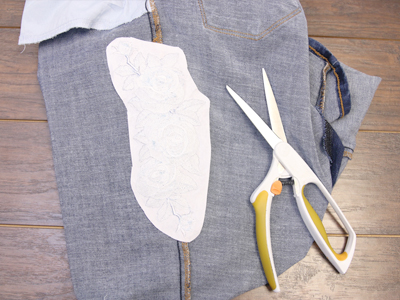
Once the design has sewn out, carefully remove the excess stabilizer, leaving a 0.25" border around the design.
Use matching top and bobbin thread to close the inseam of your pants or garment. Pin the two sides together and choose a similar stitch to the initial seam and finish the hem the same way it was previously sewn.
Note: To replace the topstitch, the best way is to turn the pant leg inside-out and begin sewing from the widest part of the leg, down, toward the hem. Try to avoid getting the other leg or fabric caught in the stitch.
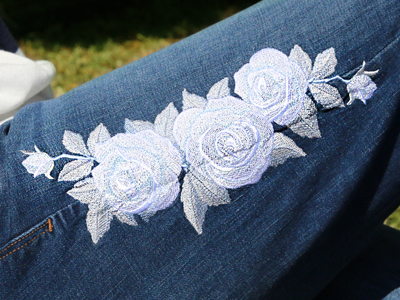
Snip any loose threads and use steam to remove any left over chalk lines -- and voila! There's a masterpiece on your pant leg.


