Border designs are so fun when dancing along hemlines or the edges of tablecloths and linens. But repeating borders, and lining them up in a nice, straight, row can be challenging.
Never fear! By doing a bit of measuring and marking, you'll soon be repeating borders over
and over again, and they'll be perfectly straight.
Borders can be stitched on anything - table linens, bed linens, hemlines, pillow shams, quilts - so to begin, grab your blank item and choose a border design. There are more than a thousand border designs at Embroidery Library to choose from. Click here to go to the Borders & Corners category, and have fun browsing through the collection!
As you browse through the borders, you will see some marked as "Endless Hoop" designs. Husqvarna Viking users are likely familiar with the special Endless Hoop, but stitchers who use other brands of machines may not have heard of it before.
For this tutorial, Kenny teamed up with embroidery enthusiast Joan Warr. Joan is very familiar with Husqvarna Viking machines, and was one of the first people to experiment with their Endless Hoop. In the project below, Kenny demonstrates how to use border designs in any hoop, and Joan gives special instructions for using the Endless Hoop.
To begin, Kenny will demonstrate how to add interest to a skirt and shirt set with the one-color Mehndi border.
Designs Used

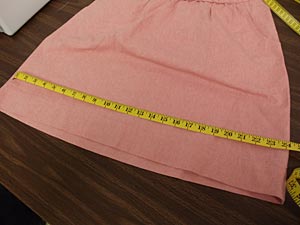
Measure the length of the area where you're planning to place the border. We'll be repeating a border along the hemline of a skirt.
The bottom edge of the skirt measures 24 inches. We're using a design that is 6 inches wide. Divide the length of your item by the width of the design to find out how many times you'll repeat the border. We'll be stitching the border four times.
We used an embroidery software program to print templates of the design. Templates are extremely useful for determining design placement and position.
There many types of embroidery software that can make templates. If you don't have one, try Embird.
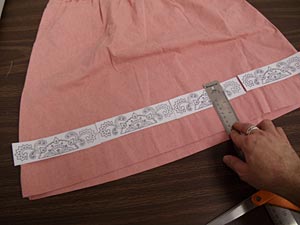
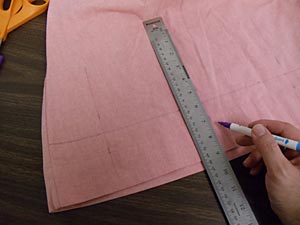
Print templates at full size, and arrange them the way that you'd like. Double-check to make sure they fit well within the space. Then, measure the distance between the bottom edge of the fabric, and the center of one of the templates. We're measuring three inches from the bottom of the fabric to the center of the border design.
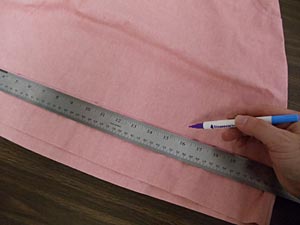
Remove the templates. Use an air-erase pen or other marking tool, and mark up that measurement (ours is three inches) periodically along the fabric. Draw a line connecting the marks. This line is the center line for the templates.
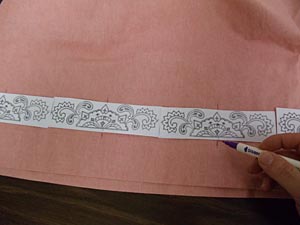
Poke holes in the centers of the templates and arrange them on the fabric. The holes are so that you can see the drawn line on the fabric.
If you're leaving space between the borders, measure equal distances between the edges of each design to space them evenly.
Find the vertical axis point on each template, and continue the line to mark the fabric.
Remove the templates and draw lines connecting the vertical axis points. These lines will be used for hooping
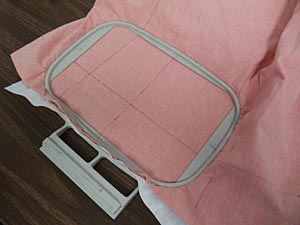
We're stitching on a linen skirt, so we've hooped the fabric with cutaway stabilizer. The horizontal line, and vertical axis line for the first border design, align with the horizontal and vertical marks on the hoop.
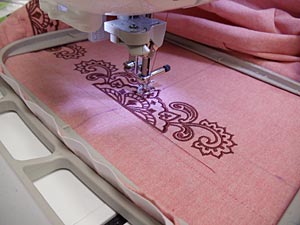
Attach the hoop to the machine, and load the design. Move the hoop so that the needle is directly over the center point (where the horizontal and vertical axis lines meet).
Embroider the design.
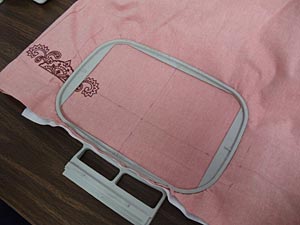
After the design has finished embroidering, unhoop the fabric and trim the excess stabilizer away. Then, hoop the fabric to stitch the second border design.
It's likely that you'll be hooping over the previous embroidery, and some stitchers are squeamish about this. But it's okay - the embroidery will not be damaged by the hoop.
Attach the hoop back onto the machine, move the hoop to align the needle over the next center point, and embroider the design. Repeat, repeat, repeat, until beautiful embroidery is added to your heart's content!
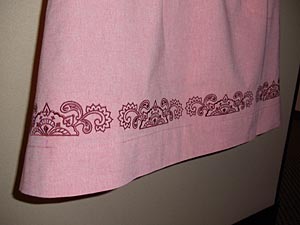
Here's the finished result! You can have a lot of fun with "flat-edged" borders by positioning them closer to the hemline, too.
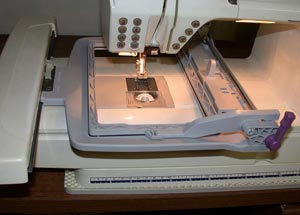
Using Borders with the Husqvarna Viking Endless Hoop
In the description for some borders, you may notice a notation about the design being formatted for the Endless Hoop. The Endless Hoop is a special hoop made for Husqvarna Viking machines, and it allows embroiderers to repeat a border over and over again in a straight line.
Joan Warr, an avid embroiderer well-experienced with Husqvarna Viking machines, worked with an Endless Hoop design to make a beautiful pillow cover. She documented her steps so that other Endless Hoop users may benefit from them, too. Thanks, Joan!
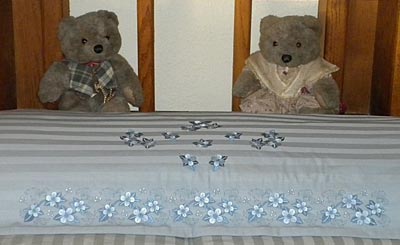
Joan made this adorable pillow cover using her Endless Hoop. She used the Out-of-the-Blue Flowers border that's formatted for the Endless Hoop.
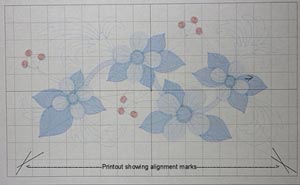
In order to place the border properly, Joan printed a template from her embroidery software program. There are alignment stitches in the Endless Hoop designs, and these alignment stitches help to keep the designs stitching straight.
Joan makes several templates and marks the alignment stitches on each one.
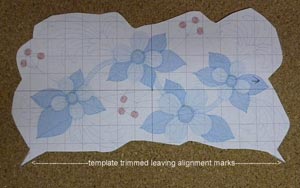
She trims the template around the design's shape so that she can arrange them easily on her fabric or item.
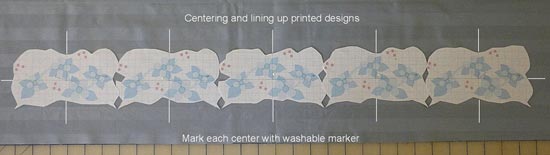
Then she arranges the templates on her fabric or item, marking each center with a washable marker or pen. When she arranges the templates, she begins in the center of the fabric or item, and works her way to each side.
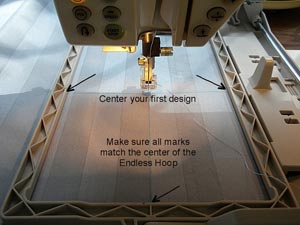
She starts stitching at the top, and when hooping the fabric, ensures that all of the marks line up with the hoop.
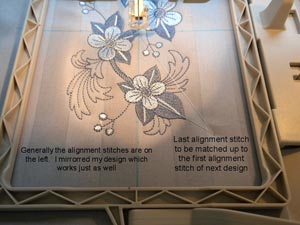
The last alignment stitch of the design will become the first alignment stitch of the following design.
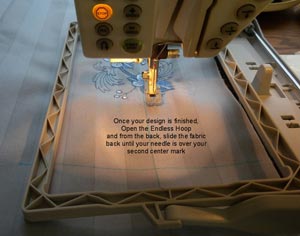
After the first design has stitched, open the Endless Hoop and from the back, slide the fabric until the needle is over the second center mark. Make sure all the marks match up to the Endless Hoop. Small adjustments can be made once the fabric is in place.
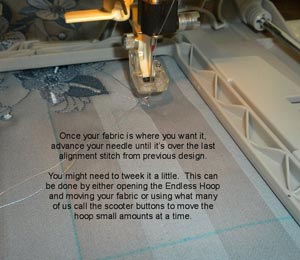
When the fabric is positioned properly again, advance the needle until it's over the last alignment stitch from the previous design.
The Husqvarna Viking machines have "scooter" buttons that can be used to move the hoop small amounts at a time to achieve this, or you can open the Endless Hoop and move the fabric manually.
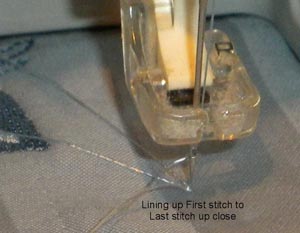
This is a close-up view of the needle positioned directly over the last alignment stitch of the first design. Once the needle is there, then start stitching the second design.
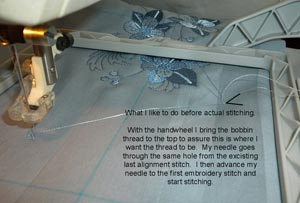
Joan uses the handwheel on the machine to bring the bobbin thread to the top. This helps here to make sure that the first stitch is where she wants it. Her needle goes through the same hole from the last alignment stitch. She then advances her needle to the first embroidery stitch, and begins stitching the second design.

By using this process, she repeated the border four times, and it's perfectly straight!
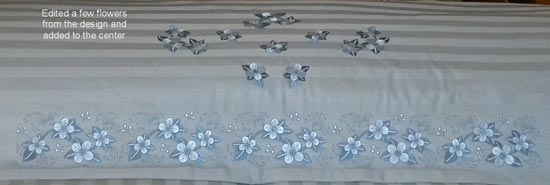
She also used her editing software to isolate a few of the flowers, and sprinkled them above the border. Absolutely beautiful!


