Lace and Mylar are a match made in heaven! Decorations made with both freestanding lace and Mylar are just the thing to put the "bling" into your projects.
The regular size designs make wonderful ornaments, while the miniature designs make fabulous earrings, gift tag decorations, tiny ornaments, and more.
Designs featured in this tutorial are a blend of applique and lace; the applique is the Mylar foil. Oftentimes we're asked if the designs can be stitched without Mylar. Unfortunately no, that is not possible. The Mylar is necessary to keep the integrity of the lace, so that the design is a "freestanding" one.
Read on for free project instructions!
Supplies Needed:
**Heavy weight water-soluble stabilizer (I prefer Sulky Ultra Solvy)
**Small pieces of Mylar (foil gift wrap or foil balloons)
**Medium weight cutaway stabilizer
**Temporary spray adhesive
**Paper towels
For earrings only (in addition to above):
**Jewelry pliers
**Jump rings
**Earring hooks
Designs Used
Special Project Notes:
In this project I used the Dazzling Christmas Lace (Mylar) Design Pack - Lg, and the Dazzling Christmas Lace (Mylar) Design Pack - Sm.
For the lace and Mylar earrings section of the project, I used the Sparkling Christmas Lace Miniatures (Mylar) Design Pack. You can find more freestanding lace miniature designs by clicking here.
We found sheets of Mylar at our local party store and at Michaels. It was labeled as "foil tissue." It's generally found in the gift wrap area. You can also use foil balloons!
A note about water-soluble stabilizers and needles:
There are many, many different brands of water-soluble stabilizer available. Some are thin and light, some are fibrous, and some are thick and heavy. It can be confusing to pick the right one for your lace project.
We've digitized and stitched thousands of freestanding lace designs, and have consistently excellent results with Sulky Ultra Solvy (the heavy weight water-soluble stabilizer by Sulky) and Vilene, a fibrous water-soluble stabilizer. We order Vilene from www.pointetopointe.com.
Use a sharp needle (as opposed to an embroidery needle) when embroidering onto water-soluble stabilizer - especially if using the "plastic-looking" kind (such as Sulky Ultra Solvy). An embroidery needle has a larger point, which makes larger holes in the water-soluble stabilizer, leading to tearing and misalignment.
The lace with Mylar designs come with three files: one starts with an "X" followed by 4 numbers. This is the full embroidery file.
The other files end with "_DLFront" and "_DLBack"; these are the dieline files.
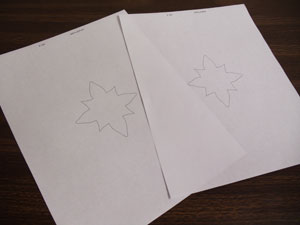
To begin, you will need to cut the Mylar to the proper shape and size, and to do this, use the dieline files. Print the dieline files at full size using embroidery software.
If you do not have embroidery software, you can create a template by embroidering the dieline files on paper. Simply hoop a piece of paper and embroider the dieline files.
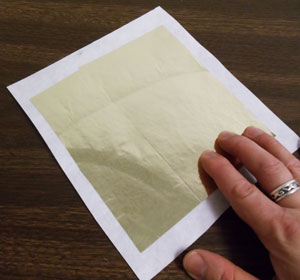
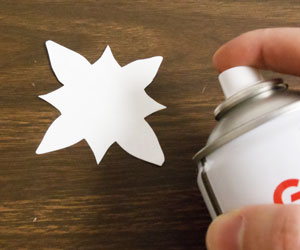
To prepare the Mylar piece, we will make a stabilizer, Mylar, and paper template sandwich. Start by spraying a piece of medium weight cutaway stabilizer with a bit of temporary adhesive. Lay the Mylar, right side up, on the stabilizer and smooth in place.
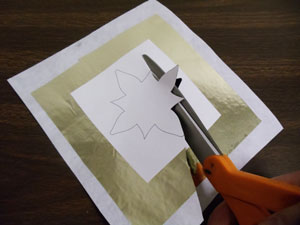
Spray the paper template with a quick shot of adhesive and smooth the template over the Mylar. Cut out the shape and remove the paper from the top of the Mylar.
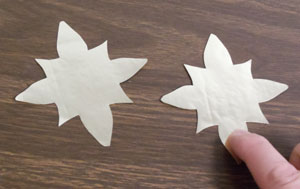
Repeat this for both of the Mylar pieces, front and back.
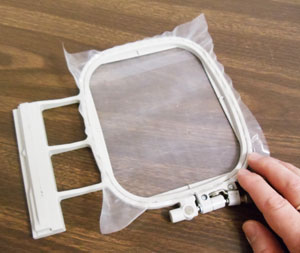
Now that the Mylar pieces are cut and ready, it is time to embroider the design. Hoop a piece of heavy weight water-soluble stabilizer (I prefer Sulky Ultra Solvy).
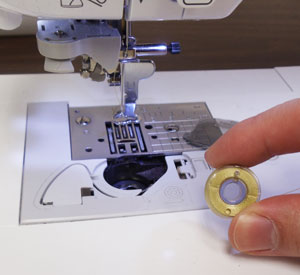
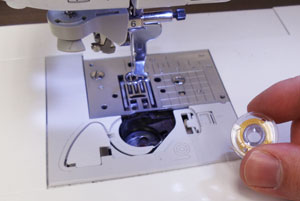
Since both sides of the design will show, wind a bobbin for each top thread color used in the design.
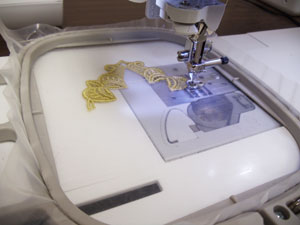
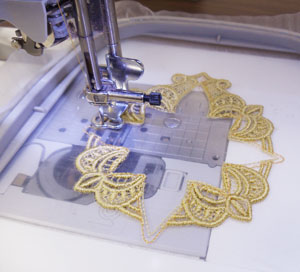
Attach the hoop to the machine, load the full embroidery file (the file that starts with an "X" followed by 4 numbers), and start the design. The first thing that sews is the lace.
After each color finishes, stop the machine. Check the color change sheet. If the color changes, remove the hoop and match the bobbin thread to the top thread.
Reattach the hoop to the machine and continue with the design: the next thing that sews is the dieline for the Mylar pieces.
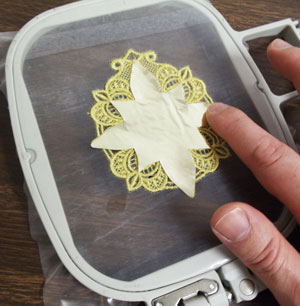
After the dieline has sewn, stop the machine and remove the hoop from the machine (but do not unhoop the stabilizer). Spray the backside of the front Mylar piece with adhesive.
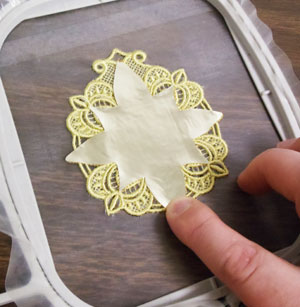
Lay it right inside the dieline shape on the front side of the embroidery.
Spray the backside of the back Mylar piece with adhesive and lay it right inside the dieline shape on the back side of the embroidery.
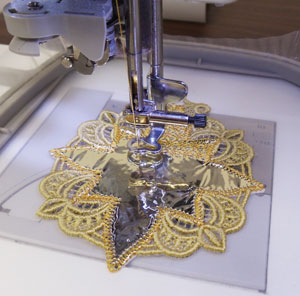
Attach the hoop back on the machine and continue with the design.
A zigzag tack down stitch will embroider next followed by some inside elements of the design.
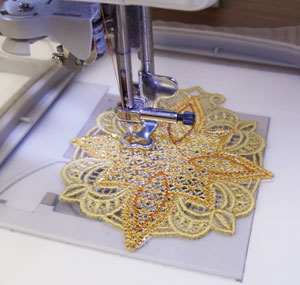
Continue with the design being sure to match the bobbin thread to the top thread when necessary.
When the design has finished, soak it in water, hot from the tap, for about 15 minutes, or until the stabilizer is soaked away.
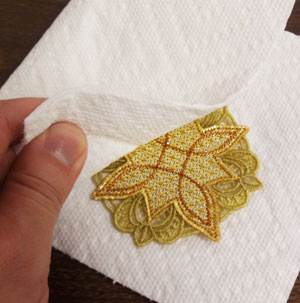
Blot it with a paper towel and allow it to air dry. And your lace with Mylar design is complete!
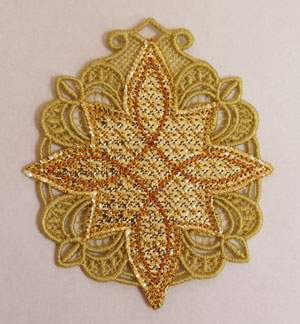
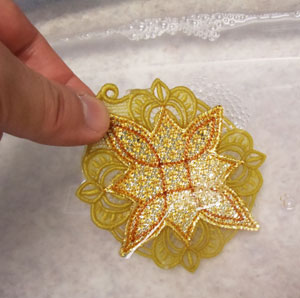
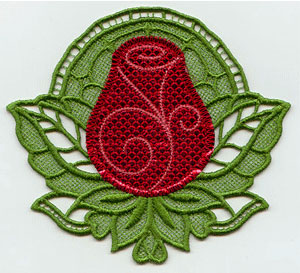
Here is a completed design showing the front. Be aware that the front will look slightly different than the back, as these designs are not 100% reversible.
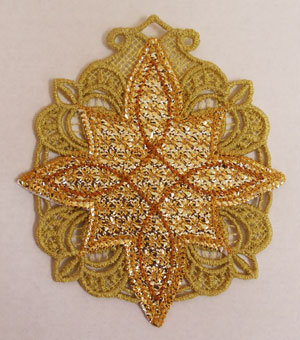
And here is a completed design showing the back. You'll notice the back looks slightly different than the front.
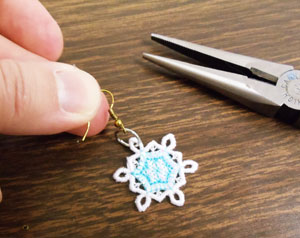
Repeat the previous steps for stitching out the miniature freestanding lace designs.
Once completed, you can turn the miniature designs into a fabulous and festive pair of earrings. First bend a jump ring open and add it to the top of the embroidery. Insert the loop of the earring hook through the jump ring and bend the ring closed. Your earring is complete!
Lace and Mylar designs are wonderful year-round decorations for your home. Hang them in a window or place them on a table for an extra special touch of style!


