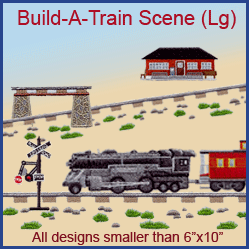
Build your own railroad with Joan Warr-Plus a peek at Endless Hoop from Husqvarna/Viking.
Joan Warr is one of the first lucky first owners of the new Husqvarna/Viking Endless Hoop, which allows any embroidery design to be sewn into a long continuous embroidery. With this hoop, embroiderers can now quickly align and re-hoop the fabric without having to remove the hoop from the embroidery machine.
Joan has quickly become an expert with the endless hoop, and she graciously agreed to share her knowledge with us. She was inspired at the end of August by the Build a Train designs that Embroidery Library introduced, and she immediately recognized that the train designs and the Endless Hoop were a match made in heaven.
Supplies:
Weaver's cloth
Cut-away stabilizer
40wt embroidery thread in assorted colors
75/11 embroidery needles
Pre-wound bobbins
Embroidery machine (I used the Husqvarna Viking Designer 1)
Embroidery hoops to fit the designs (I used the Endless Hoop and the 240 x 150mm hoop sizes)
Embroidery designs: Build a Train Pack from Embroidery Library
Preparation:
Print out all the design files in real size (100 %).
Heavily starch the weavers cloth or fabric you use; I also basted in the hoop.
For this project, I used the large hoop for the combined designs "Engine and Smoke" and reduced the length of the "track" by 3 percent for the Endless Hoop, because I was using the large designs. Engine, Smoke, and Track in the smaller size will all fit in the Endless Hoop.
Designs Used
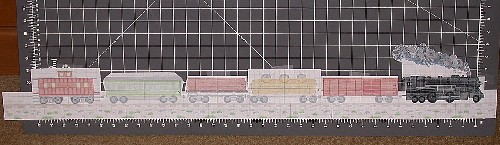
First, I printed out all my designs and placed them in the order I wanted to stitch.
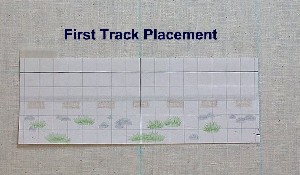
Second, I set up where I wanted the track because it needed to be stitched first.
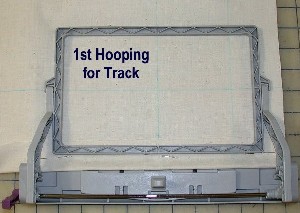
This is the hooping on the Endless Hoop for first part of the track.
Notice my placement lines extend beyond the edge of the hoop, so that I could make sure that the design would be perfectly straight.
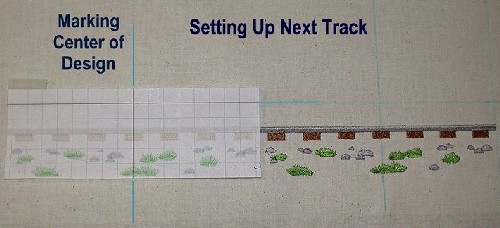
Use your printed template to line up the second track. Line up your horizontal lines and mark your middle vertical line.
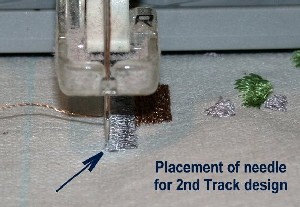
When using the design in the vertical position, line your needle up to the far left of the design. For those who have the Designer 1, you can use the scooter buttons to get the needle in just the right place.

Here is a view of 2 out of 6 tracks stitched.
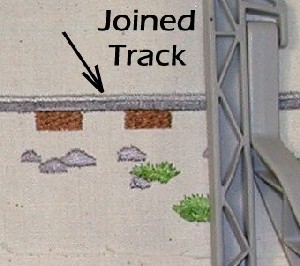
Here's an up-close look at the joined track.

Keep repeating this process until you have the length of track that you need.
Now is the time to add our engine and cars. This takes a bit longer and is much easier if you have some editing software. I used Viking's Stitch Editor and Anne Campbell�s book Stitch Editor: the Final Frontier to add some extra stitch points to the wheels. You can also use the Edit Page in 3D Embroidery. At this point, I wanted to make sure the wheels of all the cars and engine fit right on top of the track. First, I added an extra stitch point to the hitch of the car, then I added 3 stitch points along the bottom of the wheels. With the scooter buttons on the Designer 1 touch screen, I was able to line everything up.
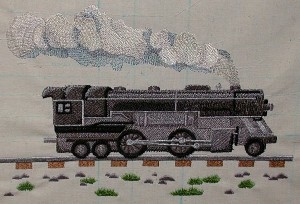
For the engine stitch-out, I combined the engine and smoke and used my large hoop for this.
You can see how you can mix the two hoops if need be. With the engine stitched out first, the rest became quite easy. I did add stitch points to the bottom of the wheels to line up against the track. This is how the engine should look once it is stitched out.

Again I added stitch points to the Box Car wheels to match up with the track and made sure the stitch point that is within the hitch of the Box Car matched up with the Engine.
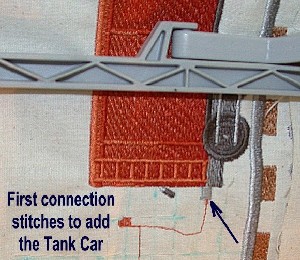
Here is a close-up of the stitching, adding the Tank Car to the Box Car. This stitch is within the design. Embroidery Library set up the designs with a stitch point in the hitch area.
Note: Add a car (any car will do, the order is up to you). Load the design into your machine, and forward to the first stitch. Then, move the hoop until the needle is directly over the engine's rear hitch. The car's front hitch will begin sewing at that point.
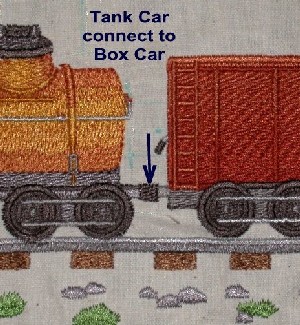
This is a close-up of the finished Tank car join.

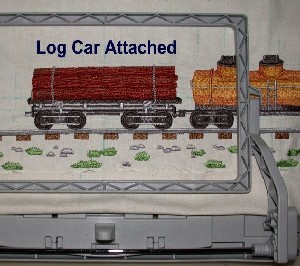
Above: Completed log and tank cars.
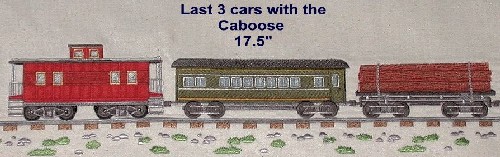
Continue on with other cars, like the passenger car and caboose, until you have completed the train.
I hope you will give this project a try -- it was so much fun! Thanks, Embroidery Library for sharing your wonderful design inspirations with all of us.


