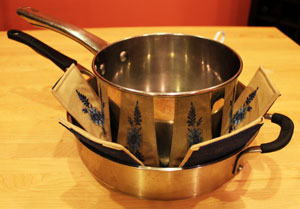
When pots and pans are stacked together for storage, they can easily be scratched. Protect your cookware with a beautifully embroidered pot protector that also doubles as a trivet or even a hot pad!
Decorated with designs of your choosing, your pot protector will be attractive enough to help dress up a table, as well as insulated for protection. Make one for yourself and one for a friend!
Read on for project instructions for creating your own useful 2-in-1 pot protector and trivet!
Supplies
Supplies Needed:
**18" by 18" piece of lightweight canvas, denim, or twill (for front)
**16" by 16" inch piece of Insul-Bright insulated lining
**16" by 16" piece of heavy weight interfacing
**16" by 16" piece of wool felt
**Temporary spray adhesive
**Medium weight cutaway stabilizer
**1/4" wide ribbon
**Scotch tape
Special Project Notes:
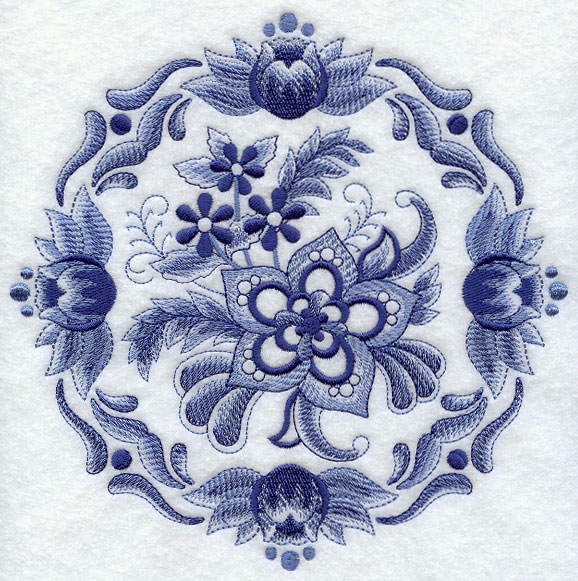
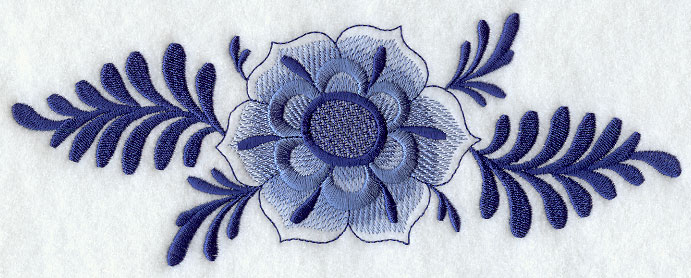
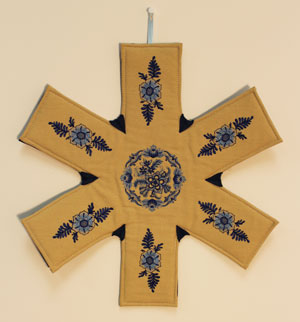
For my 2-in-1 pot protector, I used the small size of the Delft Blue Floral Medallion II design from the Delft Blue Medallions Design Pack, and the small size of the Delft Blue Flower and Filigree Border from the Delft Blue Country Cow and Flowers Design Pack.
Designs from the Delft Blue Country Kitchen Design Pack or from the Delft Blue Dining Decor Pack would be beautiful as well!
Each pot protector doubles as a trivet (or even a hot pad).
Finished size: 15" in diameter (one size fits most pans)
Designs Used
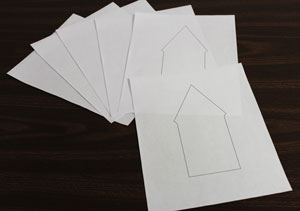
To begin, click the link above to open a PDF of the pot protector pattern. Print the pattern a six times for a total of six pieces.
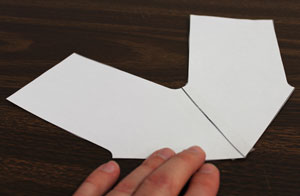
Cut out the pieces. Align the first two pieces together by aligning the angled sides of the pointed ends together and tape in place.
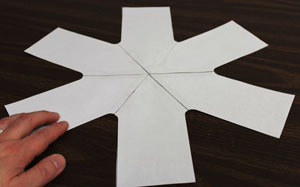
Repeat this process for each piece until the shape is complete.
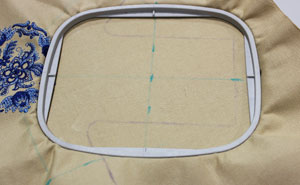
Pin the pattern piece onto the front fabric (we are using lightweight canvas). Using an air-erase pen or other marking tool, trace the shape.
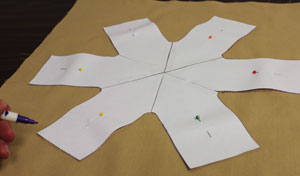
Remove the pattern piece, and measure and mark the center of each outer edge of the shape by measuring and dividing by two. Draw lines connecting the shapes. Where the lines meet is the exact center of the shape.
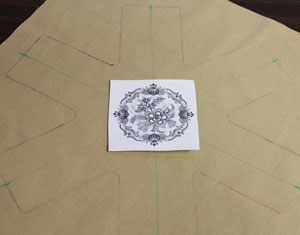
Print paper templates of the designs by printing them at full size using embroidery software. Poke a hole in the center of the center design template and align it with the center point on the fabric. Make sure the design fits well within the shape; there should be at least 1 1/2" of space between the edges of the design and the edges of the shape.
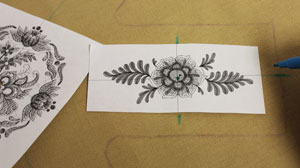
Poke a hole in the center of the outer design template and align it with the line on one of the outer sections of the shape. There should be at least 1/2" of space between the top and bottom edges of the design and the outer edges of the shape, and at least 1/2" of space between the ends of the design and the outer edges of the center design and the outer edge of the shape.
Center the design by measuring equal distances between the edges of the center design and the outer edge of the shape. Mark the vertical axis points.
Remove the template and draw lines connecting the axis points. Repeat this process for each outer section of the shape.
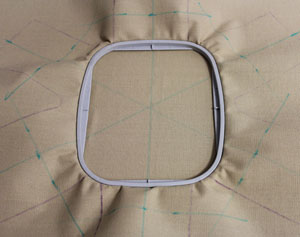
Spray a piece of medium weight cutaway stabilizer with adhesive and smooth the fabric on top. Hoop the fabric for the center design by hooping the fabric and stabilizer together by aligning the marks on the hoop with the lines on the fabric.
Attach the hoop to the machine and load the design. Move the hoop so that the needle is directly over the center point on the fabric and embroider the design.
Repeat the hooping and embroidering process for the outer section designs. When all the designs have finished, trim away the excess stabilizer on the backside of the embroidery.
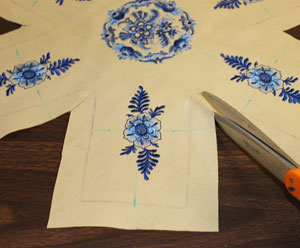
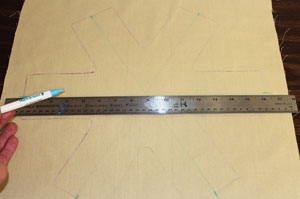
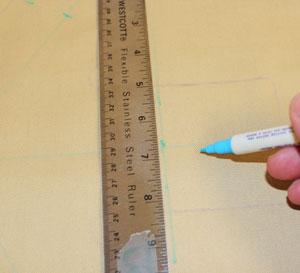
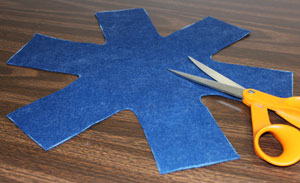
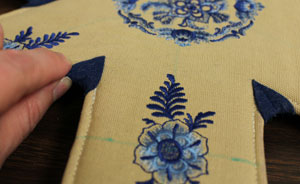
Measure and mark 3/4" out along the entire shape. Draw lines connecting the marks and cut out the shape. Cut slits up to the edge of the original shape at the bottom of each "v" shape in between the outer sections.
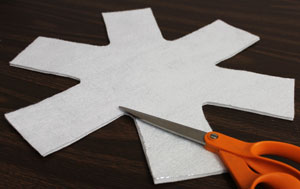
To prepare the lining, spray the backside of the Insul-Bright (non-shiny side) with temporary adhesive and smooth it over the heavy weight interfacing (shiny side of Insul-Bright should be facing up). Pin the pattern piece on top of the Insul-Bright, trace the shape, remove the pattern, and cut out the shape.
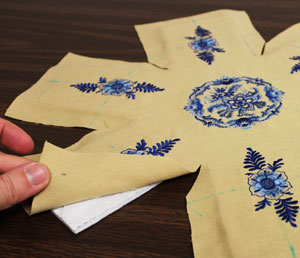
Spray the top of the lining (shiny side of the Insul-Bright) with adhesive. Align the embroidered front piece on top, right side facing up, and smooth in place. I transferred the outer corners of the original shape to the wrong side of the front piece to help me line up the lining.
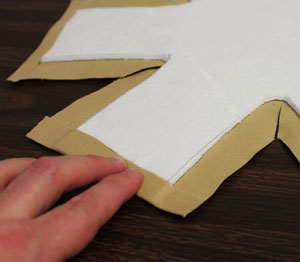
Flip the front piece/lining over to the wrong side and spray the excess fabric at each end of the outer sections with adhesive. Fold the excess fabric over to the wrong side and press in place.

Spray the excess fabric along each side of the outer sections with adhesive and then fold them over to the wrong side and press in place. Trim the folded fabric at each corner.
To prepare the fabric for the back, pin the pattern piece to the wool felt, trace the shape, and cut out the shape.
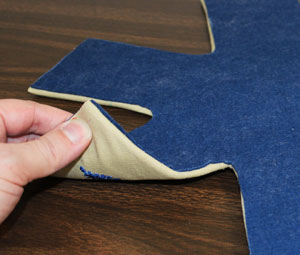
Spray the backside of the assembled front piece/lining section with adhesive, align the back fabric on top, wrong sides together, and press in place.
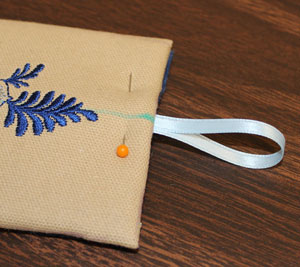
To add a loop hanger, cut a piece of 1/4" ribbon to 6" long. Form the ribbon into a loop, tuck it in between the layers of fabric at the top of the protector, and pin in place.
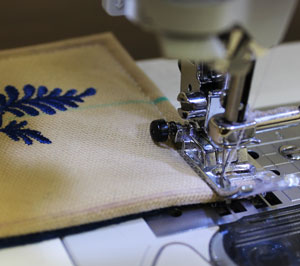
Sew a 1/4" seam along the entire outer edge of the shape. Sew back and forth over the loop to secure it in place.
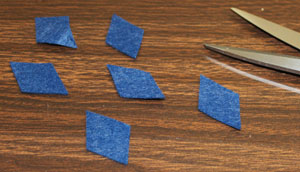
To finish off the bottom of each "v" of the outer sections, cut 6 diamond shapes from the wool felt at 1" wide by 1 3/4" long.
Spray the wrong side of the diamonds with adhesive and wrap them around the outer edge of the protector at the bottom of each "v" shape.
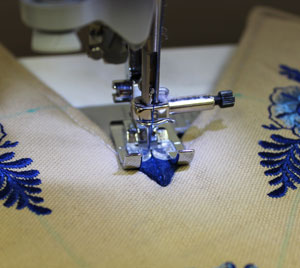
Sew a seam up the middle of each diamond to secure them in place.

Your pot protector is complete! Insert it inside a pan and then place the next pan on top.
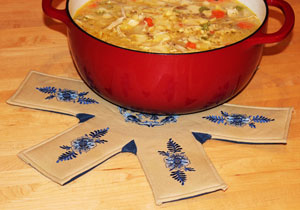
Also, when out of the pan, it can be used as an attractive trivet or hot pad!
Protecting cookware from scratches in storage, or keeping your table (or hands) safe from hot pans, this 2-in-1 pot protector is a handy kitchen item.
Add designs of your choice to personalize this helpful item, and you've got functionality and beauty, all in one!


