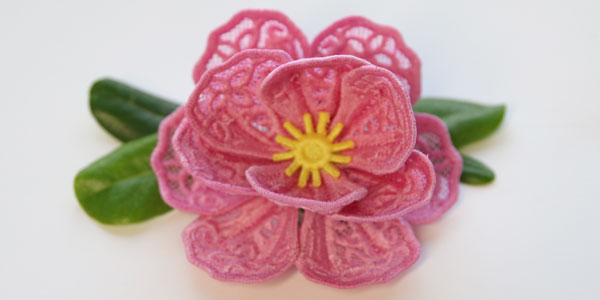
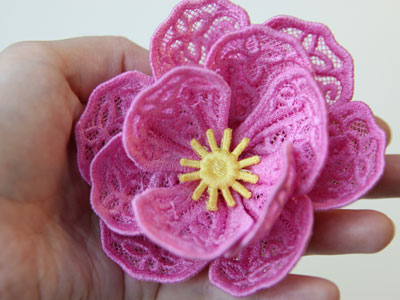
Soft and sweet-smelling peonies are beautiful springtime blooms. Stitch this three-dimensional freestanding lace blossom to bring their lovely look to your home!
Supplies
- Water-soluble stabilizer
- Pre-wrapped floral wire
Tools
- Hand sewing needle or glue
- Wire cutter
- Needle nose pliers
Designs Used
Finished Sizes:
Large: 3 3/4" x 2 1/2"
Small: 3" x 2"
Special Notes:
Shape the lace petals with your hands to look like real peony petals. Simply bend and shape the lace petals while they are damp, and they will hold their shape when they dry. Once the flower is finished you can spray it with a water spray bottle to make it damp.
Freestanding lace designs have been specially digitized for water-soluble stabilizer. After the stabilizer is removed, beautiful lace remains behind.
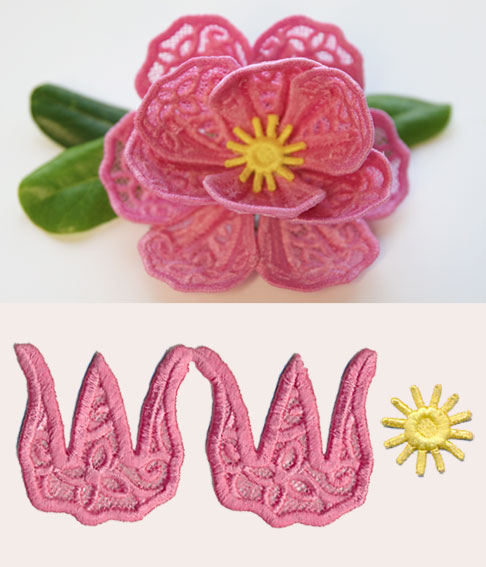
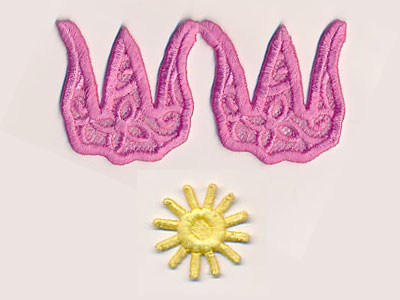
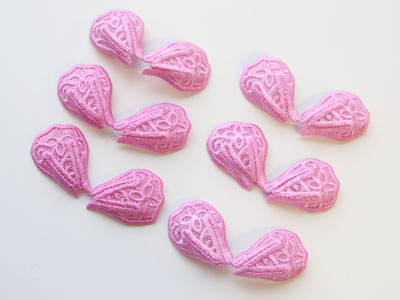
When you download the design, you will find a total of 2 files. The file labeled with the letter "a" is the petal piece, and the file labeled with a "b" is the flower center.
To make a full peony, embroider six of the file "a", and one of file "b".
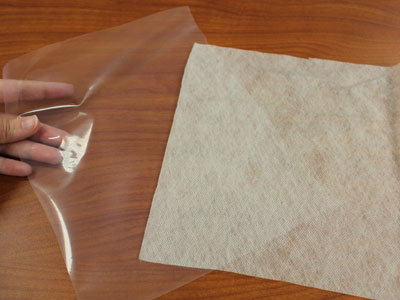
There are a couple of different kinds of water-soluble stabilizer.
One is clear and plastic, and that brand is Sulky Ultra Solvy. The other is soft and fibrous, called Vilene. Both will work very well. Vilene is used in this demonstration.
Use a size 11 or 75/11 sharp sewing needle. A sharp sewing needle has a smaller, finer point than an embroidery needle. That means it will make smaller holes in the stabilizer.

Freestanding lace is seen from both sides, so wind a bobbin with the same thread that you're using in the needle.
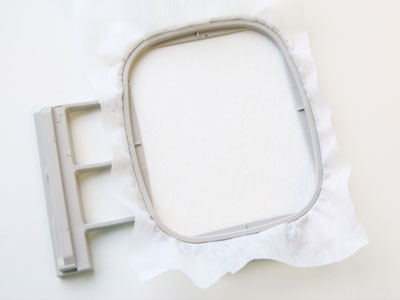
Hoop the stabilizer firmly. Make sure it is nice and tight with no wrinkles.
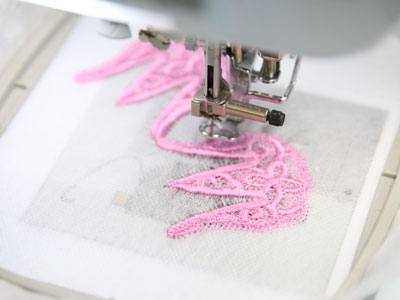
Attach the hoop to the machine and load file "a". In this example, 40 weight rayon thread was used.
You can also use 30 weight cotton or metallic thread for most freestanding lace designs.
Embroider the design.
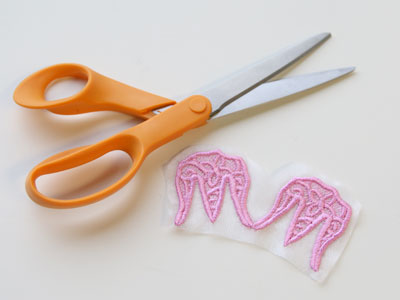
After embroidering, trim away the excess stabilizer.
The stabilizer's packaging should give instructions for removing the excess.
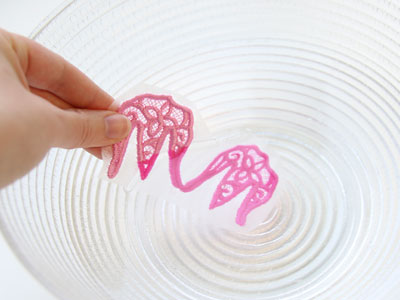
For Vilene, soak the lace pieces for a few moments.
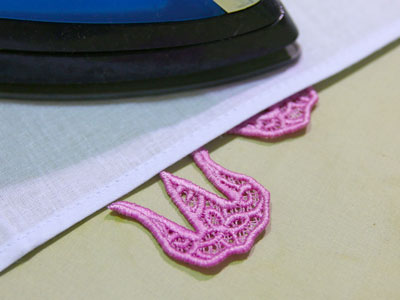
Allow the lace to air dry, then press with a pressing cloth on top.
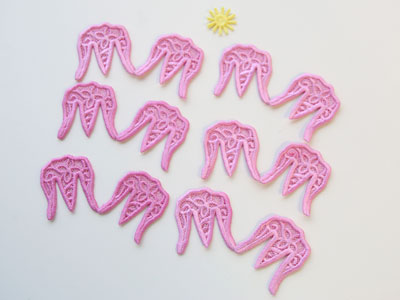
Repeat the steps above to embroider the rest of the lace pieces.
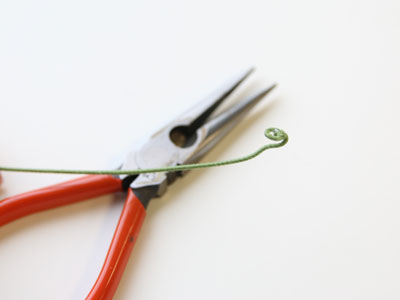
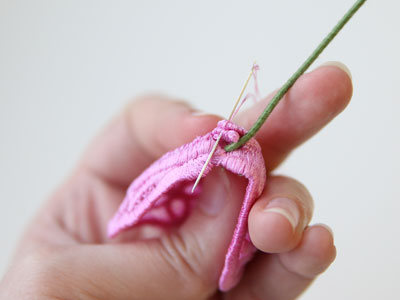
Cut the wire to 10" long, and curl the end with a needle nose pliers.
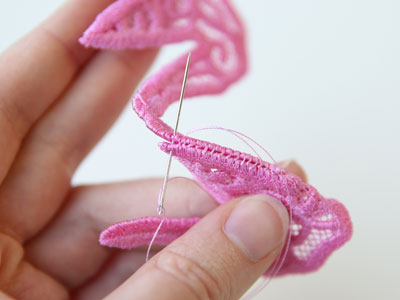
Take one the lace petal pieces (piece "a"), and fold it along one of the four triangle darts with the wrong sides of the lace together.
Using a hand sewing needle and the same thread as used in the embroidery, stitch the dart closed.
Repeat to sew all four darts on the first petal piece.
Then continue to sew all four darts on all six of the the lace petal pieces.
Wrap one of the stitched petal pieces around the wire, making sure the wrong side of the lace is against the curled end of the wire.
Match up and overlap the two extended points on the bottom corners of the petal piece, and hand sew them together.
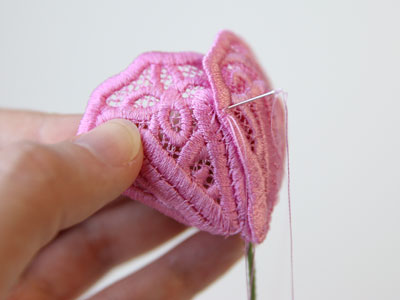
Overlap the connected petals, making sure that the edge of one lines up with the center of the dart on the other.
Using a hand sewing needle, tack them in place at the top of the dart.
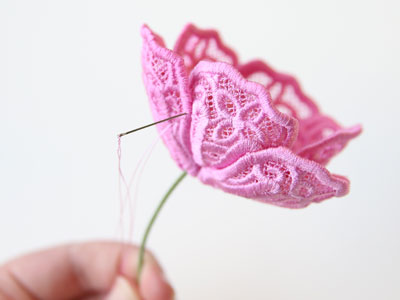
Repeat the last steps to stitch and add just two more petal pieces.
Arrange the petals so they are evenly spaced and overlapping, and then sew the three petal pieces together, again matching up the edge of the neighboring petals to the nearest dart.
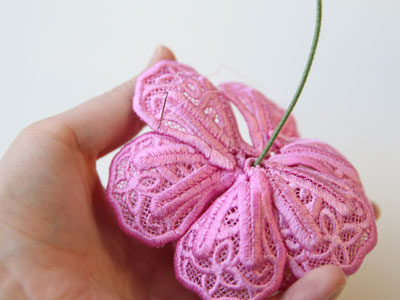
Also sew them all together around the the base where the wire comes out. This will hold them all together and keep them from shifting.
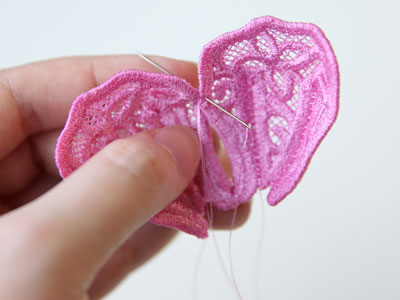
Take one of the remaining petal pieces and bend it so that the two interior sides of the petals are overlapping slightly.
Use a hand sewing needle to stitch the two petals together at this point.

Once you are finished stitching the petals together, take that piece and line up the middle bump on the bottom of it to where the wire comes out of the previously added petals.
Stitch it in place, making sure to sew all the way through all the layers of petals to effectively hold it in place.
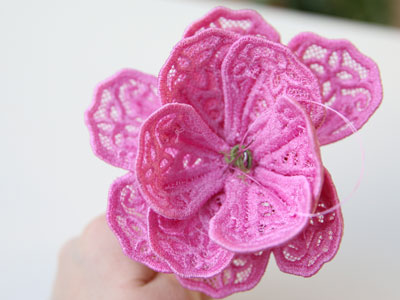
Repeat to add the final two petal pieces, making sure they are evenly spaced and slightly overlapping.
Hand tack where the last three petal pieces together, overlapping them slightly to prevent them from shifting out of place.
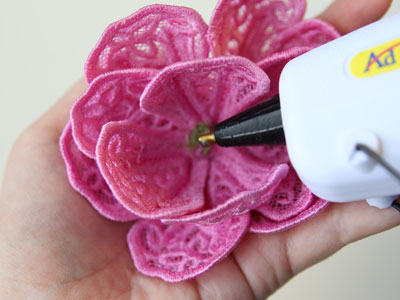
Use a glue gun to glue the wire curl to the inner center of the petals.
Then also glue the flower center over the wire curl to hide it and finish the flower.


