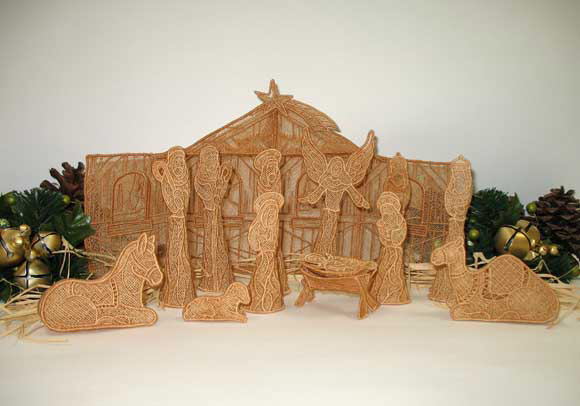
Create a unique and elegant nativity set for your home, made entirely of freestanding lace!
The first part of the instructions show you how to embroider the lace pieces, and the second part of the instructions show you how to put each figure together for the set
Supplies
Supplies needed:
** Water-soluble stabilizer
** Paper towels
** Fabric Glue
** Paper
** Needle and thread (for a small amount of hand sewing)
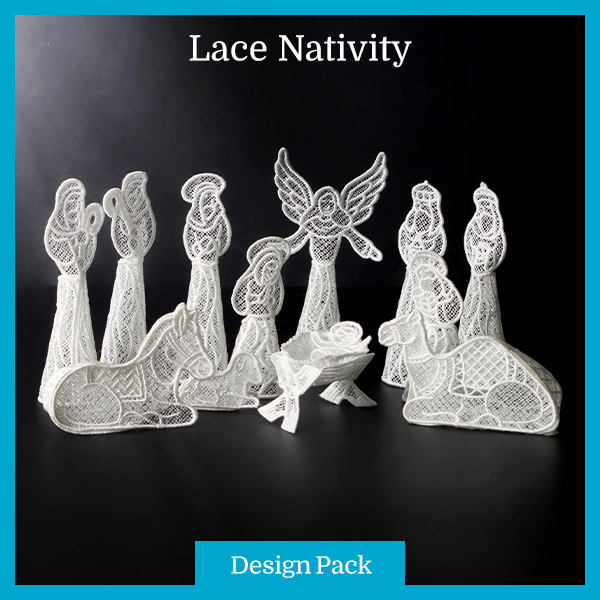
Designs Used:
** 3D Nativity Pack (Lace) - Lg or small (4 x 4)
Special Project Notes:
You can use either 40 weight rayon thread or 30 � 35 weight cotton thread.
I use Coats and Clark 30 and 35 weight cotton thread. It's labeled as Mercerized ELS Cotton for Machine Quilting & Crafts; Machine Quilting; or All Purpose. I find Coats and Clark cotton thread at JoAnn's. I've also used Madeira Cotona, which is a 30 weight cotton thread.
I use the 30 - 35 weight cotton thread both in the bobbin (I wind my own bobbins) and in the top (needle).
A note about water-soluble stabilizers and needles:
There are many, many different brands of water-soluble stabilizer available. Some are thin and light, some are fibrous, and some are thick and heavy. It can be confusing to pick the right one for your lace project.
We've digitized and stitched thousands of freestanding lace designs, and have consistently excellent results with Sulky Ultra Solvy (the heavy weight water-soluble stabilizer by Sulky) and Vilene, a fibrous water-soluble stabilizer. We order Vilene from www.pointetopointe.com.
Use a sharp needle (as opposed to an embroidery needle) when embroidering onto water-soluble stabilizer - especially if using the "plastic-looking" kind (such as Sulky Ultra Solvy). An embroidery needle has a larger point, which makes larger holes in the water-soluble stabilizer, leading to tearing and misalignment.
Designs Used

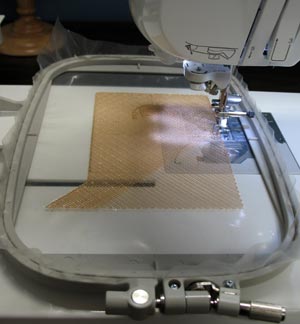
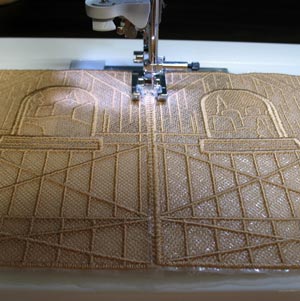
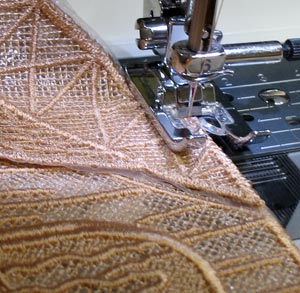
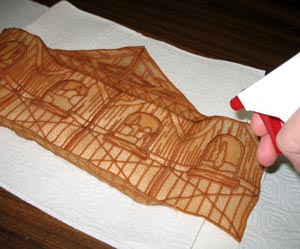
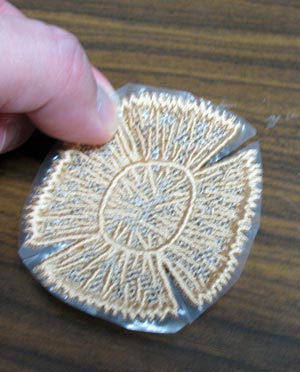
Begin by embroidering the pieces. To embroidery freestanding lace, hoop one piece of water-soluble stabilizer (WSS). We used Sulky Ultra Solvy.
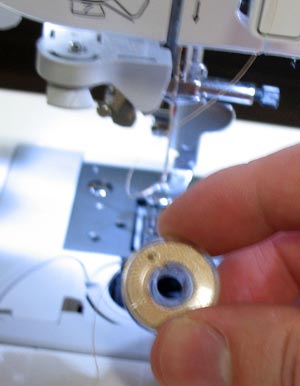
Because freestanding lace is two-sided, the bobbin thread should match the top thread. Wind a bobbin with the same thread that you'll be using in the needle.
We use a size 11 sharp needle when embroidering free standing lace.
Embroider each of the nativity designs. When embroidering the design for the legs of the manger, embroider that design twice.
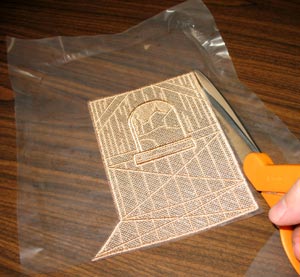
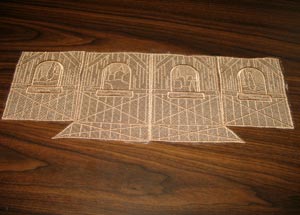
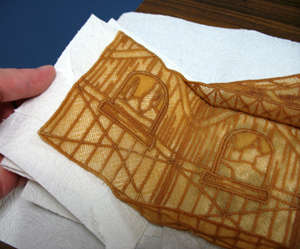
After finishing each design, unhoop the WSS and cut away the excess. Trim as close to the embroidery as possible without cutting any of the stitches.
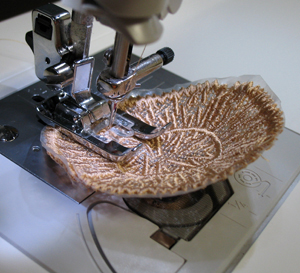
It is sometimes easier to assemble the pieces together first, and soak the stabilizer away after. We've made notes below as far as which method worked best for us.
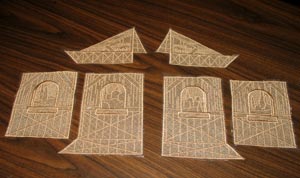
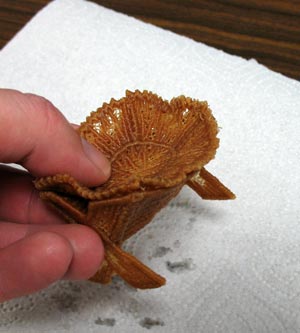
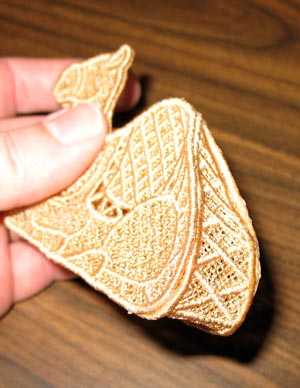
Assemble the stable first, before soaking the WSS away.
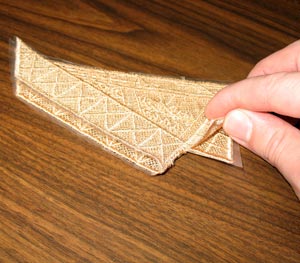
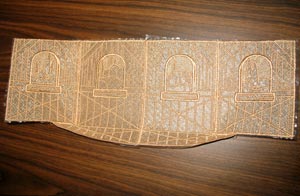
The stable is constructed from six pieces of lace: two back pieces, two side pieces, and two roof pieces.
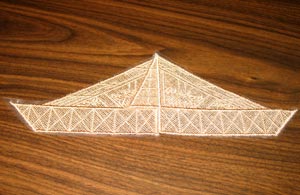
Lay the roof pieces right side up, with inner sides together. The inner triangular shapes will become a brace in the back of the roof. For now, these sections will overlap one another.
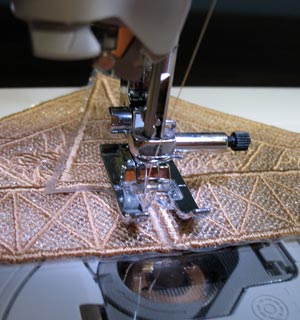
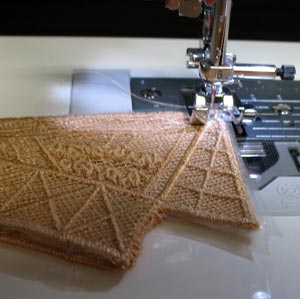
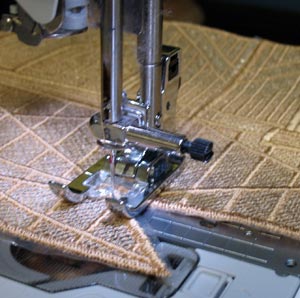
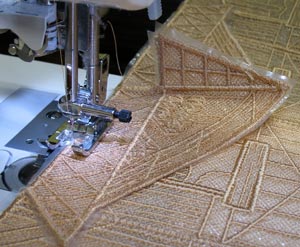
Using the same color top thread and bobbin thread as the embroidery design, sew the pieces together with a zigzag stitch.
Sew along the small area where the two roof pieces meet. Do not stitch the inner triangular sections just yet.
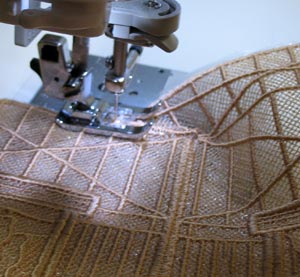
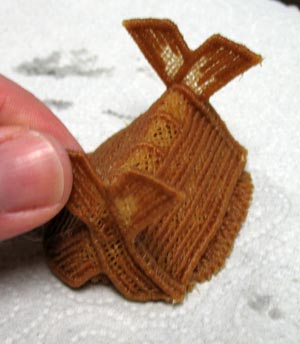
Fold the roof sections right sides together. Then fold the triangle sections right sides together.
Sew a zigzag stitch around all three sides of the triangle shape. This creates a brace at the back of the roof.
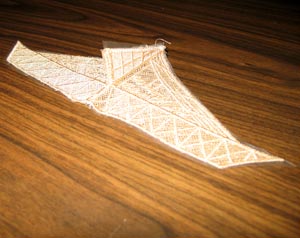
This is the back view of the completed roof section.
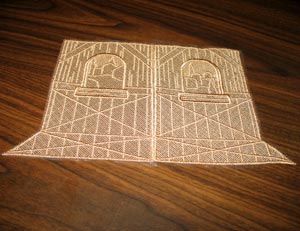
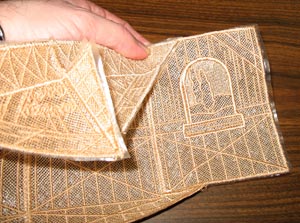
Lay the inner wall section designs side by side.
Sew them together in the center where they meet
Lay one outer wall design next to each of the inner walls.
Sew each outer wall to the inner wall next to it.

Bring each bottom "tab" of the inner walls to meet each outer side wall.
Sew each tab to the outer wall next to it.
This is the front view of the wall. The bottom strip will become the base of the stable after we soak it later on.
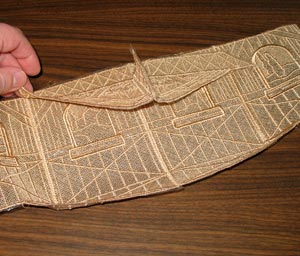
Now attach the roof to the wall.
Stitch along the long bottom edge of the roof and the top edge of the inner wall. Do not stitch the angled ends of the roof section just yet.
Align the angled ends of the roof section with the top of the outer walls.
Stitch along the outer edge only. Do not stitch more than one side.
Bring the bottom point of the triangle to the top of the walls. Stitch in place by hand at the center seam.
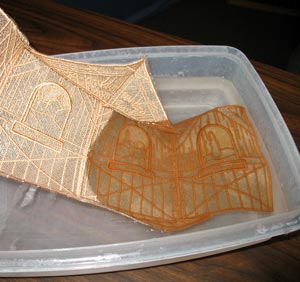
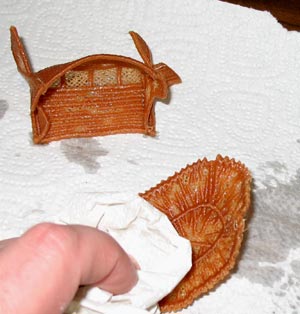
Remove the WSS according to package instructions; for Sulky Ultra Solvy, soak in hot tap water for about 15 minutes.
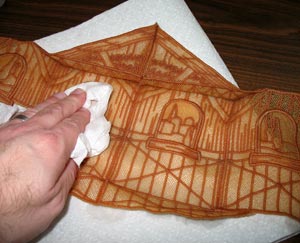
Take it out of the water, and blot the excess water away with paper towels.
To add support, spray the stable with starch. To make spray starch, dissolve a few leftover pieces of WSS in water in a spray bottle. Spray the stable, saturating the entire piece.

Shape and mold the roof and base by pinching and smoothing the lace.
Lay the stable on paper towels. Fold more paper towels and lay them under the outer walls, so the walls are propped up. Allow the stable to dry overnight.
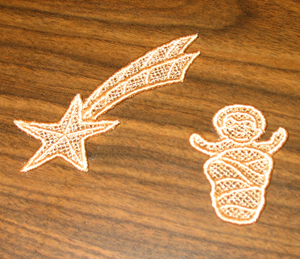
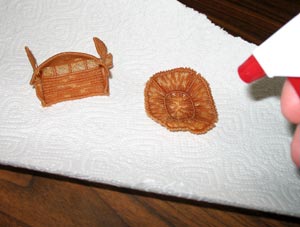
Soak the star and baby Jesus designs as you did the stable. Allow both to dry.
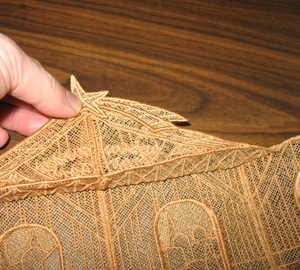
When the stable is dry, add a few drops of fabric glue to the back of the star and press it into place at the top peak of the roof.
If you would like to further stabilize your stable, you can glue craft sticks (similar to popsicle sticks) to the base. Put a few drops of fabric glue on the sticks. Add the sticks to the base so they are perpendicular to the walls.
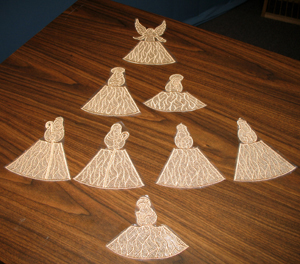
Next, assemble Mary, Joseph, the wise men, the shepherds and the angel.
All of these figures are assembled the same way, and we found that it was easiest to assemble the figures before soaking the WSS away.
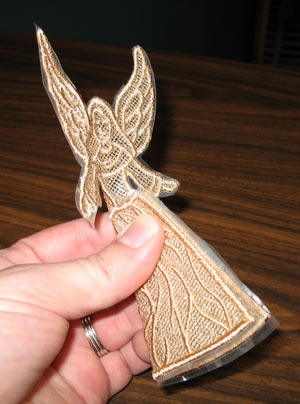
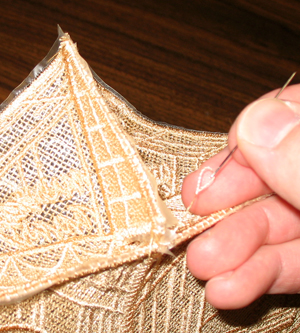
For each figure, align the sides of the robe, wrong sides together, in the back.
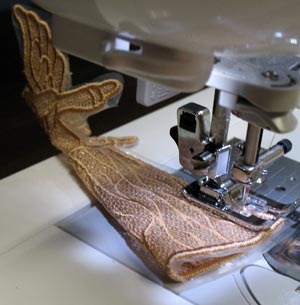
Stitch the sides together with a zigzag stitch, sewing along the robe

Soak the WSS away according to package instructions (if using Sulky Ultra Solvy, soak in hot tap water for about 15 minutes).
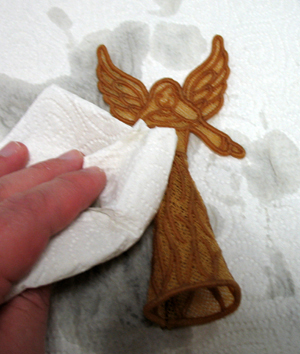
Blot the figure with a paper towel
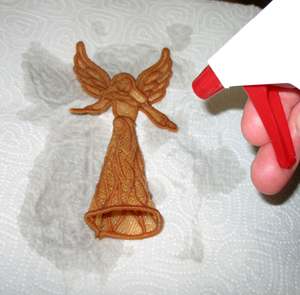
Spray the figure with starch.
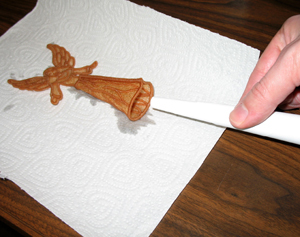
To dry the figure, roll a quarter of an 8 x 11-inch sheet of paper into a cone and...
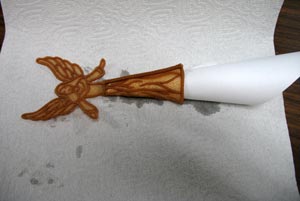
...insert it into the opening at the bottom of the figure.
Adding the paper cone will help the figure maintain its shape while drying.
Lay the figure facedown on a paper towel and let it dry overnight. When it is dry, remove the cone and set the figure upright.
Next, assemble the manger. We found it was easier to assemble the manger before soaking the WSS away.
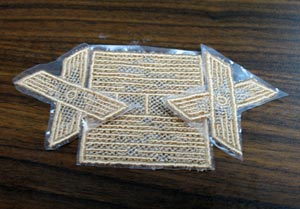
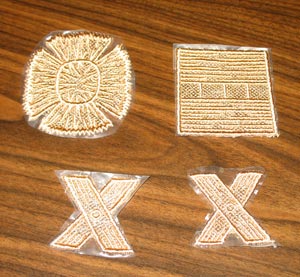
Lay the legs (the X-shape pieces) on each side of the square, right side up, as shown.
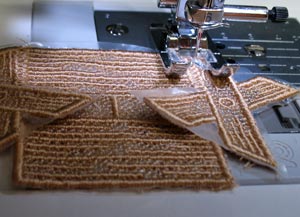
Sew the inner top leg to the square along the top half of the "X". Do the same with the second leg.
Bring the side of the manger not yet sewn to meet the opposite side of the top half of the "X"
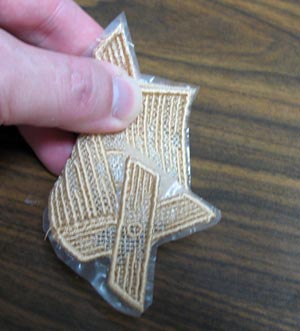
Sew the leg to the square as you did before. This transforms the square into a "trough" shape.
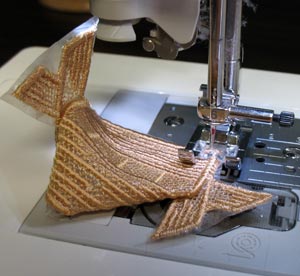
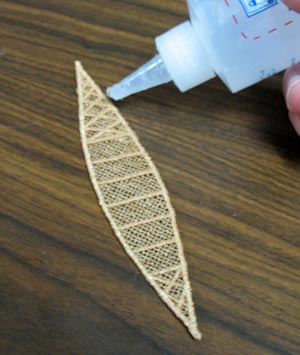
Next, create the straw bed.
Cut slits in the WSS in each of the four V-shaped corners.
Bring the edges of each corner together.
Sew the edges together in all four corners of the design.
Soak the straw bed and the manger according to WSS package instructions, then blot dry with paper towels.
Spray with starch.
Shape the pieces. Add the straw piece to the manger by placing it inside.
Dry the manger upside down on a paper towel. When it is dry, lay the lace Jesus figure inside.

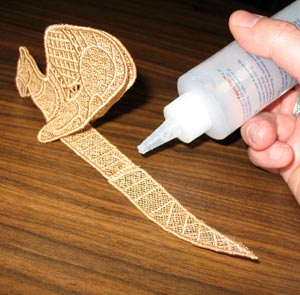
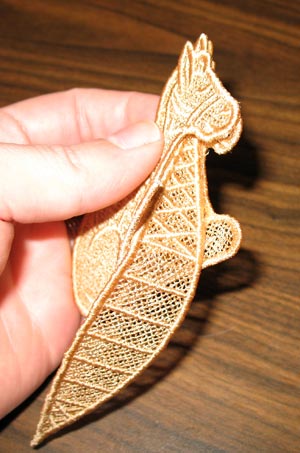
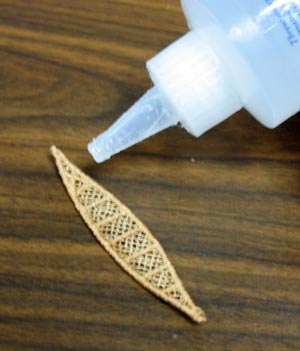
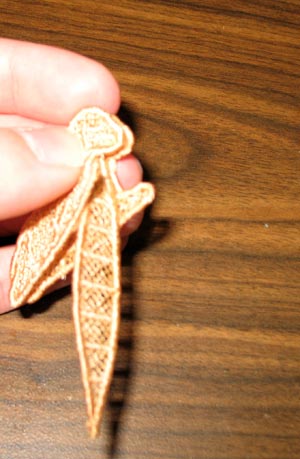
Assemble the animals. We'll start with the camel. We found that it was easiest to assemble the camel before soaking the WSS away.
Lay the wide ends of the triangle pieces together.
Sew the edges together, creating the bottom (the camel's chest)
Soak the pieces in hot tap water, and blot dry with a paper towel.
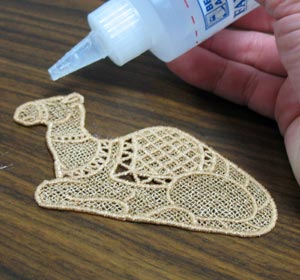
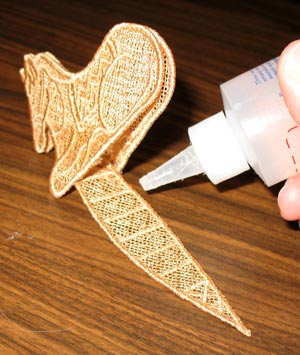
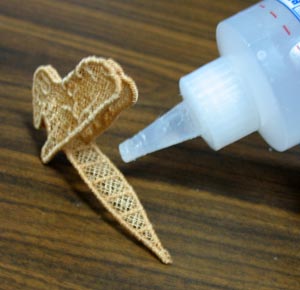
After each piece dries, lay one side of the the camel wrong side up. Add fabric glue along the outer edge from the nose to the back of the saddle.

Lay the other camel piece, wrong sides together, on top of the first piece, and press into place.
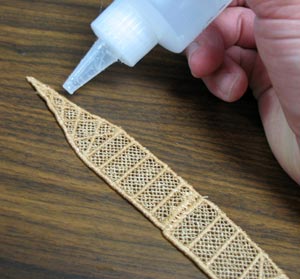
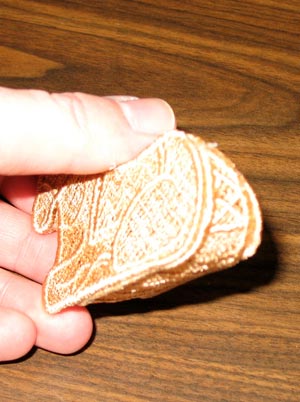
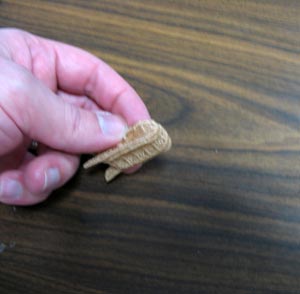
Lay the bottom piece wrong side up and add glue to the outer edges of the front tip. (The front tip has four X shapes.)
Place the front tip in between the side pieces. The end of the tip starts under the camel's chin. Hold the pieces in place for a few seconds or until the glue holds.
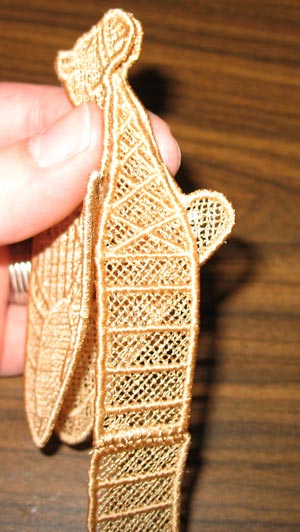
Add glue to the outer edge of the remainder of the bottom piece
Wrap the bottom piece between the front legs and along the bottom and up along the back edges, and glue in place.

Next we'll assemble the donkey and lamb, and for these, we found it was easiest to soak the WSS away first, and assemble after they've dried.
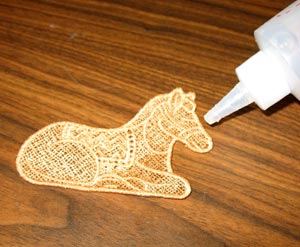
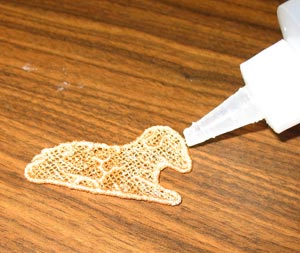
Lay one side of the donkey wrong side up. Add glue to the outer edge from the nose to the top of the rump.
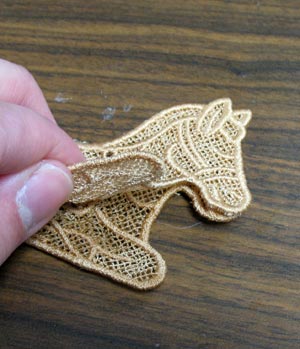
Lay the other side of the donkey, wrong sides together, on top, and press in place.
Lay the bottom piece wrong side up and add glue to the outer edges of the front tip. (The front tip has five X shapes.)
Add the front tip in between the side pieces. The end of the tip starts under the donkey's chin. Hold the pieces in place for a few seconds or until the glue holds.
Add glue to the outer edge of the remainder of the bottom piece.
Wrap the bottom piece between the front legs and along the bottom and back edges, and glue in place.
Lay one of the lamb pieces wrong side up and add glue from the nose to the top of the rump. Lay the other side of the lamb, wrong sides together, on top, and press in place.
Lay the bottom piece wrong side up and add glue to the outer edges of the front tip. (The front tip has one X shape.)
Add the bottom piece under the chin and hold in place.
Add glue to the outer edges of the bottom piece
Wrap the bottom piece between the front legs and around back, and hold in place.
Position all the pieces in front of the stable backdrop, and there you have it -- a beautiful nativity display perfect for telling the story of Christmas in your home or a wondrous gift for a loved one.


