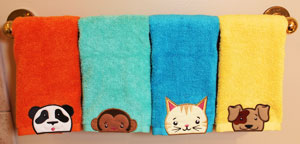
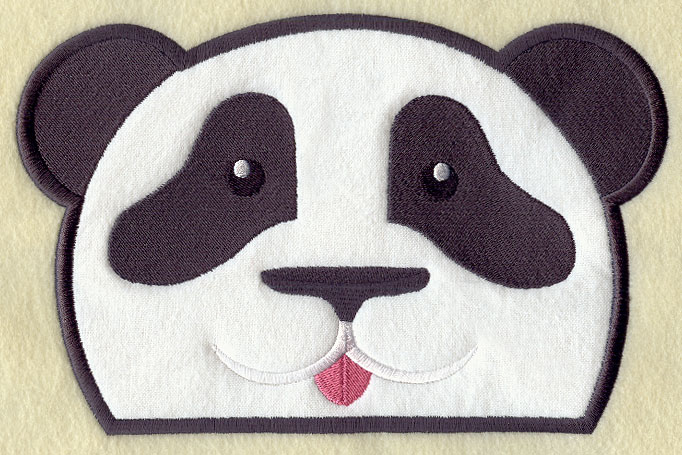
Create fun and colorful towels with "animals on the edge" applique designs! Use your favorite fabrics to make adorable animals, and place them right on the edges of bath, hand, and beach towels for an irresistibly fun effect. Read on for instructions on how to place and stitch these bright and whimsical designs.
Supplies
- Towel (I used a terry cloth hand towel)
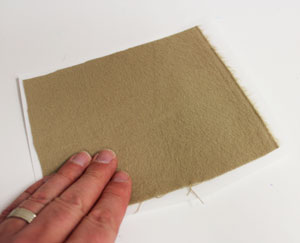
- Small piece of fabric (for applique piece, we used 100% cotton flannel)
- Medium weight cutaway stabilizer
- Temporary spray adhesive
- Air-erase pen
- Water-soluble topping (I prefer Sulky Solvy or Sulky Superior Solvy)
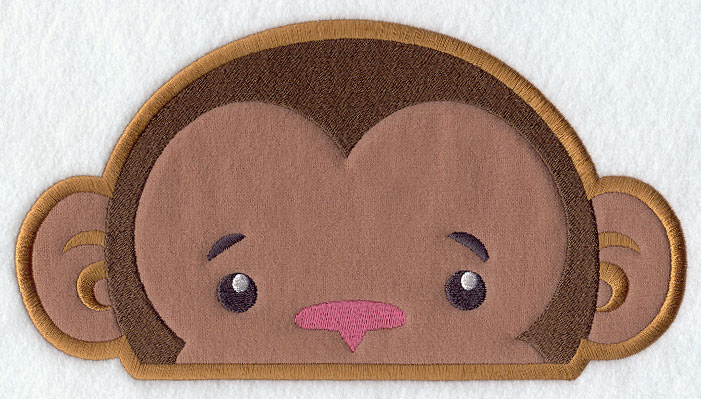
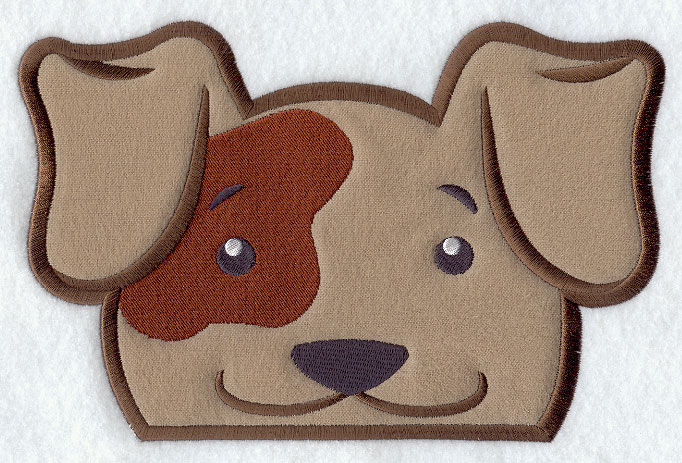
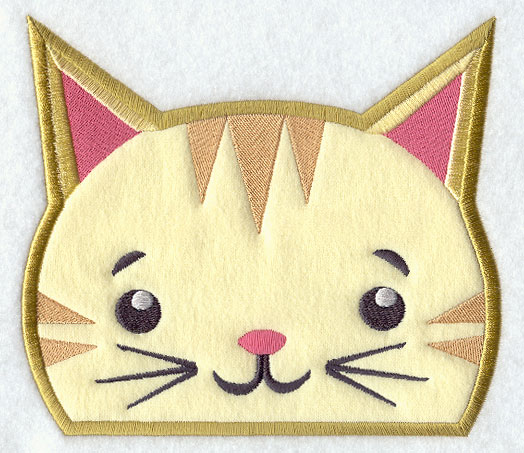
Designs Used
Special Project Notes:
Before starting, press the towel with an iron to make sure that it doesn't have any folds or wrinkles. This will help the towel to remain flat and even during the embroidery process.
For this project, I embroidered a terry cloth towel. See this Fabrics 101 article about embroidering terry cloth towels.
Because the animals are positioned "on the edge," I can't hoop the entire towel as I normally do. Instead, I'll only hoop half of the towel. Here are the steps that I took:
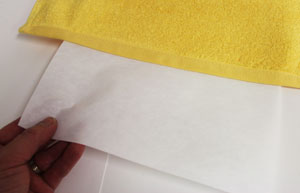
First, cut a piece of medium weight cutaway stabilizer a bit larger than your hoop. Spray the stabilizer generously with temporary adhesive (I use KK100).
Lay the towel flat with the right side facing up and smooth the bottom edge of the towel onto the center of the stabilizer leaving half of the stabilizer extending out past the bottom edge of the towel and the other half under the towel.
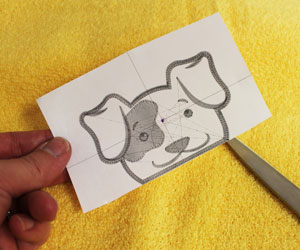
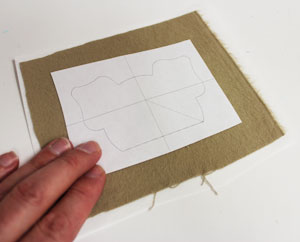
Create a paper template of the design by printing it at full size using embroidery software. See these handy instructions for more information about making and using templates. Trim the template to make it easier to work with, and cut right along the bottom edge of the design. Cut around the side and top edges leaving about one inch of excess around the design.
Position the template on the towel by aligning the bottom edge of the template with the bottom edge of the towel.
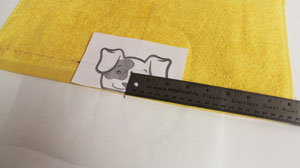
I'm placing the design in the center of the towel. Measure the towel width, divide by two, and place the center point of the template on that point.
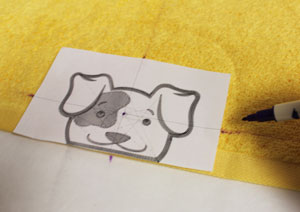
Next, to insure that the design covers the bottom edge of the towel just right, move the template directly down about 1/16". Doing this will allow the stitches on the bottom of the design to sew completely over the bottom edge of the towel. Using an air-erase pen or other marking tool, poke a hole in the template and mark the fabric. Also, mark the horizontal and vertical axis points (mark the bottom vertical point directly onto the stabilizer).
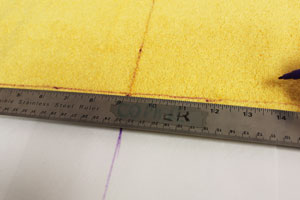
Remove the template and draw lines connecting the marks.
When embroidering on terrycloth, or any "lofty" fabric, I recommend a topping to prevent the stitches from sinking into the loft. The applique fabric will do a good job keeping the fabric fibers down, but I'm still using a topping to keep the satin stitch border looking crisp and clean.
A water-soluble stabilizer works very well as a topping.
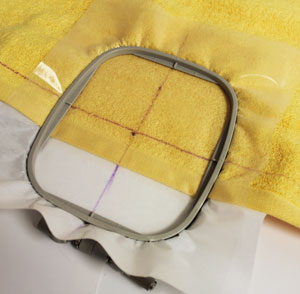
Lay a piece of water soluble topping over the towel and hoop all three layers together, aligning the marks on the hoop with the lines on the fabric. Not all of the towel will be hooped, and this is okay, as the adhesive on the stabilizer will hold the bottom edge of the towel in place.
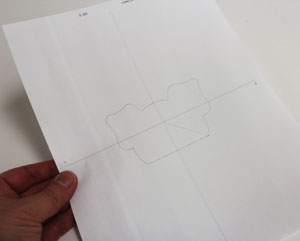
Next, prepare the applique fabric piece for the design. To do this, print the dieline (DL file) that is included in the download.
Print a copy of the dieline file at full size with your embroidery software. (If you do not have embroidery software or you are unable to print from it, you can embroider the dieline file onto a sheet of paper. Load the dieline file ("_DL") into your machine, hoop a piece of paper, and embroider the dieline directly onto the paper.)
After the dieline is printed or stitched, use the "template" to cut the fabric to the right size and shape.
Begin by making a "sandwich" of stabilizer, applique fabric, and the paper template. Spray a piece of cutaway stabilizer with a little temporary adhesive (I use KK100). Smooth the applique fabric on top of the stabilizer.
Next, spray the backside of the paper template with a quick shot of adhesive and smooth it over the fabric.
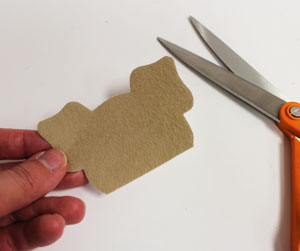
Cut out the shape.
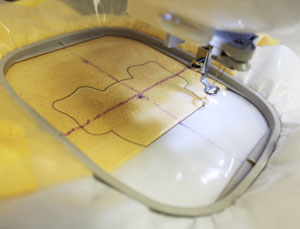
Attach the hoop to the machine and load the embroidery design (that's the file that begins with "Y" followed by four numbers).
Move the hoop so that the needle is directly over the center point on the towel.
Embroider the design. The first thing that will sew is another dieline. After the dieline is finished, stop the machine and remove the hoop, but do not unhoop the towel.
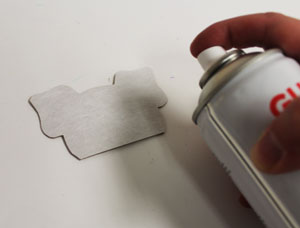
Spray the backside of the fabric piece with adhesive.
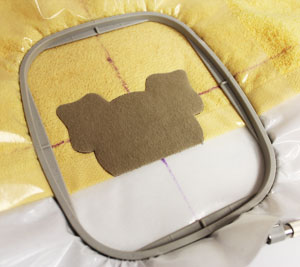
Place the fabric piece right inside the dieline.
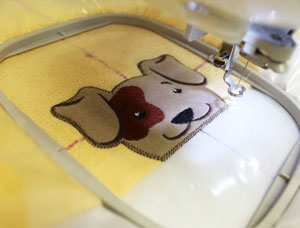
Attach the hoop back onto the machine and continue with the design. A zigzag tackdown stitch will sew next. This binds the applique piece to the fabric for the remainder of the design. Then, all the inside elements will sew.
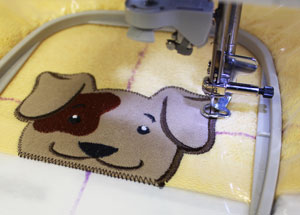
Continue with the design. Next, a satin stitch border will sew.
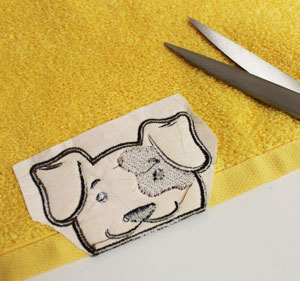
When the design has finished, unhoop the towel and tear away the topping. If any small bits are left behind you can use a tweezers to remove them or wet your fingertips and gently brush the topping away. Trim away the excess stabilizer on the backside of the embroidery: cut along the bottom edge as close to the stitches as possible without cutting them. Then, cut around the side and top edges leaving about 1/4" to 1/2" of the stabilizer behind. Also, trim any loose, long stitches on the backside of the embroidery.
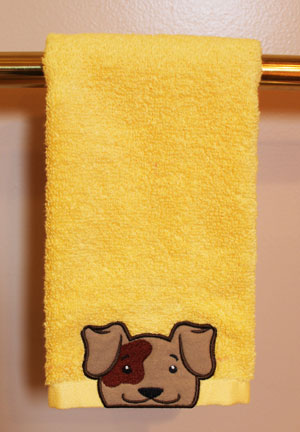
And there you have it - a colorful and fun look for your bath towels!


