FREE Snowman with $5 order PLUS Double Reward Points! Click the deals tab for details.❄️
 FREE Snowman with $5 order PLUS Double Reward Points! Click the deals tab for details.
Attic windows is a traditional quilt pattern that is just right for making your own -- as contemporary or as traditional as you like -- with your favorite embroidery designs!
With so many "window panes," you can choose your favorite designs and really showcase them. And, you can pair it with an attic windows wall hanging for a fabulous matched set!
Read on for instructions to create your own attic windows pillow!
Supplies
Supplies Needed:
**24" by 24" pillow form
**1/3 yard cotton fabric (for embroidered blocks -- I used flannel)
**3/4 yard print quilter's cotton (for borders and back)
**Two fat quarters quilter's cotton (two different colors and/or prints: one dark colored, one light colored)
**25" wide by 25" high piece of cotton batting
**Medium weight cutaway stabilizer
**Temporary spray adhesive
**Air-erase pen
**Straight edge
**24" all-purpose zipper
**Nylon monofilament thread
Designs Used:
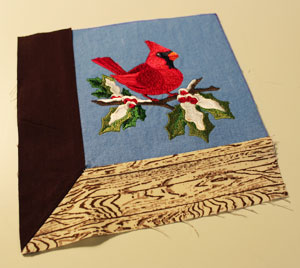
I used the following designs: Christmas Candle, the large size, the Winter Cardinal, the small size of the Merry Cardinal, the small Seasons Chickadee - Winter, the large size of Christmas Holly, the large size of the Baby Chipmunk, both sizes of Starburst, and the small size of the Pine Bough and Cone Border.
A Celebrate with Christmas Carol designs would be lovely on an attic windows pillow, or for a lighter holiday look, the Here Comes Santa Claus (Redwork) designs are a jolly choice. Choose your favorite designs!
Designs Used
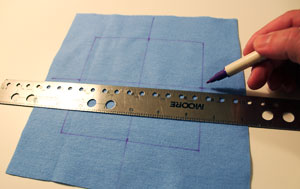
First, prepare the fabric for the embroidered blocks. Using an air-erase pen or other marking tool, draw a 5" wide by 5" high square on the cotton fabric (I used flannel). Leave a couple of inches of excess fabric around the shape. Measure and mark the center of each side of the shape by measuring and dividing by two. Draw lines connecting the marks; where the lines meet is the exact center of the shape.
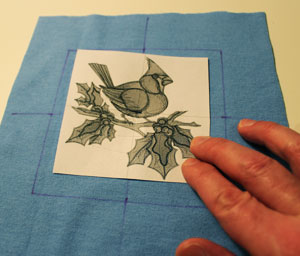
Create a paper template of the design by printing it at full size using embroidery software. Poke a hole in the center of the template and align it with the center point on the fabric. Make sure the design fits well within the shape; there should be at least 1/2" of space between the edges of the design and the edges of the shape. You can also position the designs within the shape however you like.
I positioned a few of the designs (like the holly branches and pine branch) off to one side or the next. This can help give the effect that the design is "growing" out of the side. To do this, draw the shape, print a template of the design, and position the template inside the shape leaving at least 1/2" of space between the outer edges of the design and the edges of the shape. Poke a hole in the template and mark the fabric; also, mark the horizontal and vertical axis points. Then, draw lines connecting the marks.
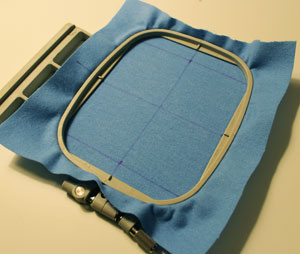
Spray a piece of medium weight cutaway stabilizer with temporary adhesive and smooth the fabric on top. Hoop the fabric and stabilizer together by aligning the marks on the hoop with the lines on the fabric. Attach the hoop to the machine, load the design, move the hoop so that the needle is directly over the center point on the fabric, and embroider the design.
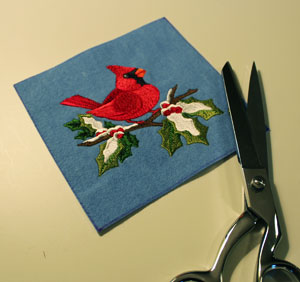
When the design has finished, carefully trim away the excess stabilizer on the backside of the embroidery, and cut out the shape. Repeat this process for a total of nine blocks, or, if you would like the design appear as though it is sitting on the window sill, like the candle design on the center block of my pillow, read on. I will cover that process soon.
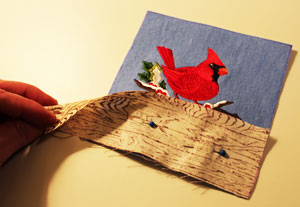
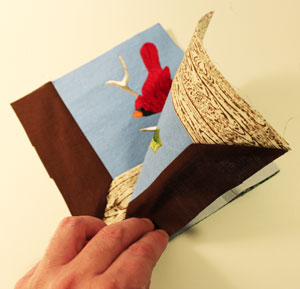
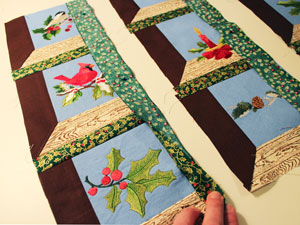
Next, to prepare the mitered borders (the "window sill" borders to the left of the embroidered blocks), cut two pieces of quilter's cotton to 7" wide by 2" high (one of each print and/or color). Lay the embroidered block flat with the right side facing up.
Align the bottom border piece (lighter colored piece) on top of the embroidered block, right sides together, with the bottom edge of the border aligned with the bottom edge of the block and the right edge of the border aligned with the right edge of the block.
Pin in place and sew a 1/4" seam along the bottom edge only. Start at the right edge and end 1/4" from the left edge. Fold the border piece to the right side and press the seam with an iron.
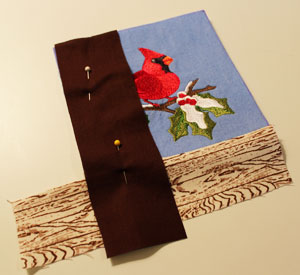
Next, align the side border piece (darker colored piece) on top of the embroidered block, right sides together, with the left edge of the side border aligned with the left edge of the block and the top edge of the side border aligned with the top edge of the block. Pin in place and sew a 1/4" seam along the left edge only. Start at the right edge and end 1/4" from the bottom edge. Fold the border piece to the right side and press the seam.
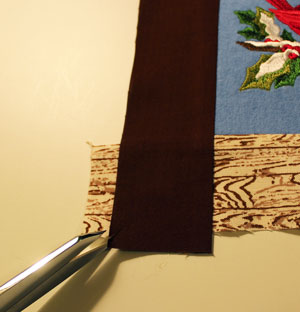
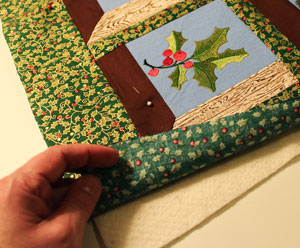
Cut a 1/8" diagonal slit (through both layers of fabric) at the bottom left corner where the fabric borders meet.
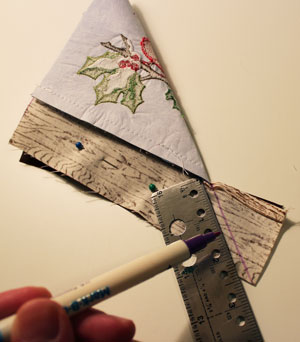
Align the borders and the slits together with the right sides together. Fold the block in half, right sides together, and finger press it flat. Pin in place and using a straight edge, draw a line across the border fabric out from the fold of the block. Sew a seam along this line and then trim the excess fabric leaving about 1/4". Unfold the fabric, and press the seam.
Now the block is complete! Repeat this process for each embroidered block.
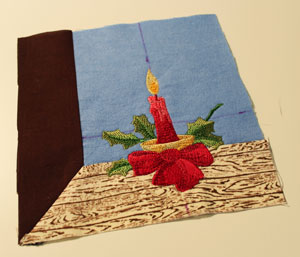
To add even more dimension and interest, you can embroider a design over the bottom border so it sits on the "window sill". To do this, piece the block together first. Top stitch a 1/8" seam along both sides of the seam. Use the design template to position and mark the fabric. Hoop and embroider the fabric just as you did earlier.
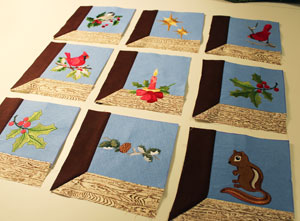
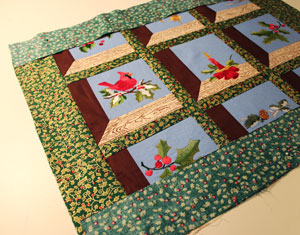
Now that all the blocks are complete, it is time to assemble the pillow! Arrange the blocks how you want them.

Next, to prepare the inner border pieces, cut six pieces of the print quilter's cotton to 6 1/2" wide by 1 1/2" high. Then, align the pieces with the top three blocks, right sides together, with the bottom edges of the inner border pieces aligned with the bottom edges of the blocks. Pin in place and sew a 1/4" seam along the bottom edges only. Press the back seams open.
Align the top edges of the middle row blocks with the bottom edges of the assembled top block/inner borders pieces, right sides together. Pin in place, sew a 1/4" seam along the pinned edge, and press.
Next, align the bottom edges of the inner border pieces with the bottom edges of the middle blocks, right sides together, pin in place, sew a 1/4" seam along the bottom edges, and press the seams. Align the top edges of the bottom row blocks with the bottom edges of the assembled pieces, right sides together, pin in place, sew a 1/4" seam along the bottom edges, and press.
To prepare the remaining inner border pieces, cut two pieces of the print cotton to 1 1/2" wide by 20" high. Align one of the pieces on top of the assembled left column, right sides together, with the left edge of the border aligned with the right edge of the column. Pin in place, sew a 1/4" seam along the right edge, and press.
Repeat this process for the middle column. Then, align the assembled left column on top of the middle column, right sides together, with the right side of the left column aligned with the left side of the middle column. Align the seams, pin in place, sew a 1/4" seam along the pinned edge, and press.
Next, align the assembled columns (left and middle columns) over the right column, right sides together, with the right edge of the assembled columns aligned with the left edge of the right column. Align the seams, pin in place, sew a 1/4" seam along the pinned edge, and press.

To prepare the outer side borders, cut two pieces of fabric to 3 1/4" wide by 20" high. Align the borders on top of the assembled blocks/inner border piece, right sides together, with the sides of the borders aligned with the left and right sides of the blocks. Pin in place and sew a 1/4" seam along the pinned edges. Press the seams.
Then, to prepare the outer top and bottom borders, cut two pieces of fabric to 25" wide by 3 1/4" high. Align the borders with the top and bottom edges of the blocks/inner border piece, right sides together, sew a 1/4" along the pinned edges, and press.
Cut a piece of cotton batting to 25" wide by 25" high. Lay the batting flat and align the assembled front panel on top. Pin in place and quilt through both layers by stitching along the existing seams (I used nylon monofilament thread in the needle). I also used a walking foot on the machine to help prevent the layers from pinching or folding.
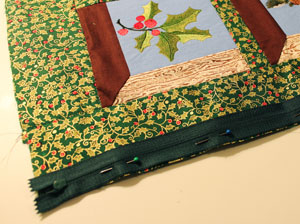
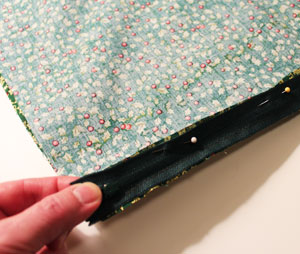
To prepare the back panel, cut a piece of fabric to 25" wide by 25" high. To add the zipper, align it on top of the front panel along the bottom edge, right sides together. Pin in place and using a zipper foot, sew a seam along the bottom edge of the zipper as close to the zipper as you can.
Lay the front panel flat with the right side facing up. Align the back panel on top, right sides together. Align the open edge of the zipper with the back panel fabric, right sides together, pin in place, and sew a seam along the open edge of the zipper just as you did before. Unzip the zipper, align the front and back panels together, right sides together, and sew a 1/2" seam along the side and top edges only. Turn the pillow right side out, insert the pillow form, and you are done!
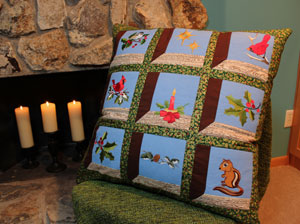
An attic windows pillow is a delightfully nostalgic pattern, and a fabulous way to highlight your favorite embroidery designs!


