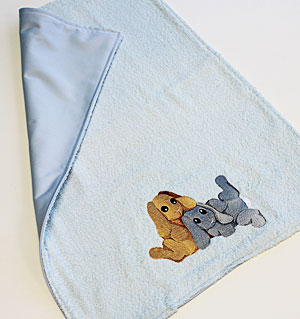
A soft changing pad with embroidery makes a cute addition to any baby's diaper bag.
Made from absorbent terrycloth and water resistant PUL, this changing pad is as useful as it is adorable.
Read on for project instructions!
Supplies
Supplies Needed:
- 5/8 yard terrycloth (for front)
- 5/8 PUL fabric (polyester/polyurethane laminated fabric -- for back)
- Water soluble stabilizer (for topping. I prefer Sulky Solvy or Sulky Super Solvy)
- Medium weight cutaway stabilizer
- Temporary spray adhesive
Designs Used:
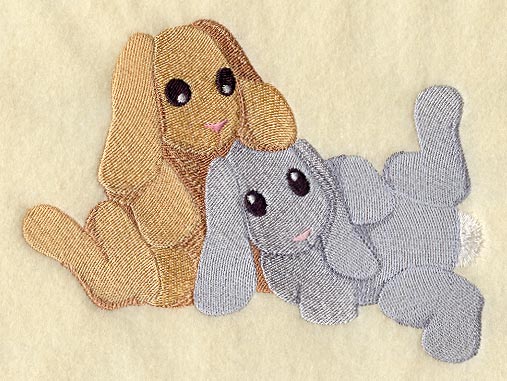
For this changing pad, I used the large size of the Bunny Pair design. Hop on over to the Children and Nursery department for an excellent selection of children's designs that are a perfect fit for this project!
Designs Used

To begin, cut a piece of terry cloth to
To center the template, measure equal distances between the center of the template and the outer edges of the fabric. Using an air-erase pen or other marking tool, poke a hole in the center of the template and mark the fabric. Also, mark the horizontal and vertical axis points.
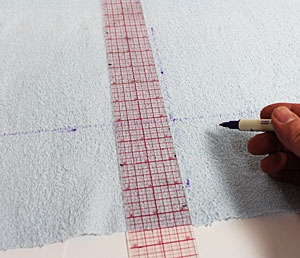
Remove the template and draw lines connecting the marks.
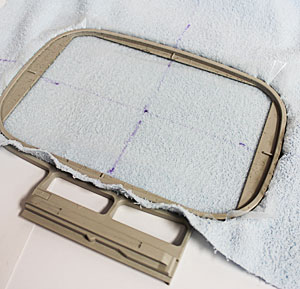
Spray a piece of medium weight cutaway stabilizer with temporary adhesive and smooth the fabric on top. Lay a piece of water soluble stabilizer on top of the fabric. This topping helps to prevent the stitches from sinking into the fabric. Hoop all three layers together by aligning the marks on the hoop with the lines on the fabric. Attach the hoop to the machine and load the design. Move the hoop so that the needle is directly over the center point on the fabric. Embroider the design.
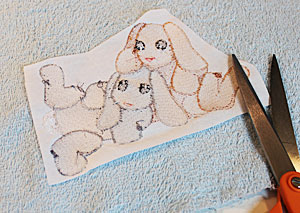
When the design has finished, trim the excess stabilizer on the backside of the embroidery. Also, gently tear away the topping. If any small bits remain you can use a tweezers to remove them. Or, wet your finger tips with water and brush the bits away.
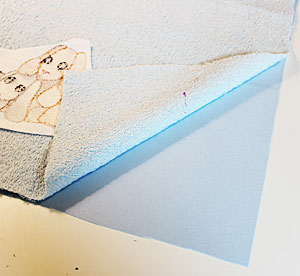
Next, cut a piece of the PUL fabric to

Clip the seam allowances at the corners and turn the pad right side out. Press the seams with an iron (press on the terry cloth side). Also, turn the fabric of the opening in 1/2" and press. Top stitch a 1/4" seam along the entire outer edge of the pad. And you are done!
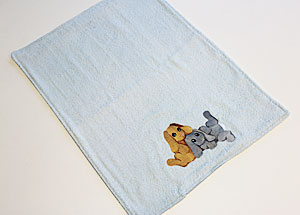
Sweet embroidered changing pads make the perfect baby shower gift!


