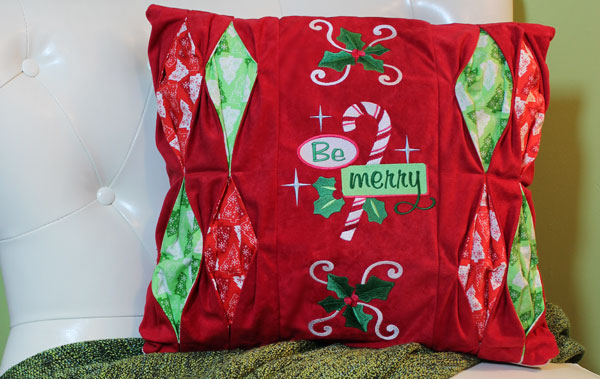
Fabric pleats in this holly-jolly pillow give it a unique, festive look (plus bold, interesting texture, too!). Retro-inspired holiday designs stitched on suede cloth and contrasting red and green quilter's cotton in the pleat fill the fun pillow with seasonal style.
Supplies
Project Needs & Notes
- 18" x 18" pillow form
- 1 yard (total) print cotton fabric (two different prints, 1/2 yard each)
- 3/4 yard solid colored suede cloth for front and back
- Medium weight (2.5 - 3 ounce) cutaway stabilizer
- Air-erase pen
- 18" all-purpose zipper
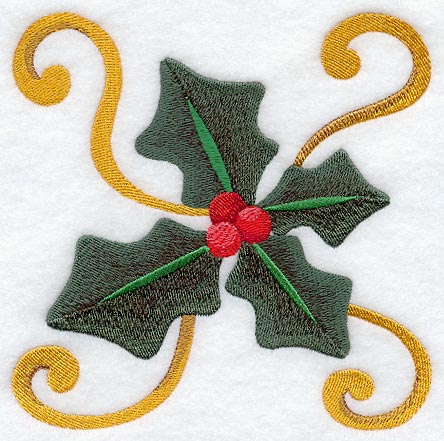
Designs used in this tutorial include D9211, Be Merry and C2039, Holly and Swirls Square. Browse through the Christmas department to find something that matches your preference and decor.
Finished Size: 18" x 18"
This project was featured in the following:
Pillow Party Trunk Show Christmas Edition
Designs Used
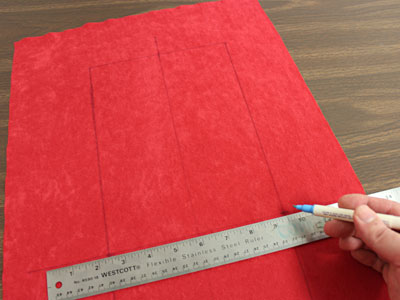
Begin by preparing the fabric for the center panel of the pillow.
Draw an 8"x 19" rectangle on the suede cloth.
Leave a couple of inches of excess fabric around the rectangle for hooping.
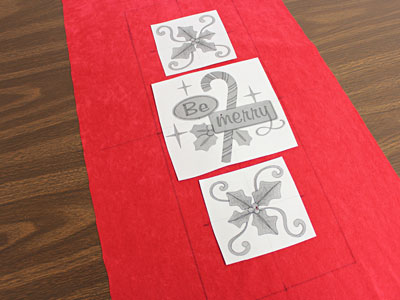
A template, or printout of a design, is an excellent tool to help with placement.
Print templates of the designs from your embroidery software. If you do not have embroidery software, Wilcom's TrueSizer is a free program to use.
Place the templates inside the rectangle. Arrange them how you'd like, but leave at least 1" of space between the outer edges of the designs and the edges of the rectangle.
Mark the center points of each design, as well as the vertical and horizontal axis lines. These marks will be used for hooping.
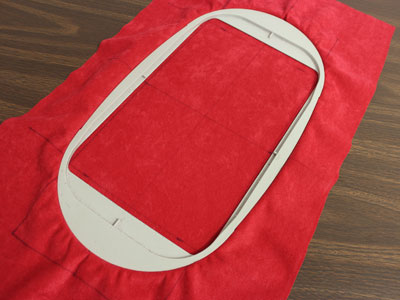
Hoop the suede cloth with a piece of cutaway stabilizer, lining up the marks on the fabric with the marks on the hoop.
Attach the hoop to the machine and load the first design.
Move the hoop so that the needle is right over the center point.
Embroider the design.
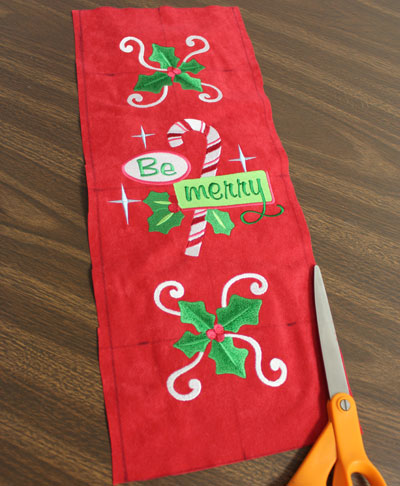
Repeat the steps to embroider all three of the designs.
Trim the excess stabilizer away from the back.
Cut out the rectangle shape.
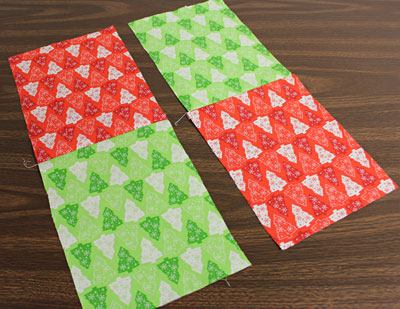
Prepare the side panels.
Cut four pieces of the print cotton fabric to 5" x 10". In this example, two pieces are from a green print, and two are from a red print.
Align the pieces together, right sides together. Pin in place along the bottom edges.
Sew a 1/2" seam along the bottom edge only. Press the back seams open with an iron.
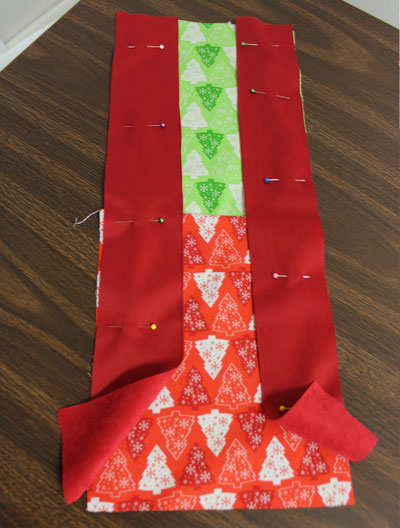
For each side panel, cut three strips of suede cloth 3" x 19".
Align two of the strips on top of one of the assembled print fabric pieces, right sides together.
The long sides of the strips should be aligned with the long edges of the print fabric.
Pin in place along the outer edges and sew a 1/2" seam along the pinned edges only. Press the seams.
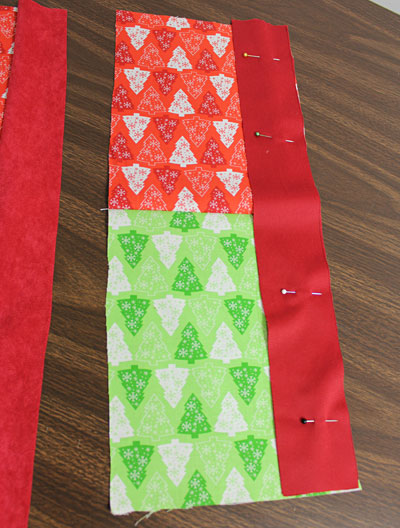
Align the long edge of the remaining strip with the right side of the remaining assembled print fabric piece, right sides together.
Pin in place and sew a 1/2" seam along the right edge only. Press the seam.
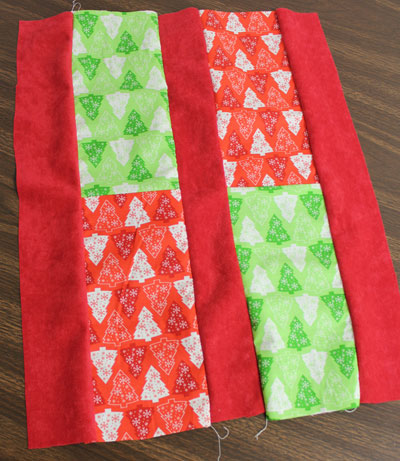
Align the open edge of the second print fabric piece with the right edge of the long strip of the first print fabric piece. Place right sides together.
Pin in place and sew a 1/2" seam along the pinned edge only.
Press the seam.
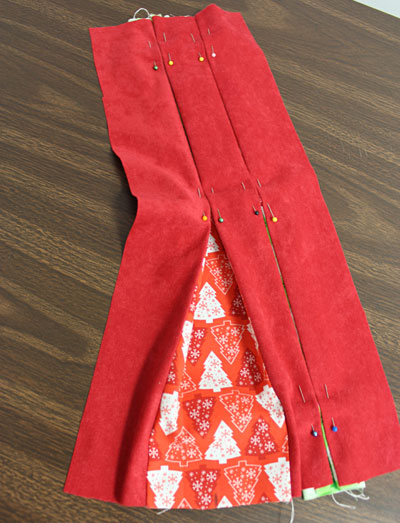
To create the pleats (total of four per side), mark the center of the top and bottom edges of the print fabric.
Bring the edges of the strips in to meet at the center of the print fabric. Fold the print fabric underneath the strips as you go.
Pin the fabric in place and press the folds on the backside.
Sew a total of five seams:
- two 1/4" seams at the top and bottom edges
- two seams 1 1/2" in from the top and bottom edges
- one seam along the center following the seams of the print fabric
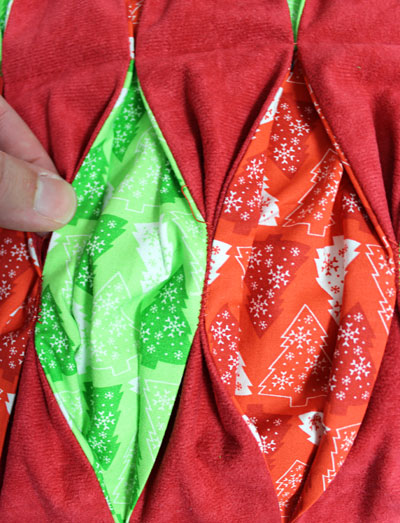
Pinch and fold the fabric of the long strips to meet in the center and pin in place.
Do this at the center of each section of the long strips in between the center seam and the inner seams. Zigzag stitch the fold together at this point.
Also, at the center of the long strip sections, fold the fabric of the outer strips 1/2" out towards the outer edges of the fabric (directly across from the inner folds).
Pin in place and zigzag stitch the fold in place. Repeat this process for each side.
Then, lay the embroidered front panel flat with the right side facing up.
Align the side panels on top, right sides together, with the inner edges of the side panels aligned with the side edges of the front panel.
Pin in place and sew a 1/2" seam along the pinned edges only. Press the seams.
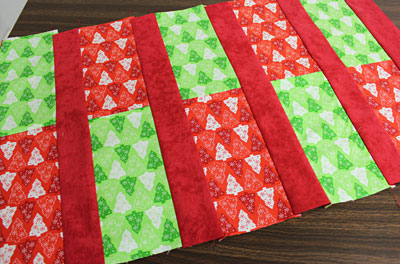
To prepare the back panel, cut 16 pieces of the print fabric to 5" x 10".
Also, cut 9 long strips to 3" x 19".
Assemble the back panel just as you did the side panels.
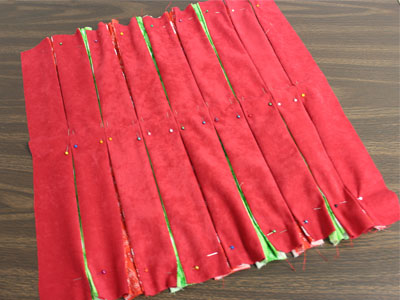
Fold the pleats. Pin in place and sew seams to tack the pleats in place just as you did earlier.
There will be a total of 16 pleats.
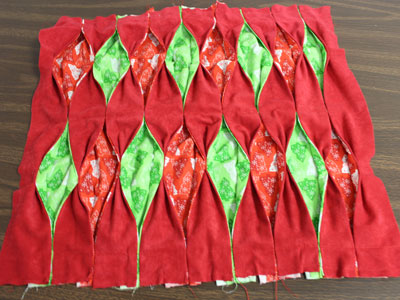
Open the pleats and zigzag stitch them in place.
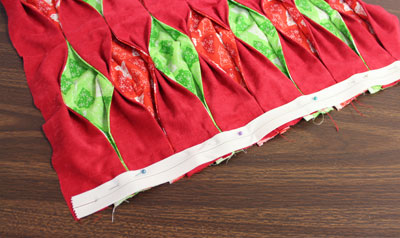
To add the zipper, align it on top of the back panel along the bottom edge, right sides together.
Pin in place and using a zipper foot, sew a seam along the bottom edge of the zipper as close to the zipper as you can.
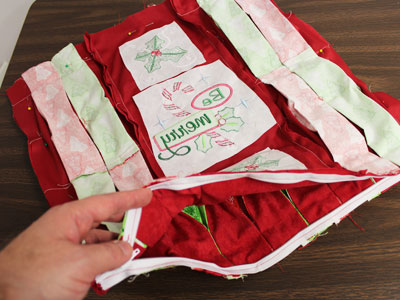
Lay the front panel flat with the right side facing up. Align the back panel on top, right sides together.
Align the open edge of the zipper with the front panel fabric, right sides together, pin in place, and sew a seam along the open edge of the zipper just as you did before.
Unzip the zipper, align the front and back panels together, right sides together, and sew a 1/2" seam along the side and top edges only.
Turn the pillow right side out, insert the pillow form.
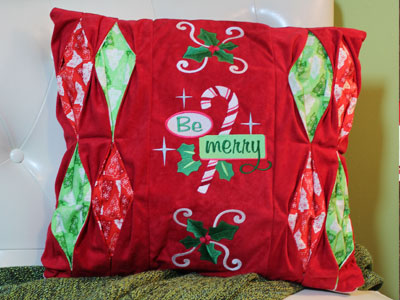
Brighten your living space with a pleated pillow made with bright colors and brilliant embroidery.
It's a festive addition to any home!
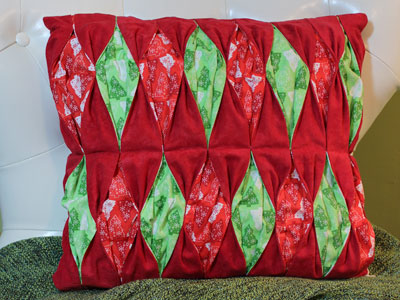
The pleats on this pillow continue all the way around both the front and the back, showing off rows and rows of your beautiful fabric.
Use different colored fabrics and designs to match your decorating style, and create an instant home decor classic.
