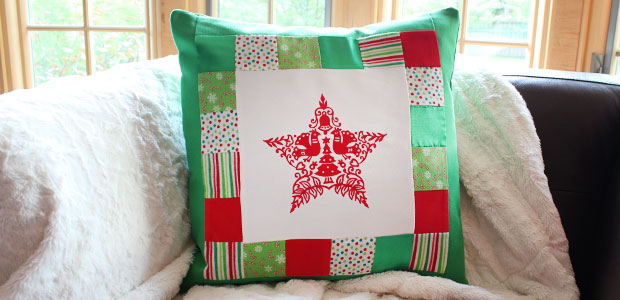
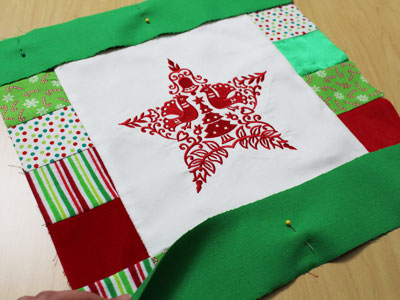
A border of miniature quilt blocks frames a stunning embroidery design in this Christmas pillow. Various fabrics in several prints and colors add depth and texture; a colored denim frame pulls the pillow together.
Supplies
Project Needs & Notes
- 18" pillow form
- 5/8 yard colored denim
- 1/2 yard faux suede
- Twenty small pieces of a variety of fabrics (velvet, flannel, quilter's cotton, satin, etc)
- Medium-weight (2.5 ounce) cutaway stabilizer
- Temporary spray adhesive (like Gunold KK100)
- Air-erase pen for marking
- Rotary cutter and cutting mat
The designs in this tutorial include:
- L6244, Scandinavian Christmas Star
- M15611, Autumn Quilting Pumpkins (Double Run)
Designs Used

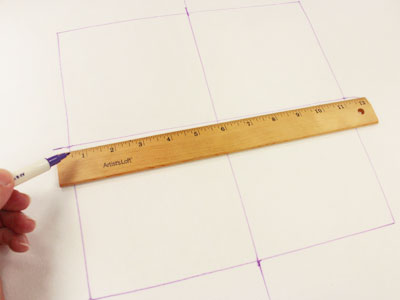
Prepare the fabric for the center embroidered block. br>
Using an air-erase pen, draw a 10"x 10" square on the faux suede. Mark the center point.
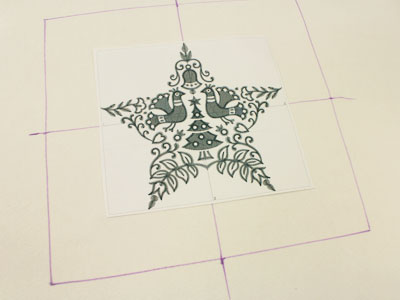
Print a template of the design from embroidery software.
If you do not have embroidery software that makes templates, Wilcom's TrueSizer is a free program to use.
Align the center point of the template with the center point on the fabric. There should be at least one inch of space in between the outer edges of the design and the edges of the shape.

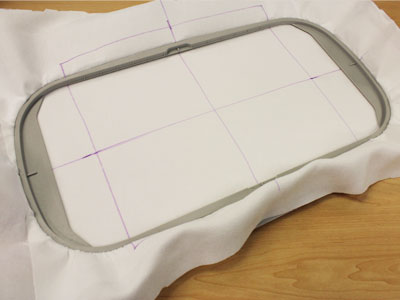
Spray a piece of medium-weight cutaway stabilizer with temporary adhesive and smooth the fabric on top.
Hoop the fabric and stabilizer together, aligning the marks on the hoop with the lines on the fabric.
For a quilted embroidery design, spray and add a piece of high loft batting between the fabric and stabilizer before hooping and embroidering the design.
This will enhance the quilted look of this pillow and allow the batting to puff the fabric up between the embroidered stitches.
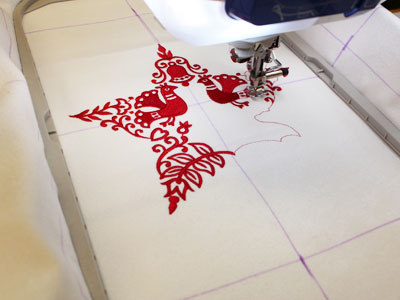
Load the design to the machine and move the hoop so the needle is right over the center point.
Embroider the design.
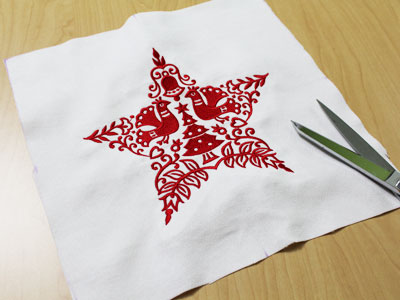
When the design has finished, trim away the excess stabilizer on the backside of the embroidery and then cut out the square shape.
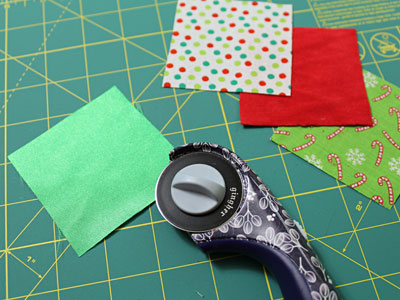
Prepare the small blocks -- these will border the faux suede.
Using a rotary cutter and cutting mat, cut twenty 3" x 3" blocks from the small pieces of fabric.
I am using a variety of colors and textures: flannel, satin, velvet, and quilter's cotton.
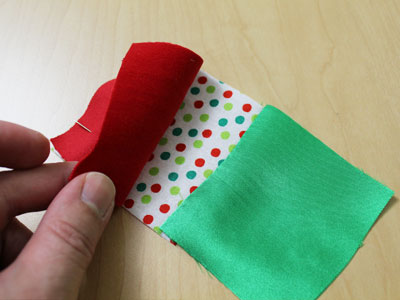
Prepare the top and bottom borders by assembling four blocks together (for each border).
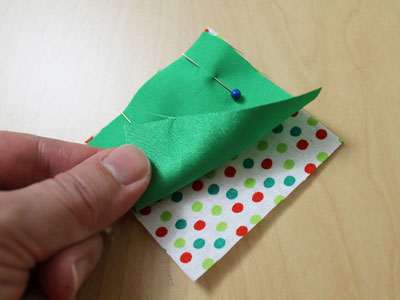
Lay one block flat and align another block on top, right sides together.
Pin in place along one side and sew a 1/4" seam along the pinned edge only.
Press the back seam with an iron, using a pressing cloth on top for fabrics like satin or velvet to prevent scorching or melting.
Lay the assembled blocks flat and align a third block on top of the second block, right sides together.
Pin in place along one side and sew a 1/4" seam along the pinned edge only.
Press the seam, using a pressing cloth to prevent scorching.
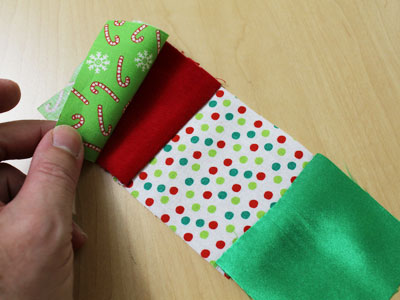
Add a fourth block just as you did for the previous blocks.
Repeat these steps to create a second border.
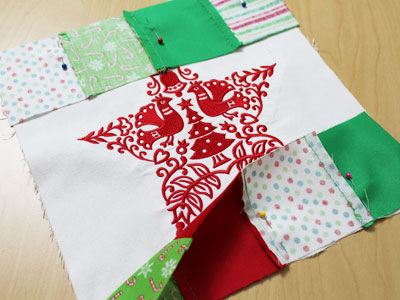
Align the assembled top and bottom borders along the top and bottom edges of the center block, right sides together.
Pin in place, and sew a 1/4" seam along the pinned edges.
Press the seam, using a pressing cloth to prevent scorching.
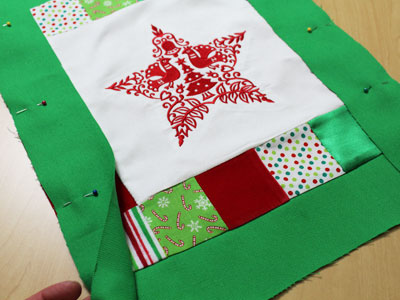
Prepare the side borders just as you did for the top and bottom borders, but this time use six blocks for each border.
Then align the side borders with the side edges of the center block/top and bottom border piece, right sides together.
Pin in place, and sew a 1/4" seam along the pinned edges.
Press the seam, using a pressing cloth to prevent scorching.
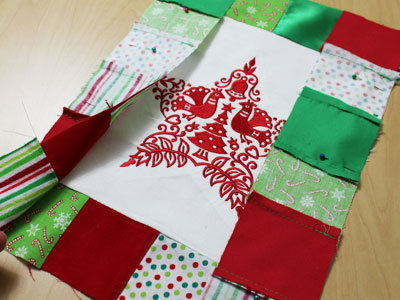
Prepare the top and bottom outer borders by cutting the colored denim to 14 1/2" x 2 3/4".
Align the cut denim pieces on top of the assembled piece, right sides together.
Pin in place, and sew a 1/4" seam along the pinned edges.
Press the seam, using a pressing cloth to prevent scorching.
For the side outer borders, cut two pieces of fabric to 2 3/4" x 19".
Align them with the side edges of the assembled piece, right sides together.
Pin in place, sew a 1/4" seam.
Press the seam, using a pressing cloth to prevent scorching.

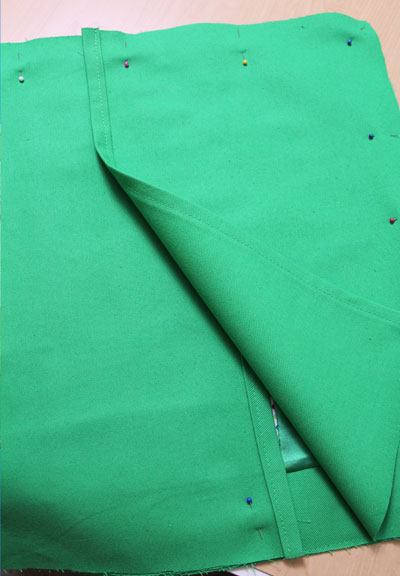
To add the inner lining, lay the assembled front panel on top of another piece of colored denim, wrong sides together.
Pin in place, and cut around the shape of the front panel.
Sew a 1/4" seam along the entire outer edges of the fabric.
To prepare the back of the pillow, cut two pieces of cotton fabric to 13" x 19".
On both pieces, fold one of the long edges over 1/2" to the wrong side and press.
Fold the fabric over 1/2" again and press.
Sew a seam along the folded edges.
Lay the front panel flat with the right side facing up.
Align the back pieces on top, right sides together, with the folded edges facing inwards and with the back pieces overlapping.
Align the outer edges of the back pieces with the outer edges of the front piece.
Pin in place and sew a 1/2" seam along the entire outer edge of the fabric.
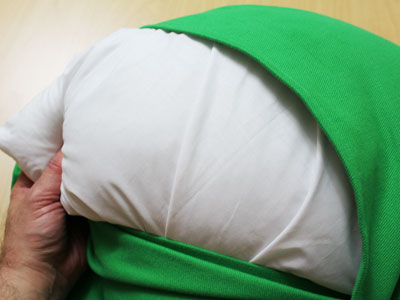
To finish, turn the fabric right side out and insert the pillow form in between the layers of the back pieces.
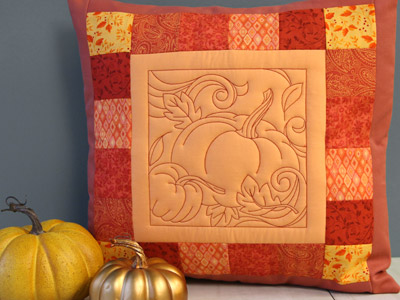
This Christmas block party pillow is a stunning way to showcase your favorite embroidery.
Adapt it for other seasons by changing out the colors and patterns of the fabric, as well as the embroidery design.


