A neat and compact way to hold your holiday greeting cards all in one pretty spot!
Staying organized during the rush toward Christmas is easier when you have a mail or greeting card caddy like this one. Keep all your family's greeting cards handy in its folded pockets. You can use the top pocket to keep the incoming cards for everyone to read, and once they have been read and a return card sent, move the card into the bottom pocket.
We made our sample with the traditional Advent colors of purple and pink, to help the whole family remember the true meaning of the season.
But, with a change of seasonal designs, a caddy like this one might come in handy to help organize mail throughout the entire year.
Supplies
Supplies needed:
-
1/3 yard of the pink and white fabrics
-
2/3 yard of the purple fabric
-
1/2 yard of 1/4-inch- wide ribbon
-
One package of jumbo metallic rickrack
-
12-inch dowel that is 1/2 inch in diameter
-
2 wood beads to fit over the dowel ends
-
10-inch by 30-inch piece of batting
Designs Used:
Designs Used
Instructions:
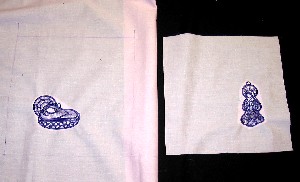
Mark out two 10-inch squares on the pink fabric. Sew out the lace embroidery designs onto the fabric so that the edges of the embroidery are 2 inches from the bottom and right or left markings of the square. (Baby Jesus is on the left side and Mary is on the right side of their respective squares.)
Making the pocket pieces:
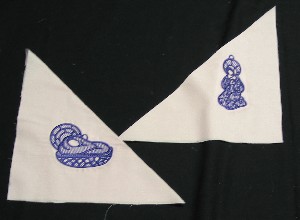
After you have finished embroidering, cut out the squares, and fold them in half diagonally. Press the squares to form a crease.
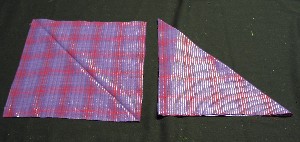
From the purple fabric, cut two 10-inch squares and fold them in half diagonally in the same manner as the pink squares
Constructing the body:
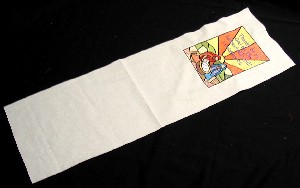
On the white fabric mark a rectangle that is 10 inches wide, by 30 inches long. Sew out the Stained Glass Nativity Sampler design in the center of the top third of the rectangle.
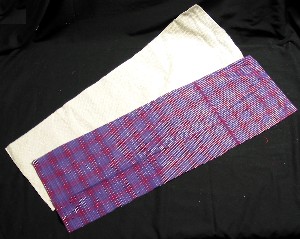
Cut out 10-inch by 30-inch rectangles from the batting and the purple fabric. The purple fabric will be the backing for the piece.
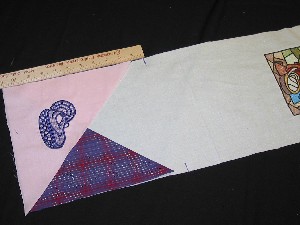
On the bottom edge of the white rectangle, lay out the folded triangles so that the unfinished edges are at the bottom and matching up with the sides as shown. The triangles overlap so that the purple is on the bottom and the pink is on the top.
When you have them positioned correctly, measure up one inch from the top tip of the folded triangle, and make a mark in the seam allowance area of the white rectangle.
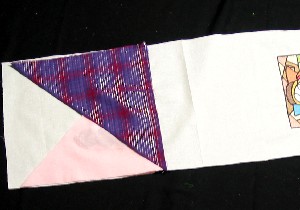
Now lay out the second set of triangles in the same manner, but with the colors on the opposite sides as the lower triangles. Setting the lower triangles aside for the moment, lay the upper triangles upside down so that the bottom edges are lined up with the marks that you made in the last step, and so the points of the triangles are pointing towards the bottom edge of the rectangle. Use a half-inch seam allowance to stitch the triangles to the white rectangle at the marked points.
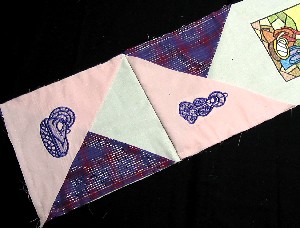
Fold the top triangles up into place.
Place the lower triangles in place at the bottom edge of the rectangle.
Using a half-inch seam allowance, baste stitch both top and bottom pockets along the sides and bottom onto the white rectangle.
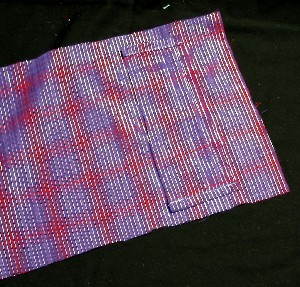
Making the rod pocket:
Cut a 9-1/2 inch by 2-1/2 inch strip from the purple fabric, and hem each end.
Use a half-inch seam allowance to stitch the strip 2 inches from the top of the purple rectangle. Fold the rectangle up over the seam allowance so that the cut edges meet at the top of the rectangle. Baste stitch the top in place.
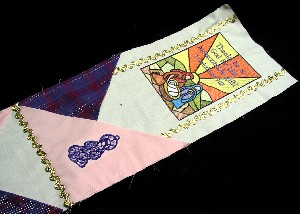
Stitch the rickrack trim down each side of the sampler and just into the top pocket. Also stitch the trim to the bottom of the first pocket.
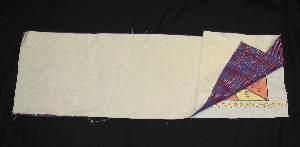
Lay out the 3 layers. First, the white rectangle with the attached pockets -- right side up, then the backing piece -- right side down with the rod pocket at the top of the rectangles. The batting piece is last.
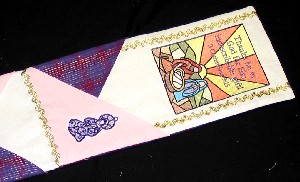
Use a half-inch seam allowance to stitch around the 4 sides of the rectangle. Leave a 5-inch opening at the bottom of the piece. Turn the piece right side out and press. Stitch the opening closed, then stitch more rickrack trim along the bottom edge.
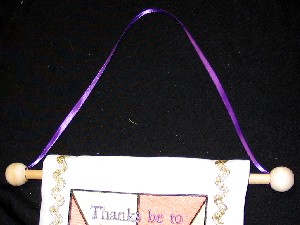
Assemble the hanger. Put the dowel through the rod pocket.
Glue the ends of the ribbon around the end of the dowel, then glue the beads around the ribbon/dowel combo.
Allow to dry. And it's ready to hang on the wall or a door to keep your mail neat and tidy while creating a holiday spirit for your home.
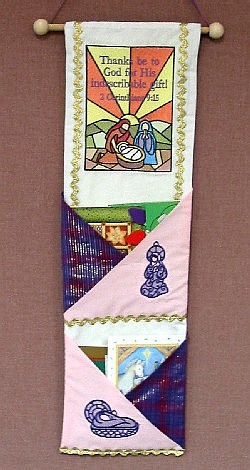
Oh, and don't let us forget to say this little caddy is quite adjustable. If your family gets lots of cards and letters at holiday time, you can "grow" more pockets by adding 10 additional inches for each pocket, and 2 more triangles for each.
And this versatile little caddy can be used in any number of ways. Add a pocket for each member of the family and sort all the incoming mail. Use it to store mailing supplies. Create a system for the monthly bills. Make a caddy for a church or organization for distributing announcements, invitations, or forms.
You decide however you want those pockets to function, and this caddy will fit the bill!


