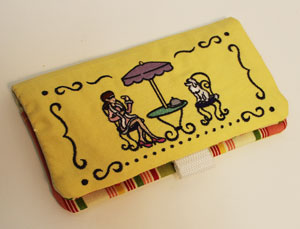
A checkbook cover is a terrific spot for embroidery. For something that gets so much use, a checkbook should be lovely to look at! A pretty and functional cover for it is a great example of embroidery making ordinary life more exciting and beautiful.
Read on for project instructions to make your own decorated checkbook cover!
Supplies
Supplies Needed:
**1/4 yard solid-colored fabric like twill or lightweight canvas (for outer shell)
**1/4 yard print fabric like twill or lightweight canvas (for inner lining and pockets)
**Medium weight cutaway stabilizer
**Temporary spray adhesive
**Air-erase pen or dressmaker's pencil
Supplies Continued:
**2 1/2"" length of 1" wide strapping
**All-purpose polyester zipper (I used a 7" zipper that I cut down to 3 1/2" long)
**Needle and thread (for some hand sewing)
Special Project Notes:
This checkbook cover features an inner zippered pocket and a pen holder loop. Coordinate it with the Fringed and Fabulous Purse and the Credit Card Holder for a complete set!.
Designs used:
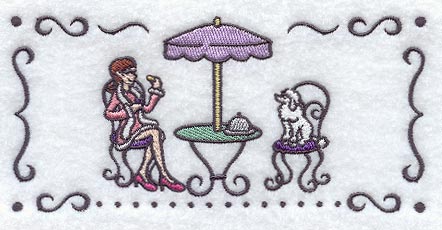
For my checkbook cover, I embroidered the Parisian Woman and Poodle - Rectangle design from the Parisian Purse Set. The rectangular designs from our other purse sets are also the perfect shape and size for this project.
Finished size: 6 3/4" wide by 3 3/4" high
Designs Used
First, to prepare the fabric for the outer shell of the cover, draw a 7 3/4" wide by 8 1/2" high rectangle on the solid-colored fabric. Using an air-erase pen or other marking tool, measure and mark the center of each side by measuring and dividing by two.
Draw a line connecting the marks. Measure and mark the center of the side, top, and bottom edges of the bottom half of the shape (this area will be the front of the cover). Draw lines connecting the marks -- where the lines meet is the exact center of the shape.
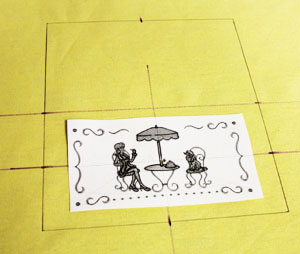
Create a paper template of the design by printing it at full size using embroidery software. Poke a hole in the center of the template and align it with the center point on the fabric. Make sure the design fits well within the shape. There should be at least one inch of space between the outer edges of the design and the edges of the shape.
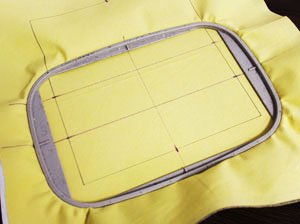
Remove the template and spray a piece of medium weight cutaway stabilizer with adhesive and smooth the fabric on top. Hoop the fabric and stabilizer together by aligning the marks on the hoop with the lines on the fabric. Attach the hoop to the machine and load the design. Move the hoop so that the needle is aligned with the center point on the fabric. Embroider the design.
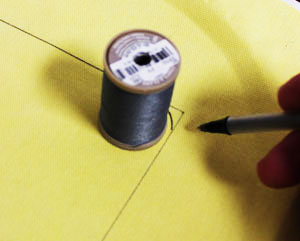
When the design has finished, lay the fabric flat and using a small round object (I used a thread spool) round off the four corners of the entire shape by tracing the object. Cut out the shape. I left the stabilizer on the backside of the embroidery to give the fabric more support.
To prepare the fabric for the inner lining, lay the embroidered outer shell piece on top of the fabric, pin in place, trace the shape, remove the outer shell piece, and cut out the shape.
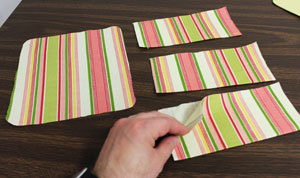
To prepare the fabric for the pockets, cut three pieces of fabric to 7 3/4" wide by 7" high. Fold the fabric in half lengthwise (align the shorter ends together) and press the fold with an iron. Top stitch a 1/4" seam along the fold on one of the pocket pieces; this will be the bottom pocket.

To add the zipper to the top pocket, take one of the two remaining folded pocket pieces and measure and mark 1 3/4" in along the bottom edge (folded edge) starting at the bottom left corner. Draw a vertical line up from the mark to the top edge and cut the fabric along this line.
Lay the zipper along the inner side edge of the one of the fabric pieces with about 1/4" of the top of the zipper extending out past the top edge of the fabric. Mark the zipper at the bottom edge of the fabric. Sew a seam across the zipper at the mark and then trim the zipper just under the seam.
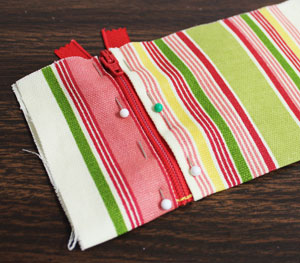
Fold the inner edges of the fabric over to the wrong side 1/4" and press. Insert the edges of the zipper in between the inner folded edges of the fabric, pin in place, and using a zipper foot on the machine, sew a seam along the inner edges of the folds.
Align the zipper pocket on top of the remaining folded pocket piece with the folded edges together. Pin in place and sew a 1/4" seam along the side and bottom edges only; leave the top edge open.
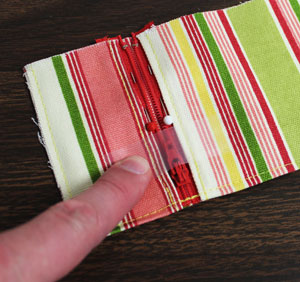
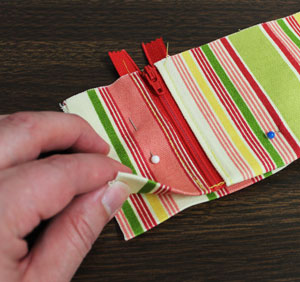
Unzip the zipper almost all the way. Pin the edges of the zipper in place and tape the zipper tab up to the inside so it will not be sewn over later on.
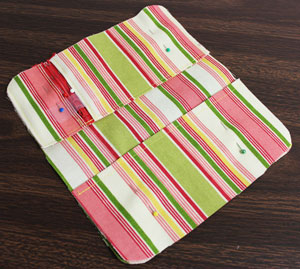
Lay the inner lining fabric flat right side facing up. Align the top zipper pocket with the top edge of the fabric and the bottom pocket with the bottom edge of the fabric, right sides facing up. Pin in place and trim the corners of the pockets.
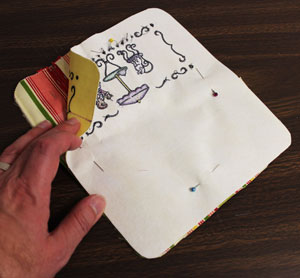
Align the outer shell fabric on top, right sides together, with the embroidered bottom edge aligned with the zipper pocket.
Also, to add the pen loop, cut a piece of 1" wide strapping to 2 1/2" long. Form into a loop and insert the loop at the center top of the cover between the outer shell and zipper pocket layers with about 1/4" of the raw ends of the loop extending out past the outer edge of the fabric.
Pin in place and sew a 1/2" seam along the outer edge of the fabric. Leave a 4" opening on the bottom or one of the sides for turning.
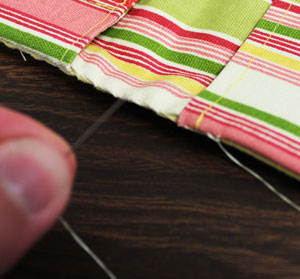
Turn the cover right side out, press the seams, and fold the fabric of the opening in 1/2" and press. With needle and thread, hand-sew the opening closed.

A handmade embroidered checkbook cover is a fabulous way to personalize a commonly used item. Make one for yourself and one for a friend!


