
This classic Christmas wall hanging was inspired by stitcher Diane's fabulous Christmas card holders that were featured in the Stitchers Showcase. Everyone loved her work, so I decided to create my own project instructions for this fabulous project. Click here to see Diane's inspiring work!
Whether you use it for Christmas cards or other keepsakes, this wall hanging is sure to be a favorite and functional part of your holiday decor for years to come, or a great gift idea to help someone else stay organized in style!
Read on for free project instructions!
Supplies
Supplies Needed:
**1/2 yard print canvas (for embroidered panel)
**1/4 yard solid-colored cotton fabric (for inner panel frame borders)
**3/8 yard print cotton fabric (for pockets)
**3/4 yard print cotton fabric (for pockets and back of pockets)
**3/4 solid-colored fabric (at least 40" wide for outer and inner borders - we used suede cloth)
**1 yard canvas (at least 40" wide for back)
**Medium weight cutaway stabilizer
**Temporary spray adhesive
**Air-erase pen
**Grommets and grommet tool
Special Project Notes:
In this project I used designs from the Nestled Up in Christmas Design Pack. I also think designs in the Christmas Potpourri Design Pack and the Feliz Flutterby Design Pack would look lovely on this holiday wall hanging.
The finished size of this wall hanging is 16 1/4" wide by 38 1/2" high.
Designs Used

First, I prepared the panel for the embroidery. Cut a piece of canvas a bit larger than your hoop (I cut mine to about 16" wide by 18" high).
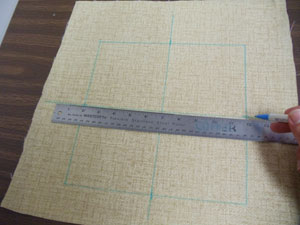
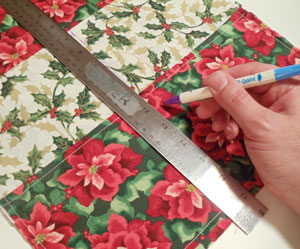
Using an air-erase pen or other marking tool, draw a 10" by 10" square in the center of the fabric. Measure and mark the center of each side of the shape by measuring and dividing by two.
Draw lines connecting the marks - where the lines meet is the exact center of the shape.
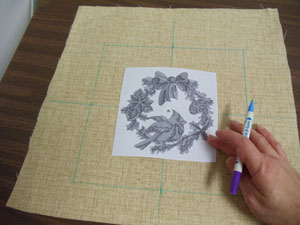
Create a paper template of the design by printing the design at full size using embroidery software. Poke a hole in the center of the template and align it with the center point on the fabric.
Make sure the design fits well within the shape - there should be at least one inch of space between the outer edges of the design and the edges of the shape.
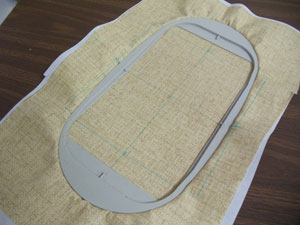
Spray a piece of medium weight cutaway stabilizer with temporary adhesive and smooth the fabric on top. Hoop the fabric and stabilizer together by aligning the marks on the hoop with the lines on the fabric.
Attach the hoop to the machine and load the design. Move the hoop so that the needle is directly over the center point on the fabric. Embroider the design.
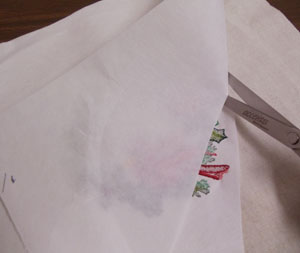
When the design has finished, carefully trim away the stabilizer on the backside of the embroidery.
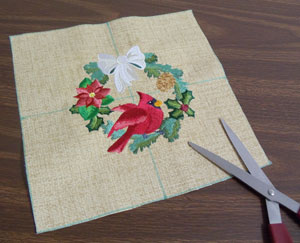
Cut out the shape.
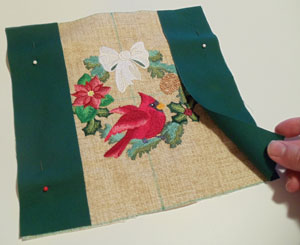
To prepare the fabric for the inner borders of the embroidered panel, first cut two pieces of cotton fabric to 2 1/2" wide by 10" high.
Align the pieces with the side edges of the embroidered panel, right sides together, and pin in place. Sew a 1/4" seam along the pinned edges only and press the back seams open with an iron.
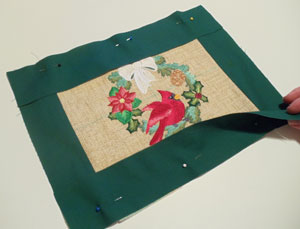
To prepare the fabric for the top and bottom borders of the panel, cut two pieces of cotton fabric to 13 3/4" wide by 2 1/2" high and align the pieces with the top and bottom edges of the panel, right sides together.
Pin in place, and sew a 1/4" seam along the pinned edges only. Press the seams.
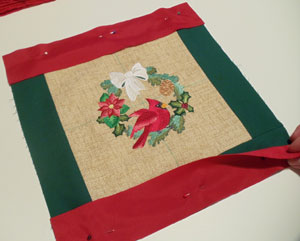
To prepare the fabric for the outer and inner center borders, cut three pieces of fabric to 13 3/4" wide by 2 1/2" high.
Align two of the pieces with the top and bottom edges of the assembled embroidered panel/border piece, right sides together.
Pin in place, and sew a 1/4" seam along the pinned edges only. Set the third piece aside for now.
Next I prepared the fabric for the pockets. Cut four total pieces of the print fabric (two pieces of each print - two different prints) to 13 3/4" wide by 12 1/2" high.
Align the short ends together, right sides together, pin in place, and sew a 1/4" seam along the pinned edges only.
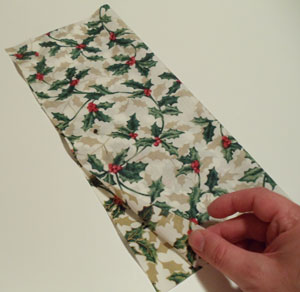
Turn the fabric right side out, lay the fabric flat, and press the fold and the seam.
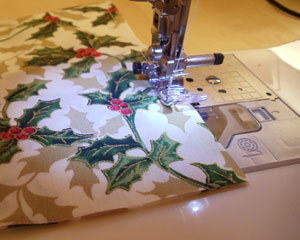
Top stitch a 1/4" seam along each of the folded edges on each pocket piece.
To prepare the fabric for the back pocket panel, cut a piece of print fabric to 13 3/4" wide by 21" high.
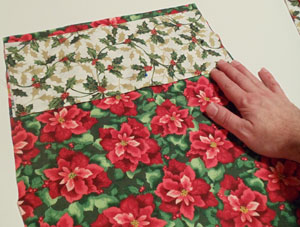
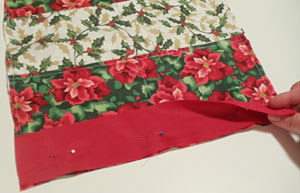
Lay the back fabric flat with the right side facing up. Then, lay the first pocket piece at the top of the back fabric with the side edges aligned and leaving one inch of excess back fabric above the pocket piece. The top stitched folded edge of the pocket should face to the top.
Pin in place and sew a 1/4" seam along the side and bottom edges of the pocket piece.
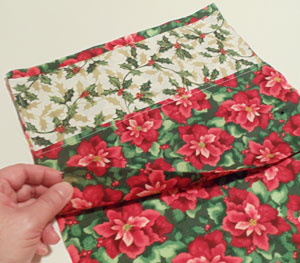
Lay the second pocket piece on top of the back fabric, overlapping one inch over the bottom edge of the first pocket and with the side edges aligned.
Pin in place and sew a 1/4" seam along the side and bottom edges of the pocket piece.
Repeat this process for the third and fourth pocket pieces. There should be 1/2" excess of the back fabric below the bottom edge of the bottom pocket.
Measure and mark the center of the pockets at the top and bottom edge by measuring and dividing by two.
Draw a line connecting the marks. Sew a seam right along this line - this seam creates the separations between the pockets.
Align the remaining center border piece and align it with the bottom edge of the pocket panel, right sides together, pin in place, and sew a 1/4" seam along the pinned edge.
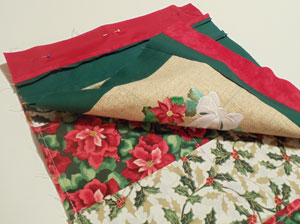
Align the bottom edge of the embroidered panel section with the top edge of the pocket section, right sides together, pin in place, and sew a 1/4" seam along the pinned edge.
To prepare the outer side borders, cut two pieces of fabric (we used suede cloth) to 2 1/2" wide by 39 1/2" high.
Align the pieces with the side edges of the assembled embroidered panel/pocket piece, right sides together, pin in place, and sew a 1/4" seam along the pinned edges.
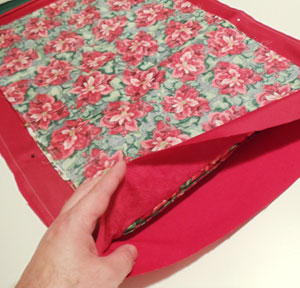
To prepare the fabric for the back of the wall hanging, lay the assembled front panel on top of the canvas, right sides together, pin in place, and cut around the shape.
Sew a 1/4" seam along the side and top edges only - leave the bottom open for turning.

Turn the fabric right side out and press the seams. Also, turn the fabric of the opening in 1/2" and press.
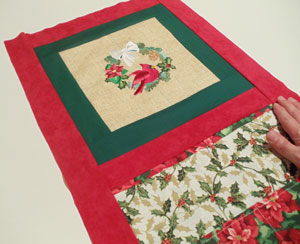
Top stitch a 1/4" seam along the entire outer edge.
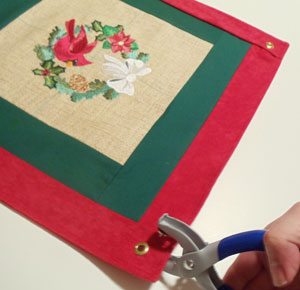
Measure and mark down one inch and in one inch starting at each top corner. Add a grommet at each mark.
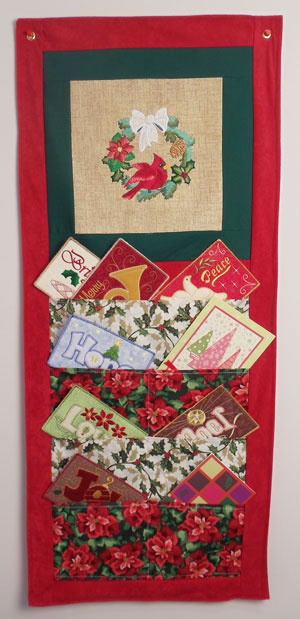
Hang your holiday wall hanging for friends and family to cherish year after year. Store Christmas cards, decorations, or other keepsakes in this lovely holiday-themed wall hanging! It's a nice idea for gift giving, too!


