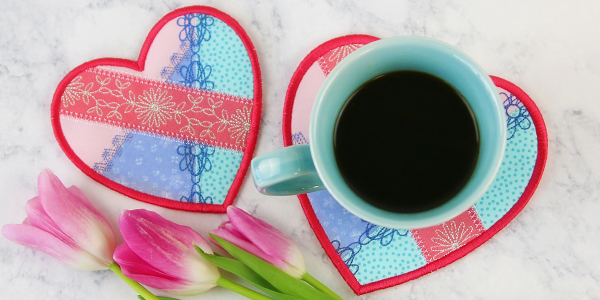
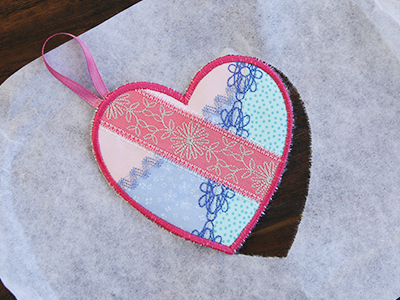
Bring timeless charm to your kitchen with this crazy patchwork trivet, stitched entirely in-the-hoop! Your choice of fabrics accented by dainty, decorative stitching makes a unique accent for your own kitchen -- and a perfect hostess gift, too! We'll show you step-by-step how to stitch your own.
Supplies
Project Needs & Notes:
- Small pieces of quilter's cotton
- Insul-Bright
- Embroidery thread
- Tear-away stabilizer
- Temporary spray adhesive (such as Gunold KK100)
- Scissors
- Ribbon for hanger (optional)
- Masking tape
Designs featured in this tutorial include:
- X14548, Crazy Patchwork Heart Trivet (In-the-Hoop)
Designs Used

When you download the in-the-hoop trivet design, you will find multiple files. Some are the embroidery files, and the others are dieline files marked with the letters "DL". Dielines are used to cut the fabric to the correct shape and size.
Open each dieline file with an embroidery software, and print it. If you do not have embroidery software, Wilcom TrueSizer is a free program to use.
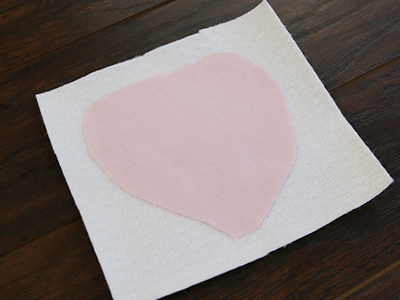
First spray one side of a piece of Insul-Bright with temporary adhesive. Smooth the Insul-Bright batting onto the wrong side of the back fabric piece.
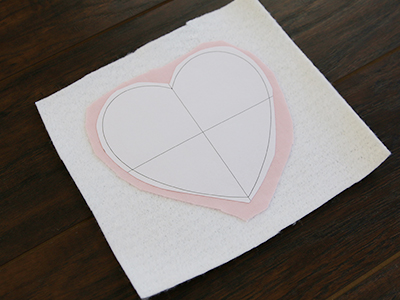
Then spray the back side of the printed back piece dieline with temporary adhesive, and smooth it onto the right side of the back fabric.
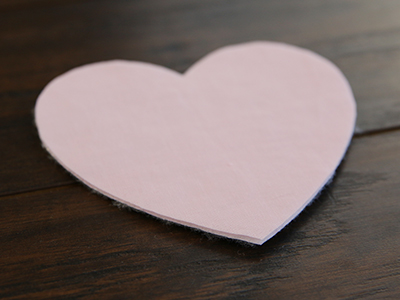
Cut the back dieline shape out of the adhered fabric and Insul-Bright. Then remove the paper dieline.
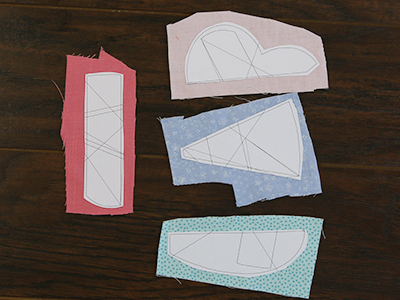
Next spray the back of all of the remaining paper dielines with temporary adhesive. Then smooth them onto the right side of the appropriate fabrics.

Cut out all the remaining dieline pieces. These should only be fabric, and should not have Insul-Bright on the back.

Once all the fabric pieces are cut to the correct shapes, it's time to embroider the design.
Hoop a piece of tear-away stabilizer. Madeira E-Zee 1.5 oz or Floriani Tearaway Medium are good choices. Those brands are more fibrous, less like paper, and will tear more cleanly.
Attach the hoop onto the machine, and load the embroidery file (not the dieline files).
Use a 75/11 sharp sewing needle instead of an embroidery needle. The sharp sewing needle has a finer point, and it will make smaller perforations in the stabilizer.
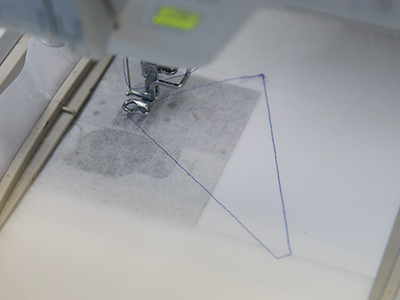
Embroider the design. The first thing to embroider will be a dieline (or outline stitch). This marks the area on the stabilizer where the fabric piece will be placed.
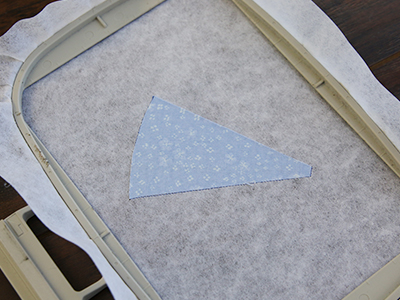
After the first dieline has sewn, remove the hoop from the machine, but do not unhoop the stabilizer. Spray the wrong side of the first fabric piece with temporary adhesive. Smooth the fabric piece onto the stabilizer inside of the sewn dieline.
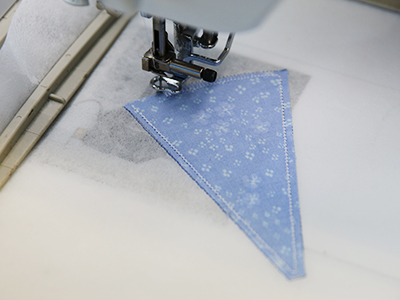
Then place the hoop back onto the machine, and embroider the tackdown for the first fabric piece. The tackdown will hold the fabric piece in place for the remainder of the design.

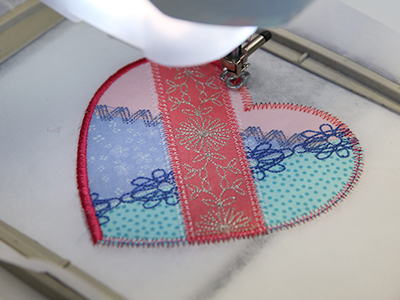
Then follow the color change sheet, and sew the next dieline step. This marks the area on the stabilizer for the next fabric piece.
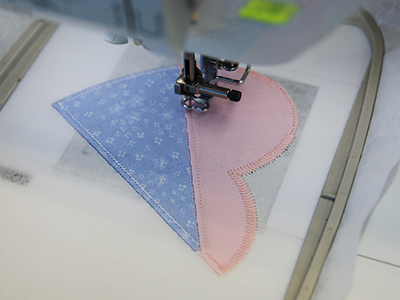
Repeat to remove the hoop from the machine, spray the wrong side of the next fabric piece, and smooth it inside the sewn dieline. Then embroider the tackdown step.
Then continue to follow the color change sheet, and sew the dieline for the next fabric piece.
Repeat again to remove the hoop from the machine, spray the wrong side of the fabric piece, place it inside the sewn dieline, and embroider the tackdown step.
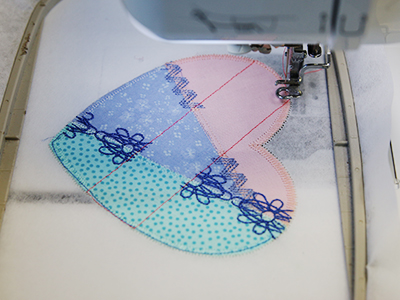
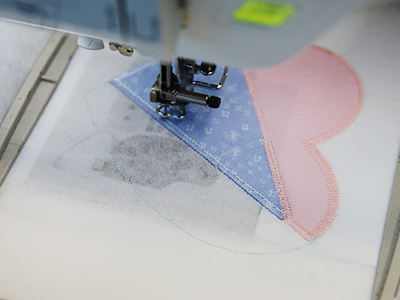
Once the bottom front fabric pieces are stitched in place, embroider all the inner details until you reach the next dieline step. Embroider the dieline, but make sure to stop before sewing the accompanying tackdown step.
After the dieline has sewn, again remove the hoop from the machine, but do not unhoop the stabilizer. Spray the wrong side of the fabric piece with temporary adhesive. Smooth the fabric piece onto the stabilizer inside of the sewn dieline.
Then place the hoop back onto the machine, and embroider the tackdown for the fabric piece.
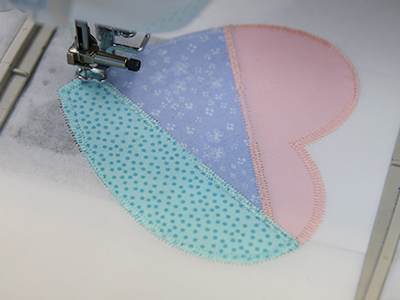
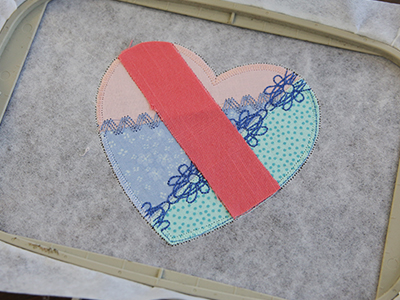
Follow the color change sheet and embroider the remaining details of the design. Make sure to stop before sewing the "back piece tackdown" step.
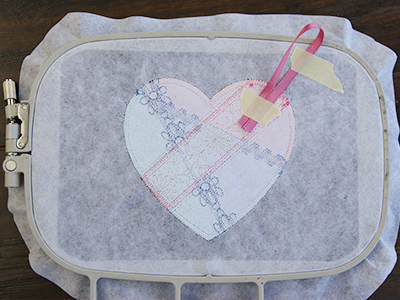
Before sewing the "back piece tackdown" step, remove the hoop from the machine, and turn it over so the back side of the embroidery is facing up. To add a hanger onto the trivet, cut a length of ribbon 7" long, and make it into a loop. Then tape the loop into place along the top center edge of the trivet.
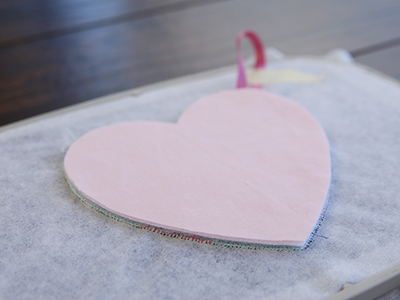
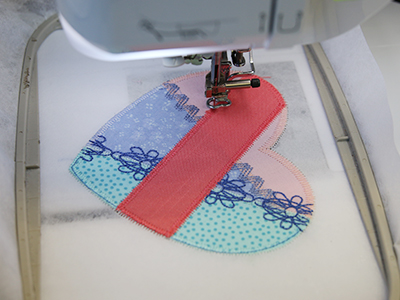
Then spray the Insul-Bright side of the back piece with temporary adhesive. Smooth it into place on the back side of the embroidery, with the Insul-Bright against the stabilizer.
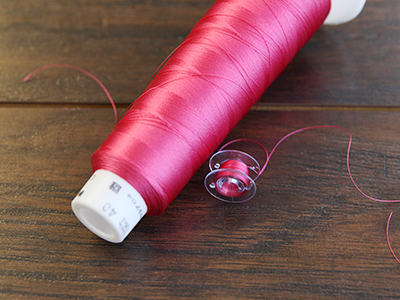
As the embroidery from here on out will be seen from both sides, wind a bobbin to match the remaining thread colors used in the design.
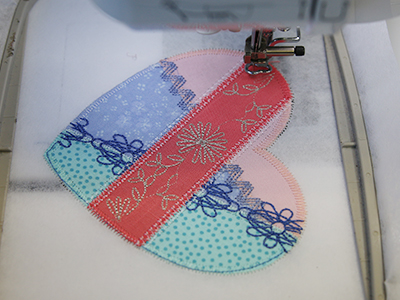
Place the matching bobbin into the machine, and follow the color change sheet to embroider the rest of the design.
Once the embroidery is finished, carefully tear the excess stabilizer away from the outside edges of the design.


