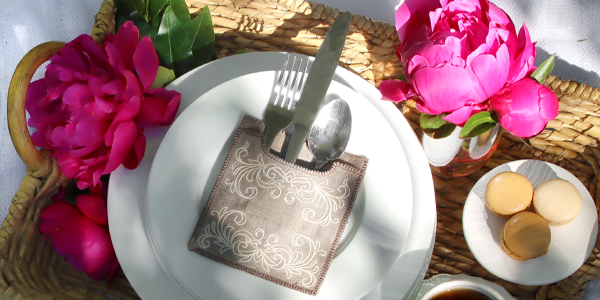
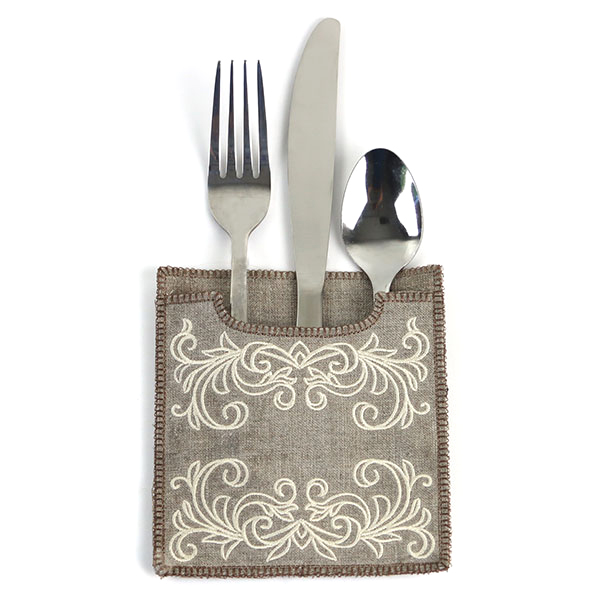
Create cozy accents for your next picnic or dinner party with this lovely in-the-hoop silverware holder. With beautifully stitched scroll detailing and the ability to use a wide variety of fabrics (like cotton, linen, and more), this chic motif is a fast and fabulous way to add a bit of character to your meal time decor.
Supplies
Project Needs & Notes:
- 1/4 yard of linen, cotton, or other fabric
- Tearaway stabilizer
- Medium weight cutaway stabilizer
- Temporary Spray Adhesive (Gunold's KK100)
- Scissors
Designs featured in this tutorial include: - X15184, Cutlery Cozy (In-the-Hoop)
Designs Used
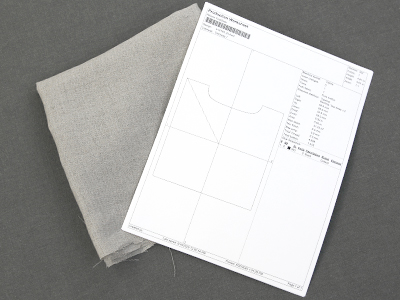
This in-the-hoop design has multiple files. One is a full embroidery file. The others are dieline files marked with the letters DL. Dielines are used to cut the fabric to the right shape and size. Open the dieline files with embroidery software. Wilcom's Truesizer is a free program to use.

Spray the backside of the paper dieline for the front piece with temporary adhesive. Then smooth it onto the right side of the fabric.
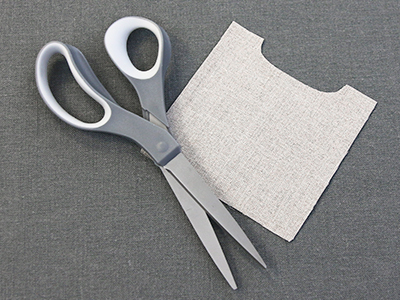
Cut out the shape.
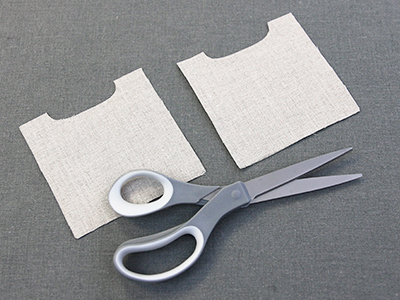
Repeat to cut out the lining piece, which is also cut from the front dieline.
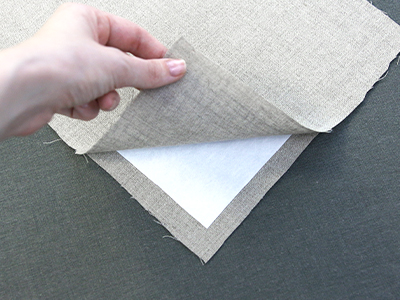
For the back piece, take a piece of cut away stabilizer, spray it with temporary spray adhesive, and smooth it onto the wrong side of a piece of fabric. Then spray the opposite side of the stabilizer and smooth it onto the wrong side of another piece of fabric. This will make a sandwich of fabric on top, stabilizer in the middle, and fabric on the bottom.
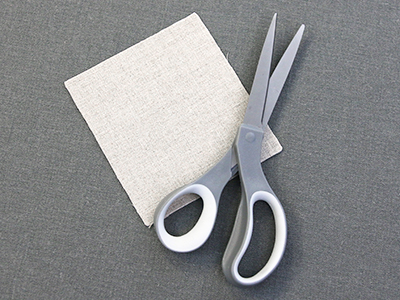
Spray the backside of the back paper dieline, and smooth it onto the sandwich of fabric and stabilizer. Then cut out the back piece.
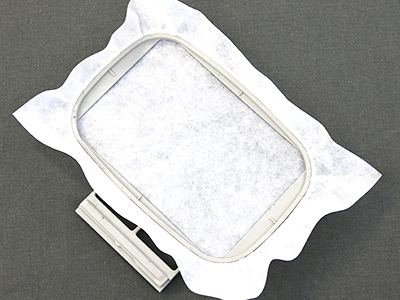
Hoop a piece of tear-away stabilizer firmly. Make sure it is nice and tight with no wrinkles. Madeira E-Zee 1.5 oz or Floriani Tearaway medium are good options. Those stabilizers are more fibrous, less paper like, and will tear more cleanly.
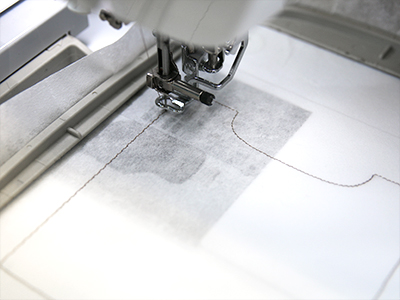
Attach the hoop onto the machine and load the full embroidery file (not the dieline files). Embroider the design. The first thing to embroider will be the "front piece dieline." This will mark the area on the stabilizer where the front fabric piece is to be placed.
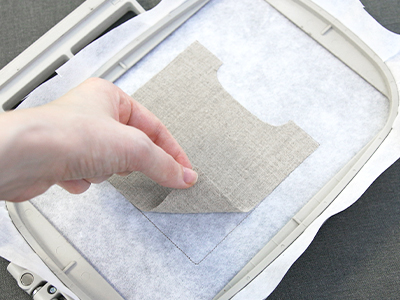
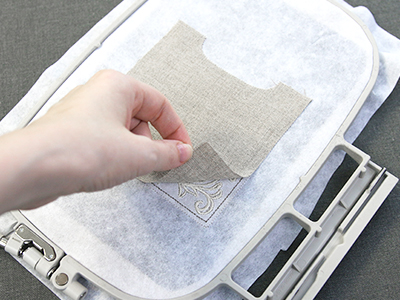
Remove the hoop from the machine, but do not unhoop the stabilizer. Spray the back of the front piece with temporary adhesive, and smooth it into place inside of the sewn dieline.
Then attach the hoop back onto the machine and sew the "front piece tackdown" which will hold that fabric piece in place.
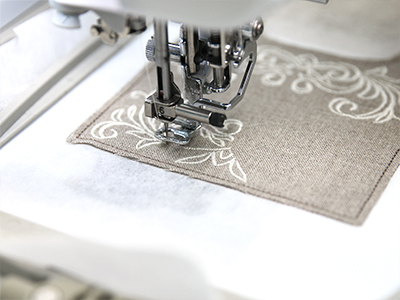
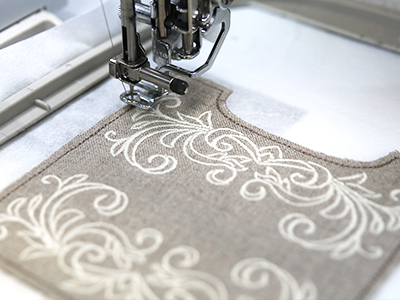
Continue to embroider the inner details of the design.
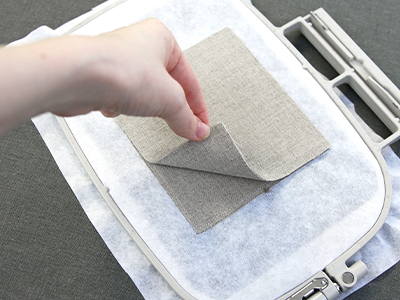
Remove the hoop from the machine without unhooping the stabilizer and flip it so the back side of the embroidery is facing up. Spray the backside of the lining piece with temporary adhesive, and smooth it into place on the backside of the embroidery.
Return the hoop back to the machine and embroider the lining tackdown.

As the rest of the embroidery will now be seen from both sides, wind a bobbin with the same thread that is being used in the top needle. Place the new bobbin into the machine.

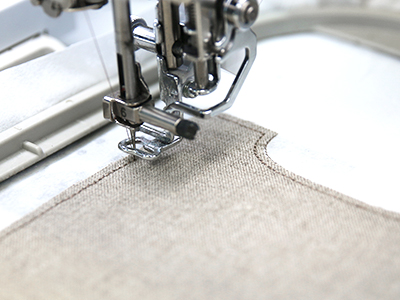
Then place the hoop back onto the machine and embroider the "front finishing edge" step. This will only sew along the top edge of the design.
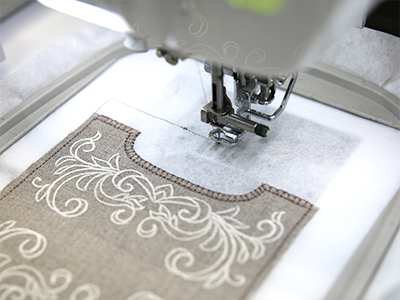
Next embroider the "back piece dieline" which will show where the back piece will be place on the back of the hoop.
Remove the hoop from the machine without unhooping the stabilizer and flip it so the back side of the embroidery is facing up. Spray the right side of the back piece with temporary adhesive, and smooth it into place within the dieline.
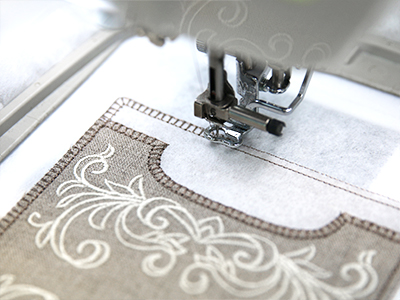
Then return the hoop back onto the machine and embroider the final step which will embroider both the "back piece tackdown" as well as the "finishing edge."
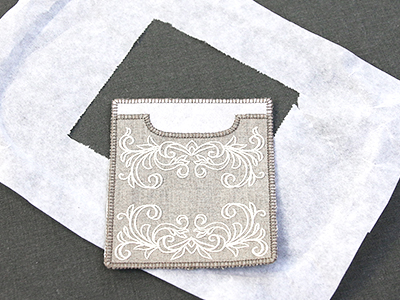
Once the embroidery is finished, unhoop the stabilizer, and remove the excess stabilizer from around the design.
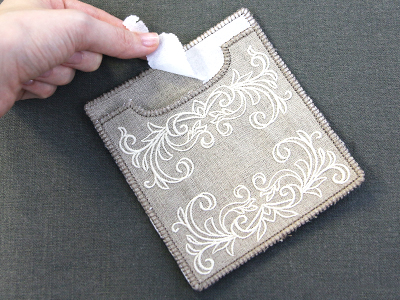
Lastly, tear the silverware holder open by removing the small strip of tearaway stabilizer that remains at the top edge.


