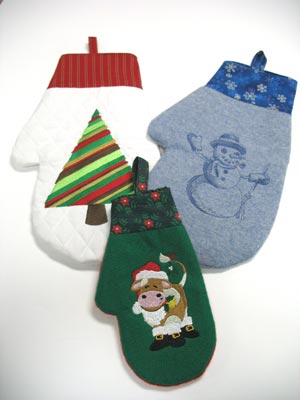
Warm your home with cozy, colorful ornaments and decorations! Embroider with Christmas or winter-themed designs for a special seasonal touch.
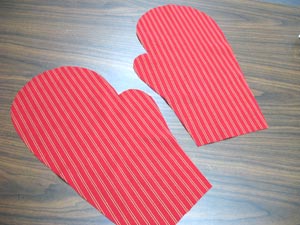
A pattern for the mittens is provided, and we'll show you how to embellish and stitch the mitten. Use the large for wall decorations, and the smaller ones for gift card holders and tree decorations.
Read below for these free project instructions!
Supplies
Supplies Needed:
**1/4 yard fabric for outer shell (we used felt and quilted cotton), or an old sweater
**1/4 yard of quilters cotton (for cuff and inner lining)
**Medium weight cutaway stabilizer
**Lightweight water-soluble stabilizer (we use Sulky Solvy)
**Temporary spray adhesive (we use KK100)
**Air-erase pen (or other marking tool)
**Tape
Finished size: The large mitten is 7 inches wide by 12 1/2 inches high; the small mitten is 4 1/4 inches wide by 7 3/4 high.
Designs Used


First, open and print the pattern piece. Click the link above to access the PDF pattern for this project.
The large mitten pattern is split into two sections and will print on two pieces of paper.
The small mitten pattern is also split into two sections, but will print on one piece of paper.
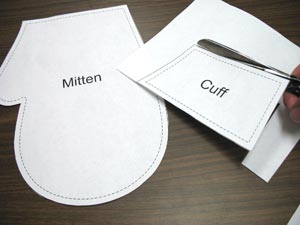
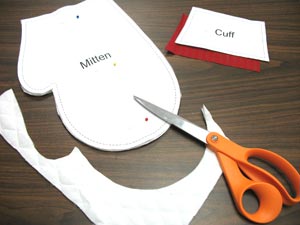
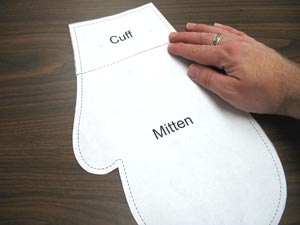
Cut out the patterns along the outer solid line (the inner dashed line represents the seams).
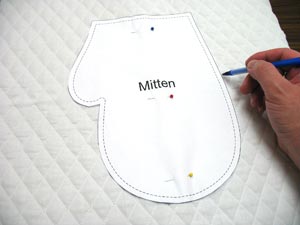
Prepare the fabric for the front of the mitten by laying the fabric right side up and pin the pattern labeled "mitten" onto the fabric.
Leave a couple of inches of space between the edges of the pattern and the edges of the fabric.
Trace the shape of the pattern onto the fabric.
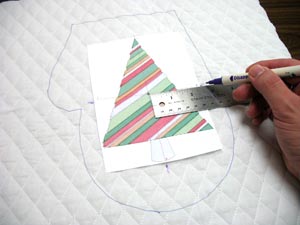
Create a paper template of the design by printing it at full size using embroidery software.
Trim around the design to make it easy to place. Then, place the template within the shape and measure equal distances between the center point on the template and the outer edges of the shape. There should be at least 1 inch of space from the edges of the design and the sides of the fabric.
Using an air-erase pen (or other marking tool), poke a hole in the center of the template and mark the fabric. Also, mark the horizontal and vertical axis points.
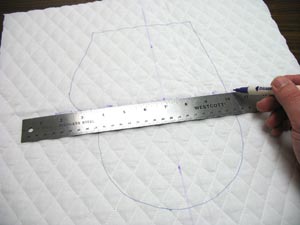
Remove the template and draw lines connecting the axis points.
These lines will be used for hooping.
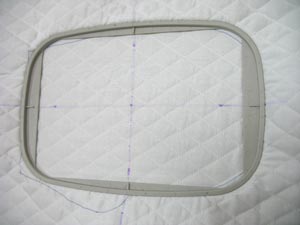
Spray a piece of cutaway stabilizer with a bit of temporary adhesive. Smooth the fabric on top.
Hoop the fabric and stabilizer together by aligning the marks on the hoop with the lines on the fabric.
If you're using an old sweater to make the mitten, hoop it as shown above. However, add one layer of lightweight water soluble stabilizer on top of the fabric to serve as a topping. The stabilizer prevents the stitches from sinking into the loose weave of the knit.
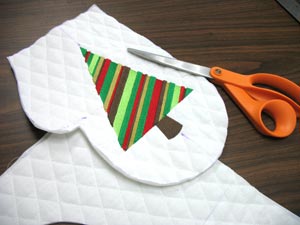
Attach the hoop to the machine and load the design. Move the hoop so that the needle is directly over the center point on the fabric. Embroider the design.
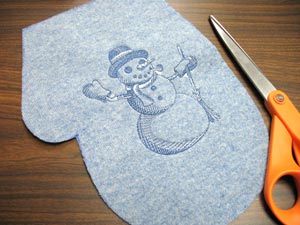
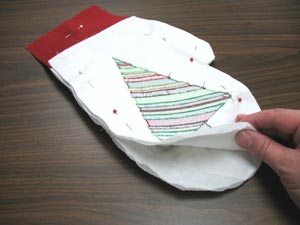
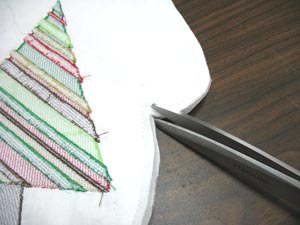
After the design has sewn, unhoop the fabric and cut out the mitten shape.
If you've used a water-soluble stabilizer as a topping, gently tear the excess away. If there are any bits left over, wet the tips of your fingers with water and dab the fabric until the stabilizer dissolves away.
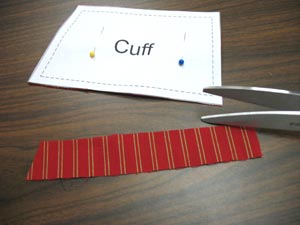
Next, prepare the cuff fabric for the front of the mitten. Place the fabric right side up and pinning the pattern labeled "cuff" on top.
Cut out the shape.
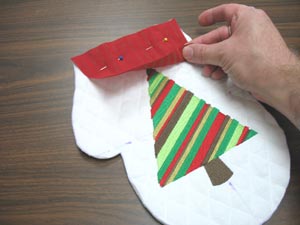
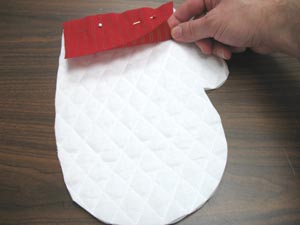
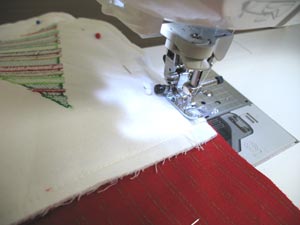
Now, place the embroidered mitten piece right side up. Align the long edge of the cuff piece and the top edge of the mitten piece right sides together.
Pin in place.
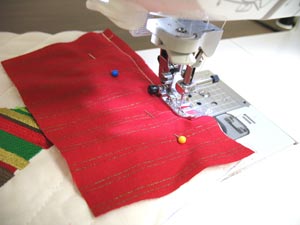
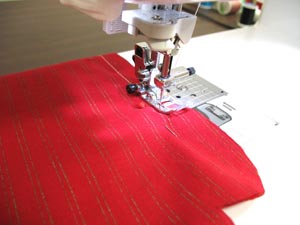
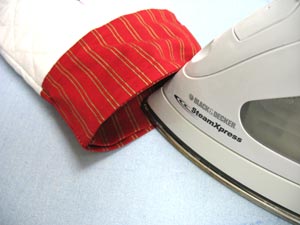
Sew a 1/4 inch seam along the pinned edge.
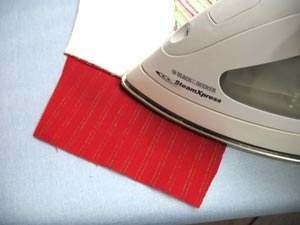
Press the back of the seam flat with an iron.
Next, we will prepare the backside of the mitten. Lay the mitten and cuff fabric with the wrong side up, lay the pattern pieces on top, pin in place, and cut out the shapes.
Align the long edge of the cuff piece and the top edge of the mitten piece right sides together.
Pin in place and sew a 1/4 inch seam along the pinned edge.
Then, press the back of the seam flat with an iron.
Next, align the assembled front and back pieces together with the right sides facing each other and pin in place.
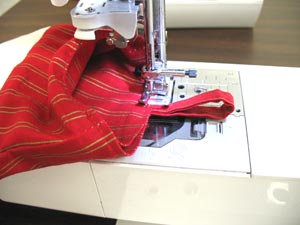
Sew a 1/4 inch seam along the sides and bottom of the mitten.
Be sure to leave the top edge open for turning.
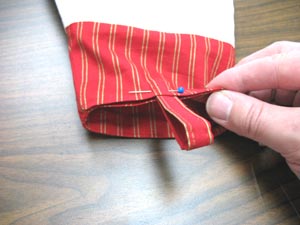
Make a notch in the seam allowance where the bottom of the "thumb" meets the side of the mitten. Be careful to not cut the seam.
Doing this will help the fabric lay flat when turned right side out.
Turn the mitten right side out.

Now we will prepare the pattern to create the inner lining.
Trim the seam allowance from the bottom edge of the "cuff" pattern piece and from the top of the "mitten" pattern piece.
Align the pieces together and tape in place.
Cut out two pieces of fabric for the inner lining pieces.
First, place and pin the pattern piece on the right side of the fabric and cut out the shape.
Then, place and pin the pattern piece on the wrong side of the fabric and cut out the shape.
Align the inner lining pieces together, pin in place, and sew a 1/4 inch seam along the sides and bottom.
Leave the top edge open.
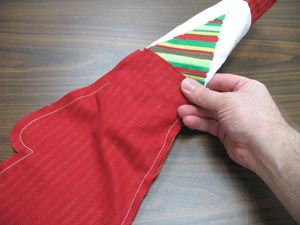
Next, roll up the outer shell (widthwise) and insert it inside the inner lining with the thumbs aligned.
Align the top edges together and sew a 1/4 inch seam along the front side only.
Pull the outer shell out of the inner lining.
Flip the inner lining back over the top of the outer shell and insert the inner lining inside the outer shell.
Align the top edges once again and turn the open back side over 1/4 inch and press in place.
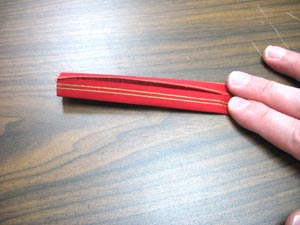
To create the loop, cut a piece of fabric to 5 inches wide by 2 inches high.
Fold in the long edges to meet in the center and press in place with an iron.
Then, fold again by bringing the long folded edges together and press in place with an iron.
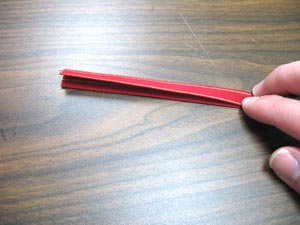
Sew a seam along each folded edge.
Create a loop by bringing the ends together and inserting them in between the layers of fabric on the backside of the top edge of the mitten (insert the ends of the loop in about 1/2 inch).
Pin in place.
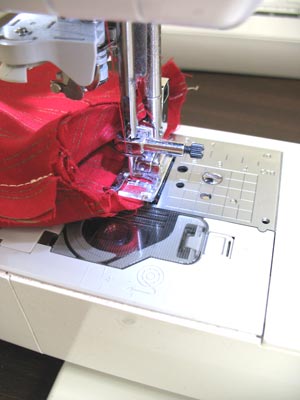
Sew a 1/8 inch seam along the entire top edge of the mitten.
This will close the backside opening, will sew the loop in place, and will also finish the front side of the top of the cuff.
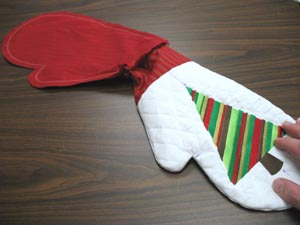
The large mitten is now complete! Hang it on a door to hold Christmas cards, or as decoration when filled with festive faux flowers, pine cones, and berries.
The large mitten also doubles as a stocking when hung on a mantle.
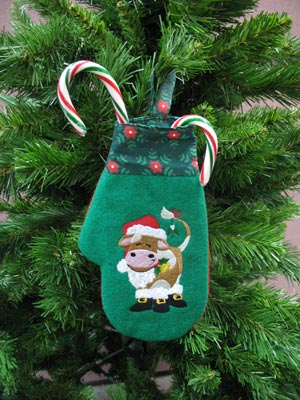
The small size of the mitten is just the right size for gift cards, candy canes, and other small gifts.
Hang it on a Christmas tree for extra color and flair!
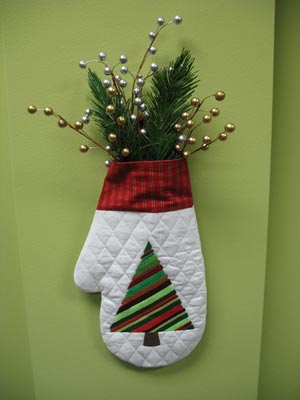
The large size is beautiful as a wall decoration. Fill with boughs of evergreen or tinsel to spruce of your home for the holidays!


