Treat yourself to 70% off Storewide! Click the deals tab for details.
 Treat yourself to 70% off Storewide! Click the deals tab for details.
Be seated in elegance at your next dinner party. Turn any plain chair into an embroidered masterpiece with this simple project. It can be sewn up so quickly, it'll be fast and easy to make up one for each chair in your dining set!
Supplies
Supplies needed for two chair covers:
-
1 yard of fabric 44" to 54" wide
-
4 rayon tassels
-
2 1/2 yards of braided trim
Embroidery Designs from Embroidery Library:
Designs Used
Instructions:
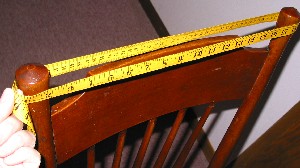
Measure the widest part of your chair back. Insert your finger into the loop that goes around the chair. The space that your finger adds will give the cover just enough room to slip onto the chair comfortably.
Tip: If your chair has a curve at the top, use a piece of tag board and a pencil to trace the outline of the curve. Use the shape that you traced to create your pattern piece.

Using the measurement that you just took (mine was 38"), divide that number in half then add 1". This will be the width of your pieces. Determine how deep you want your cover to be, and add 1". This will be the height of your cover pieces.
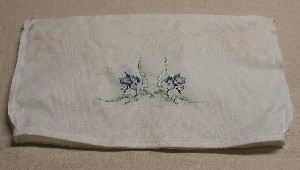
Mine were 20" wide by 12" high. Mark out the dimensions of the fronts of the chair covers on your fabric and embroider your designs on them. The design that we used was actually sewn twice on each cover, in mirror image to each other.
Cut out 2 back pieces, the same size as the front pieces.
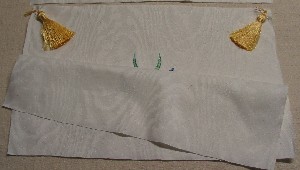
On the right sides of the front pieces, pin a tassel in each corner, then put the back piece over the top of the front piece with the right sides together.
Sew the top and side seams, making sure to secure the cord of the tassels in the stitching, but not sewing the tassel itself.
Stitch a narrow hem along the bottom cut edge.
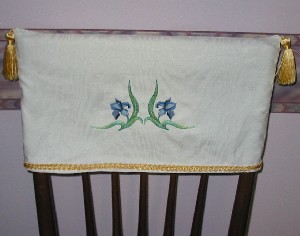
Turn the cover right side out and stitch the braided trim along the bottom hemmed edge of the cover.


