
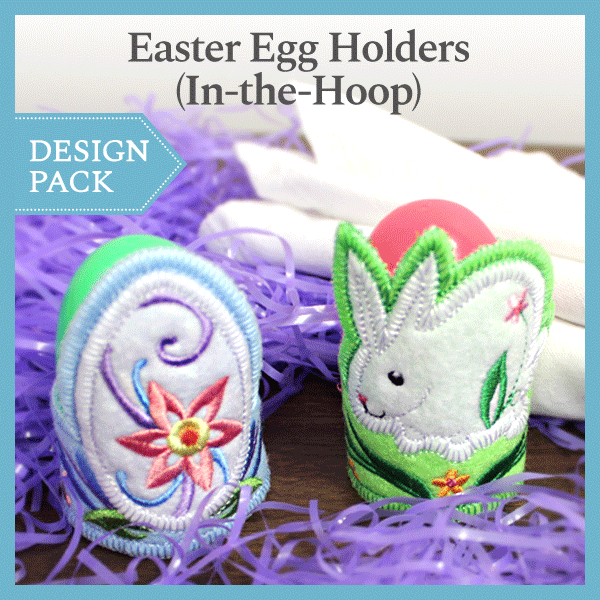
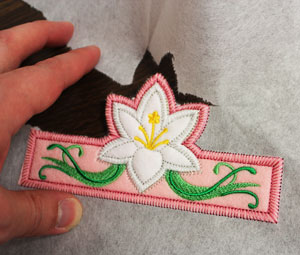
Make your Easter table settings even more special with adorable in-the-hoop egg holders, which can also serve as napkin rings!
A lovely lily, a sweet bunny, a pastel egg, and more are just the thing to brighten your holiday table.
Read on for project instructions to create cheerful egg and napkin holders!
Supplies
Supplies Needed:
**Craft felt or wool felt (for front and back)
**Small pieces of fabric (for applique pieces; I used felt)
**Temporary spray adhesive
**Medium weight cutaway stabilizer
**Tear-away stabilizer
**Fabric glue
Special Project Notes:
Designs Used
A Easter Egg Holders (In-the-Hoop) Design Pack - Lg
A Easter Egg Holders (In-the-Hoop) Design Pack - Sm
**Note that the finished sizes of designs from both design packs are the same. The small size includes split files, for use on smaller hoops.
Designs Used
When you download an in-the-hoop egg holder design, you'll find four files for the 5x7 size and seven files for the 4x4 size.
The 5x7 size will sew out all in one piece. The 4x4 size will sew out in two pieces, in two separate hoopings. For the 5x7 size, one file will begin with the letter "X" followed by 4 numbers -- that's the embroidery file.
For the 4x4 size, two files will begin with "X" followed by 4 numbers and one letter. The front piece ends with an "a" and the back piece ends with a "b". The other files are marked with "_DL" -- those are the dielines. The dielines are used to cut the fabric for the front, back, and small applique pieces of the egg holder ("_DLfront", "_DLback" and the small applique dielines are labeled as the file name followed by "_DL" -- "X9340_DL for example).
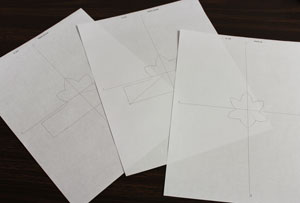
If you have embroidery software, open the DL (dieline) files and print them at full size. These are the templates we will use to cut the shapes. If you do not have embroidery software, you can sew the dielines directly onto paper. To do this, hoop a piece of paper and embroider the dieline files.
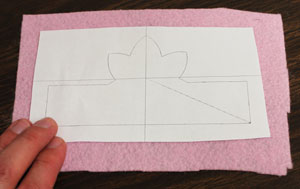
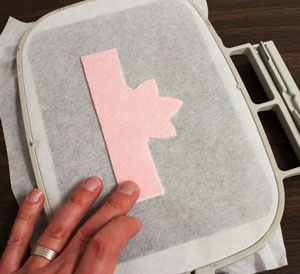
To prepare the front fabric piece, spray the back of the paper template with a quick shot of adhesive and smooth it on the felt. I did not add a layer of cutaway backing to the backside of the felt (as I sometimes do with other in-the-hoop designs) as the felt is thick and does not need the support.
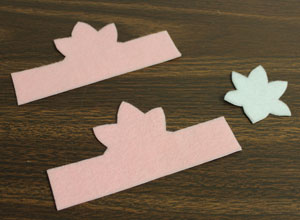
Cut out the shape. Repeat this process and cut out the remaining fabric pieces: the back piece and the small applique piece - if you are using quilter's cotton or another thin fabric for the applique pieces, spray a piece of medium weight cutaway stabilizer with adhesive, smooth the fabric on top, add the template, and then cut out the shapes.
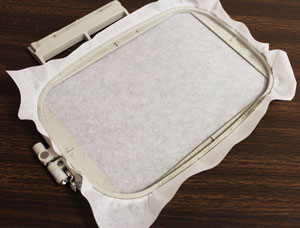
Now that the fabric pieces are cut and ready, it is time to embroider the egg holder. Hoop a piece of tear-away stabilizer.

Attach the hoop to the machine and load the embroidery file (the file that starts with an "X" followed by four numbers for the 5x7 size and "X" followed by four numbers and an "a" for the 4x4 size). Embroider the design. The first thing that sews is another dieline. After the dieline has sewn, stop the machine.

Spray the backside of the front fabric piece with adhesive. Then, lay the fabric right inside the shape and continue with the design. A tack down stitch will sew next around the entire outer edge of the shape. This binds the fabric piece to the stabilizer for the remainder of the design.
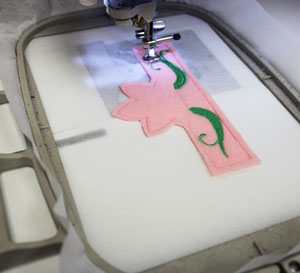
Next, other elements of the design will sew.
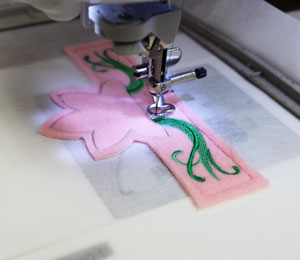
Continue with the design; the small applique piece will sew next. The dieline for the applique piece will sew.
After the dieline sews, stop the machine, spray the backside of the applique piece with adhesive, and place it right inside the dieline. Continue with the design, a tack down stitch will sew around the applique piece.
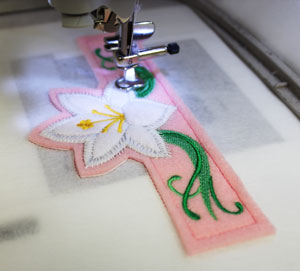
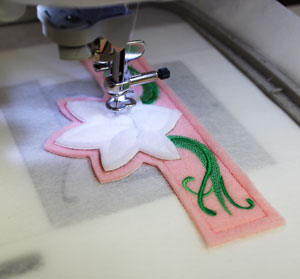
Then, the outer border and the remaining front elements will sew.
Look for a note on the color change sheet that says "back piece tack down." When you reach this step, stop the machine. Remove the hoop from the machine but do not remove the stabilizer from the hoop. Spray the backside of the back fabric piece with adhesive and add it inside the shape on the backside of the embroidery.
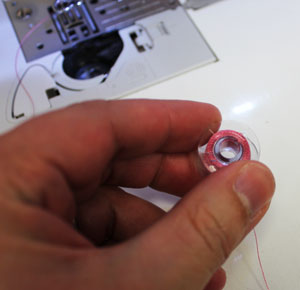
Since both sides of the embroidery will be seen, we are winding a bobbin in the same color as the top thread for the remaining step.
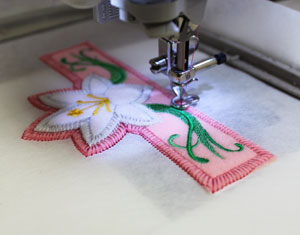
Attach the hoop back on the machine and continue with the design. Another tack down stitch will sew next; this binds the front and back together.
Unhoop the stabilizer and gently tear away the stabilizer.
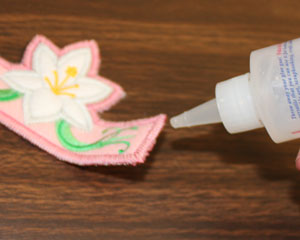
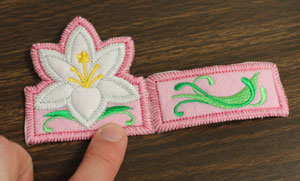
To finish the 5x7 size, add fabric glue along one of the short ends of the bottom band.
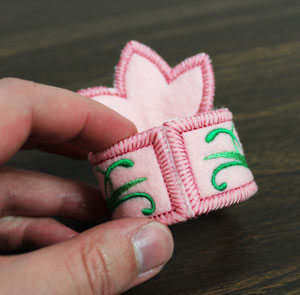
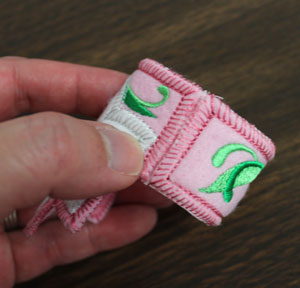
Bring the short ends together forming a loop, butt them up against one another, and hold them in place until the glue sets.
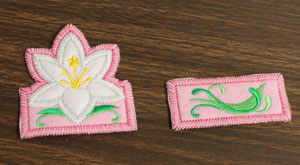
For the 4x4 size, embroider the both the "a" and the "b" embroidery files. Note: the back piece (the file labeled with a "b") has a front and back fabric piece, but no small applique pieces.
Add fabric glue along one of the short ends of the bottom band of the front piece. Align one of the short ends of the back piece with the short end of the front piece. Butt them up against one another and allow the glue to set.
Add glue along the other short end of the back piece, bring the short end of the back piece to meet the left short end of the front piece forming a loop, butt them up against one another, and hold them in place until the glue sets.
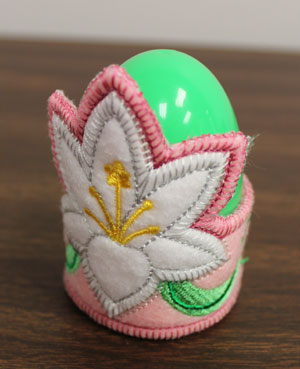
Now your egg holder is complete. Add the egg and let the festivities begin!
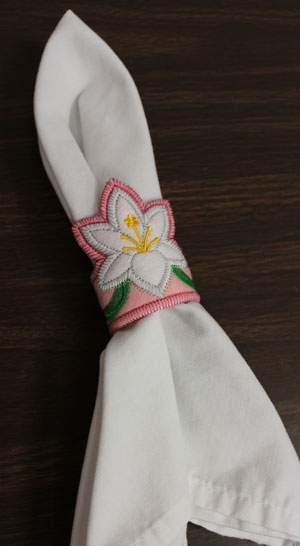
Your egg holder also doubles as a napkin ring. Simply insert the napkin through the back loop.
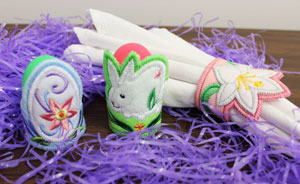
Whether you put eggs in them or napkins, darling in-the-hoop egg holders are a terrific way to decorate your table for Easter!
Egg holders would also look great on mantels and coffee tables, and make Easter egg hunts even more fun.


