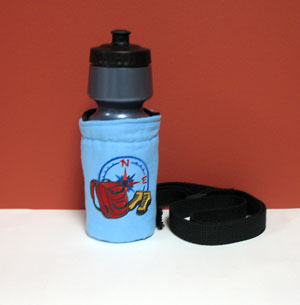
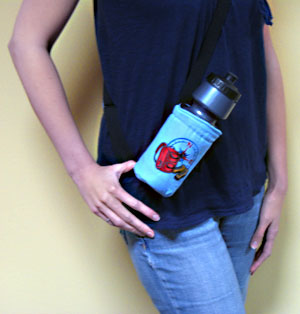
Keep your drink cool with this stylish insulated water bottle carrier. The unique hands-free design is ideal for walking and hiking. Personalize yours with your favorite embroidery design!
Read below for these free project instructions.
Supplies
Supplies Needed:
**1/4 yard lightweight canvas
**1/4 yard Insul-Bright (thermal lining)
**1/4 yard rip-stop nylon (for lining)
**Cutaway stabilizer
**Temporary spray adhesive
**Air-erase pen or other marking tool
**4 inch diameter plastic lid
**60 inch length of 1 inch wide nylon or cotton strap
**24 inch length of nylon cord
**One strap adjuster
**One cord stop
**Safety pin
**Masking tape
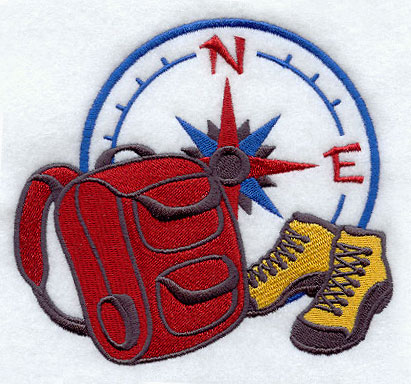
Designs used:
Hiking Crest (Small)
These designs are available in the following design packs:
A Outdoor Adventures Design Pack - Lg
A Outdoor Adventures Design Pack - Sm
Designs Used
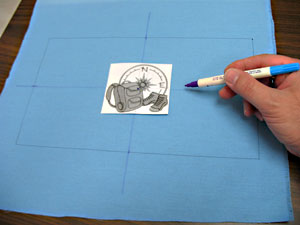
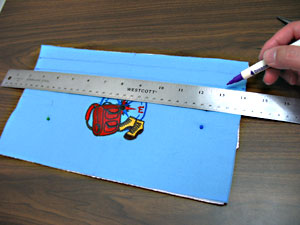
First we will prepare the fabric for the outer shell. Draw a 13 inch wide by 7 inch high rectangle on the canvas. Leave a couple of inches of excess fabric around the shape. Then, using an air-erase pen or other marking tool, measure and mark the center of each side of the shape by measuring and dividing by two. Draw lines to connect the marks - these lines will be used for hooping.
Create a paper template of the design by printing it at full size using embroidery software. If you don't have embroidery software, you can cut a piece of paper the shape and dimensions of the designs to help with placement and centering.
Poke a hole in the center of the template and align it with the center point on the fabric. Make sure the design fits well within the shape. There should be about 1 1/2 inches of space between the top and bottom edges of the design and the edges of the shape. Also, there should be about 3 1/2 inches of space between the side edges of the design and the edges of the shape.
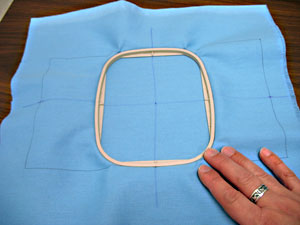
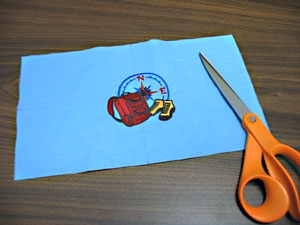
Spray a piece of cutaway stabilizer with temporary adhesive and smooth the fabric on top. Hoop the fabric and stabilizer together by aligning the marks on the hoop with the lines on the fabric. Attach the hoop to the machine and load the design. Move the hoop so that the needle is directly over the center point on the fabric. Embroider the design.

After the design has sewn, trim away the excess stabilizer on the backside of the embroidery.
Cut out the shape.
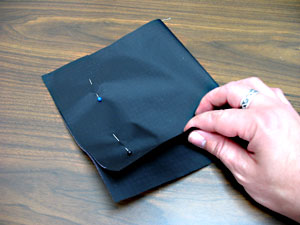
Cut a piece of the Insul-Bright to 13 inches wide by 7 inches high and align the embroidered piece on top, right side facing up (the shiny side of the Insul-Bright should face down). Pin together.
Now we will mark the fabric to create the drawstring pocket. Using an air-erase pen, or other marking tool, mark down 3/4 inch along each side starting at the top corners. Then, mark down another 3/4 inch from the mark you just made. Draw horizontal lines across the fabric connecting the marks. Sew a seam along each line. Then, sew a 1/4 inch seam around the outer edge of the fabric - start and stop at the space in between the lines - do not sew over this space! The space needs to stay open so that the drawstring can be threaded through later on.
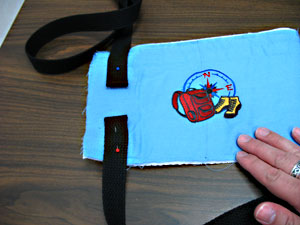
Cut a length of the strapping 46 inches long (for the top section) and 14 inches long (for the bottom section). Then, fold one end of the top strap over 1/2 inch and pin it to the outer shell with the end of the strap 3 inches down from the top edge of the fabric and 1 inch over from the left edge of the fabric.
Again, be sure to not sew over the drawstring pocket area.
Then, fold one end of the bottom strap in 1/2 inch and pin it to the outer shell with the end of the strap 2 inches up from the bottom edge of the fabric and 1 inch over from the left edge of the fabric. Sew the straps in place by sewing a 1/8 inch seamed box around the ends of the straps.

Bring the short ends of the outer shell together, right sides facing, and pin in place. Sew a 1/2 inch seam along the pinned edge only starting and stopping on the outside of the drawstring pocket.
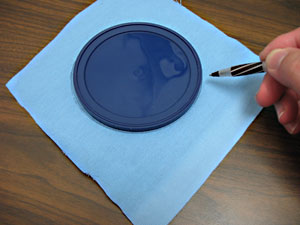
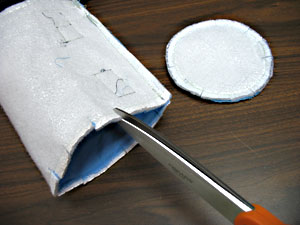
To prepare the bottom portion of the carrier, lay the plastic lid over the canvas, trace and cut out the shape. Then, trace the shape onto the Insul-Bright and cut out the shape. Align the pieces together with the shiny side of the Insul-Bright facing away from the canvas, pin in place, and sew a 1/4 inch seam around the entire shape.
Cut 1/4 inch slits along the bottom edge of the outer shell and around the edges of the bottom portion - cut a slit about every 1/2 inch.
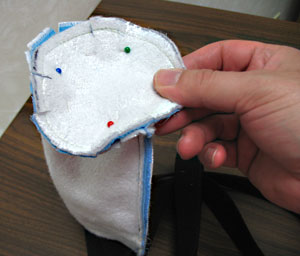
Align the bottom portion with the bottom of the outer shell, pin in place, and sew a 1/2 inch seam around the entire bottom edge.
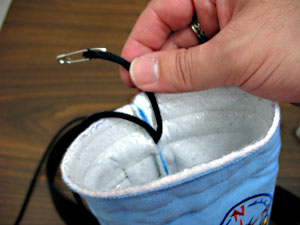
To add the drawstring, cut a length of cord to 24 inches long. Attach a safety pin to one end, insert the pin into the drawstring pocket and thread the cord through. After the cord is inserted, thread the ends of the cord to the outside of the outer shell.
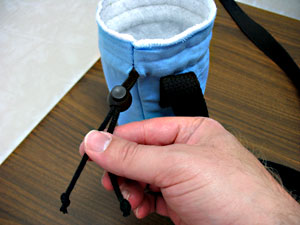
Thread the ends of the cord through the cord stop and tie knots at the ends of the cord.
To prepare the inner lining, cut a piece of the rip-stop nylon 13 inches wide by 7 inches high, trace the plastic lid and cut out the shape. Assemble the inner lining just as you did the outer shell: bring the short ends of the rectangle piece together, pin in place, and sew a 1/2 inch seam along the pinned edge only. Then, cut slits along the bottom edge and along the edges of the bottom circle piece. Sew the bottom piece to one end of the side piece just as you did the outer shell.
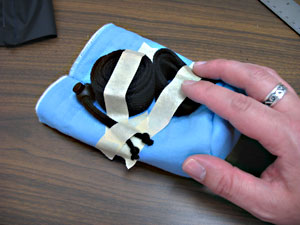
Now we will attach the inner lining to the outer shell - roll up the straps on the outer shell and tape them in place on the side of outer shell. Doing this will keep them out of the way during the next steps.
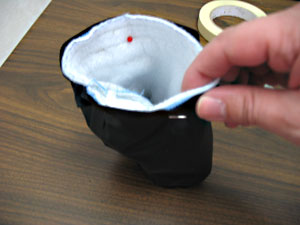
Insert the outer shell inside the inner lining with the right sides together and with the side seam aligned, pin in place, and sew a 1/2 inch seam around only half of the top edge of the carrier.
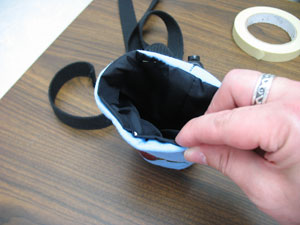
Turn the inner lining right side out, remove the tape from the straps, and insert the inner lining inside the outer shell. Turn the opening of the outer shell in 1/2 inch and press with an iron - do not press the inner lining. Align the top edges of the inner lining with the outer shell, pin in place, and sew a 1/8 inch seam around the entire top edge of the carrier.
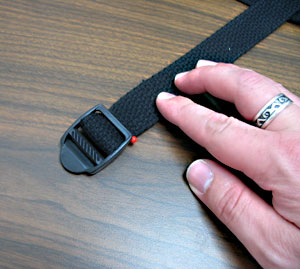
To add the strap adjusters, wrap the end of the top strap around the adjuster, sew it in place, and then wrap the end of the bottom strap through the other end (refer to the adjuster instructions for specific instructions). To prevent the ends of the straps from fraying, you can apply fabric glue or Fray Check.
Pair your insulated water bottle with an insulated snack bag for on-the-go snacks!


