
Keep embroidery supplies and other small items neat and tidy with this stylish Catch-All Canister.
Crafty cut applique embroidery is a fabulous way to add a little flair to your projects. Mix and match designs, colors and fabrics to create a canister that works best with your decor. Use it to store toys, crafty supplies, or whatever else you please!
Read below for these fun and free project instructions!
Supplies
Supplies Needed:
**Medium weight cutaway stabilizer
**Temporary spray adhesive
**Air-erase pen (or other marking tool)
**Metal canister (we used a popcorn canister - 8 inches high by 10 1/4 inches in diameter at the top)
Supplies Continued:
**1/2 yard solid colored lightweight home decor canvas
**1/2 yard print lightweight home decor canvas
**Small pieces of fabric for applique pieces (we used craft felt and quilter's cotton)
**1/2 inch wide ribbon
**Tape measure
**Polyester fiberfill
**Hot glue and gun
**Pinking shears
Designs used:
Crafty Cut Daisy (Applique), Crafty Cut Black-eyed Susan (Applique)
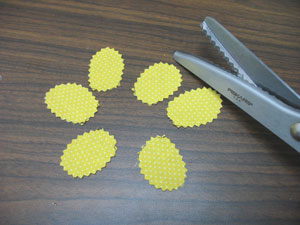
**These designs can be used with any fabric you like from craft felt to quilter's cotton. We used pinking shears to cut some of our fabric pieces. This gives them an interesting texture and helps prevent fraying on woven fabrics.
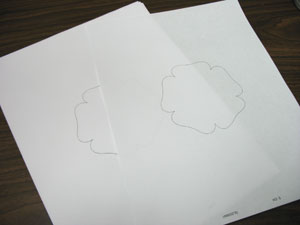
First we will cut the applique pieces to the correct shape. We will be embroidering "crafty cut applique" designs on the cover and sides of the canister. When you download a crafty cut applique design you will see two files. One starts with a "Y" followed by 4 numbers - this is the embroidery file. The other file ends with "_DL" and that stands for dieline. Print the dieline files at full size using embroidery software.
If you don't have embroidery software, keep reading! Alternative instructions will be shown later.
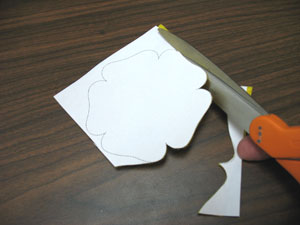
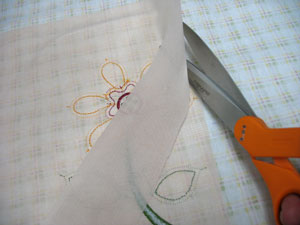
Lay the paper template on top and cut out the shape. You may spray the back of the paper template with a bit of adhesive to help hold it in place while you cut. We are using a regular scissors for this piece. This gives the applique fabric smooth clean edges.
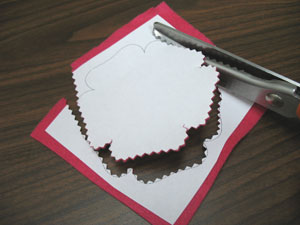
You may also use pinking shears to cut out the applique fabric. This gives the fabric a fun, textured edge and works great with woven fabrics such as quilter's cotton. Simply cut along the line of the template as we demonstrated earlier

If you do not have embroidery software or cannot print from it, you can embroider the dieline file directly onto the fabric. To do this, hoop the fabric tightly in the hoop, no need for stabilizer.
Load the dieline file (the file that ends with "_DL") and attach the hoop to the machine. Embroider the dielines directly onto the fabric.
Then, unhoop the fabric and cut out the shapes.
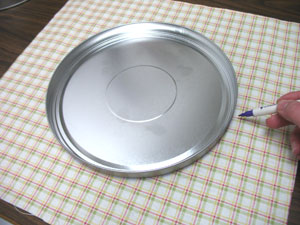
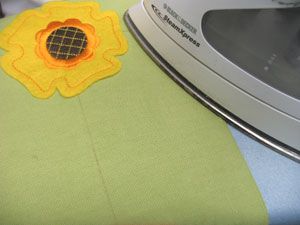
Now we will prepare the fabric for the cover of the canister. Lay the cover on top of the lightweight print canvas, with the top of the cover facing the right side of the fabric, and trace the cover with an air-erase pen (or other marking tool).
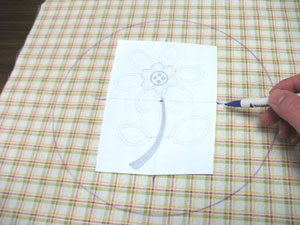
Create a paper template of the design by printing it at full size using embroidery software. If you don't have embroidery software, you can cut a piece of paper the shape and dimensions of the design to help with placement and centering.
Lay the template in the center of the circle on the fabric. To perfectly center the design, measure equal distances between the center of the design and the sides of the circle. Also, measure equal distances between the center of the design and the top and bottom of the circle. Then, poke a hole in the center of the template and mark the fabric. Also, mark the horizontal and vertical axis points.
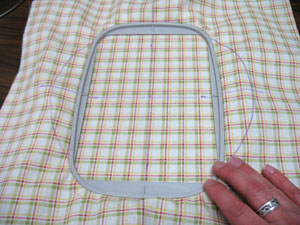
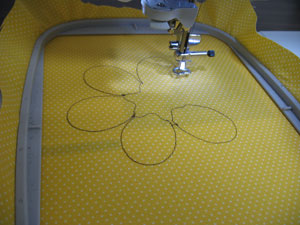
Remove the template and draw lines to connect the axis points. Then, spray a piece of cutaway stabilizer with temporary adhesive and smooth the fabric on top. Hoop the fabric and stabilizer together by aligning the marks on the hoop with the lines on the fabric.
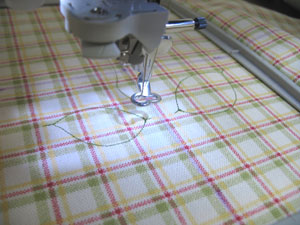
Attach the hoop to the machine and load the embroidery design (the file that is named with "Y" followed by 4 numbers). Embroider the design. The first thing that sews is another dieline. After the dieline has sewn, stop the machine.
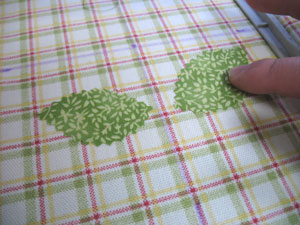
Spray the back of the corresponding fabric shape with a bit of adhesive and lay the fabric right inside the shape. The dielines have small "tabs" wherever there is a point or corner on the shape. Align the points or corners of the fabric piece with the tabs on the dieline.
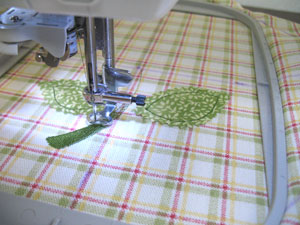
Continue with the design. The next thing that will sew is a tack down stitch which will sew about 1/4 inch from the outer edge of the fabric piece, this will bind the fabric piece to the hooped fabric.
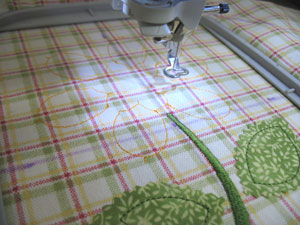
Continue with the design. Some crafty cut applique designs have more than one applique piece. Watch for a note on the color change sheet that says "dieline". After each dieline sews, stop the machine. Add the fabric pieces as you did earlier - spray the backside of the fabric piece, align it with the dieline, and continue sewing. Finally, other elements of the design will sew such as the detail in the center of the flowers.
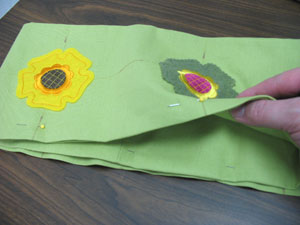
Once the design has finished sewing, carefully trim away the excess stabilizer on the back of the embroidery.
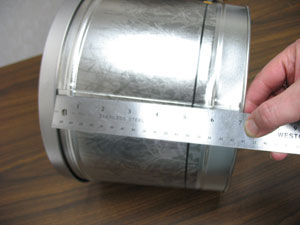
Now we will prepare the fabric for the sides of the canister. With the lid on the canister, measure the side of the canister from the bottom edge up to the bottom edge of the lid.
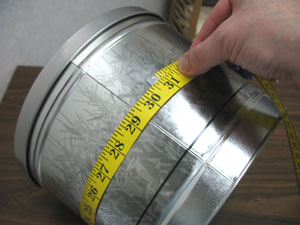
Also, measure around the widest part of the canister.

Using these measurements, add one inch to each dimension for seam allowances (ours is 7 inches high by 32 inches wide so our final measurement is 8 inches high by 33 inches wide. Cut a piece of canvas using these dimensions. Then, measure in 1/2 inch on the corner of each short end and draw a line to connect the marks. These lines represent seam allowances.
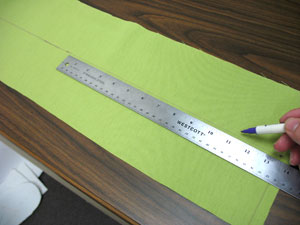
Measure the lines you just drew, divide by two, and mark the lines. Then, draw a line down the length of the fabric in between the two marks. This line will be used to position the embroidery designs.
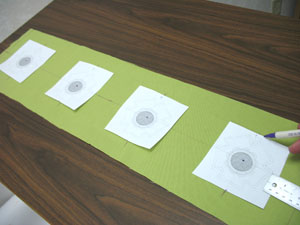
Create paper templates of the designs as you did in earlier steps, poke holes in the centers, and align the centers with the line on the fabric. Position the middle designs with equal distances in between each design. Then, take the measurement in between the middle designs and divide by two. Use this measurement to space the side designs from the lines on the short ends. Then, mark the axis points.
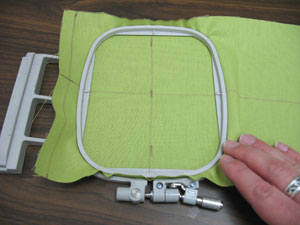
Remove the templates and draw lines to connect the axis points. Spray a piece of cutaway stabilizer with adhesive and smooth the fabric on top. Hoop the fabric and stabilizer together by aligning the marks on the hoop with the lines on the fabric. Embroider the designs as you did before, re-hooping the designs as you go.
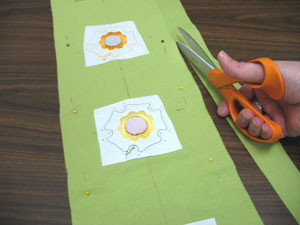
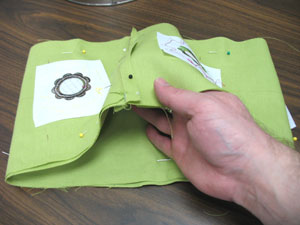
When the designs have finished, carefully trim away the excess stabilizer. Then, lay the embroidered fabric on top of another piece of canvas. Pin in place and cut out the shape - this is the back of the side piece.
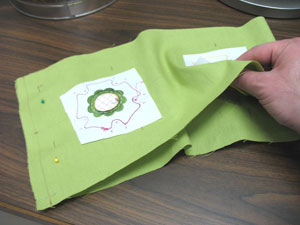
Remove the pins from the front and back side pieces then fold each piece with the short ends together, right sides facing. Pin in place and sew a 1/2 inch seam along the pinned edges only.
Press the seams flat with an iron. Then, insert the back piece inside the front piece with the seams aligned and the right sides together (the wrong side of the front piece should face out). Pin in place and sew a 1/2 inch seam along one side only. Be sure to leave one entire side open for turning.
Turn the fabric right side out and press the seam.
Turn the raw edges of the open side in 1/2 inch and press in place.
Align the pressed edges of the open side together and pin in place. Then, top stitch a 1/4 inch seam along each side - the open side and the seamed side.
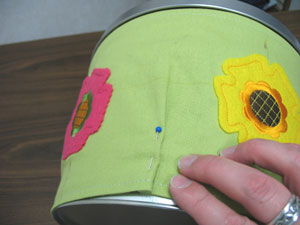
Now, slide the side piece over the canister. To fit the fabric perfectly, at the bottom edge of the canister, pinch the fabric (in equal amounts) to form pleats in between each design. Pin in place and then remove the fabric. Tack the pleats in place with a few stitches - follow along the existing top stitch at the bottom of the fabric.
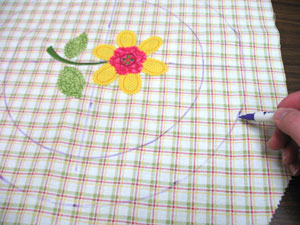
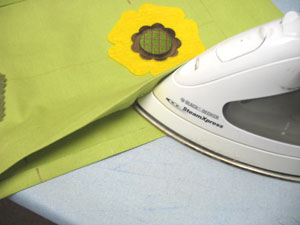
Now we will cut the fabric for the cover of the canister. Measure and make marks around the existing circle on the embroidered cover fabric about 2 inches out. Then, draw a line connecting the marks.
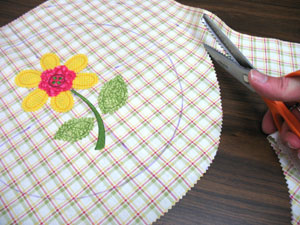
Cut the fabric along the line you just drew using pinking shears.
Align the fabric on top of the canister cover using the original circle marked on the fabric. Then, add drops of hot glue, in four spots around the circle, on the side of the cover. Press the fabric in place.
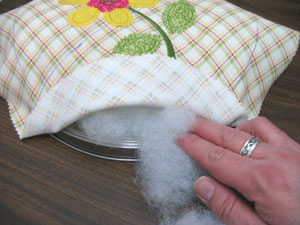
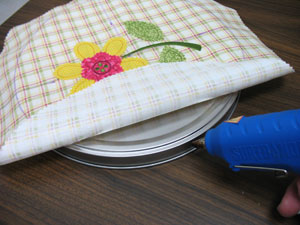
Add polyester fiberfill between the fabric and the top of the cover, stuff the fiberfill through the openings left in the fabric.
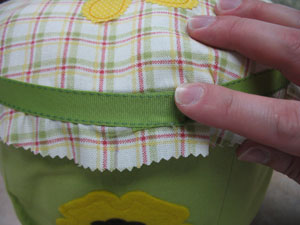
Add more glue around the edges of the cover and press the fabric in place. Then, wrap ribbon around the edge of the cover on top of the fabric. Leave about one inch excess at each end of the ribbon. Then, glue one end of the ribbon in place onto the fabric. Finally, fold the other end of the ribbon in about 1/2 inch and glue that end in place on top of the start of the ribbon.
Your crafty container is now complete!


