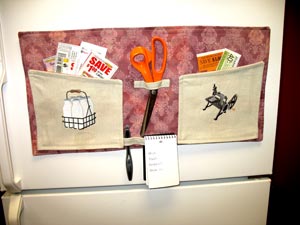
Keep coupons and clippers easy-to-access in this unique organizer!
Made with durable canvas and lightweight cotton, this clip and save coupon organizer keeps scissors, pens, and a notepad close at hand.
Read on for free project instructions!
Supplies
Supplies Needed:
**1/4 yard twill or lightweight canvas fabric
**3/4 yard print cotton
**Medium weight cutaway stabilizer
**Air-erase pen (or other marking tool)
**Temporary spray adhesive (we use KK100)
**Button magnets (or plastic or metal rings)
**Hot glue and glue gun
**String and small safety pin
Designs used:
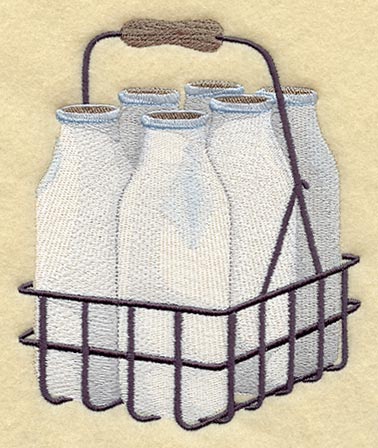
Milk Bottles - Sm
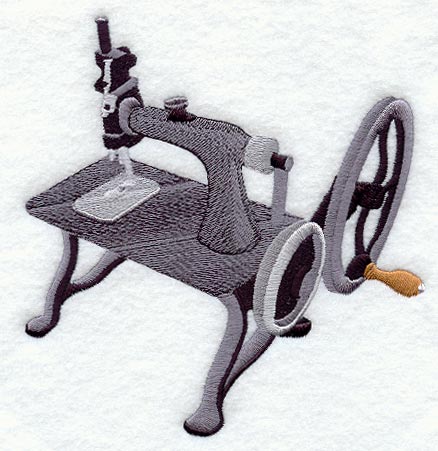
Sewing Machine - Sm
These designs are also available in the following design pack:
A Antique Design Pack - Sm
Finished size:
The finished size of this clip and save coupon organizer is 22 1/2 inches wide by 11 1/2 inches high.
Designs Used
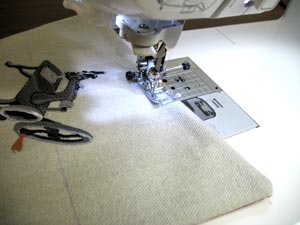
First we'll prepare the front pocket fabric for the embroidery.
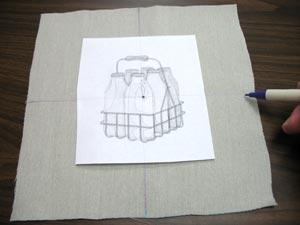
Cut two pieces of the twill to 9 inches by 9 inches. Then, using an air-erase pen (or other marking tool), measure and mark the center of each side by measuring and dividing by two. Draw lines connecting the center points. Where the lines meet is the exact center and the edge of the fabric.
Next, create a template of the design by printing it at full size from embroidery software. Poke a hole in the center of one of the templates and align it with the center point on the fabric. Make sure that there is at least one inch of space between the edges of the design and the outer edge of the fabric.
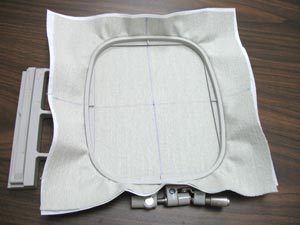
Cut a piece of medium weight cutaway stabilizer to the size of the fabric. Spray the stabilizer with temporary adhesive and smooth it on the back of the fabric. Hoop the fabric and stabilizer together, aligning the marks on the hoop with the lines on the fabric.
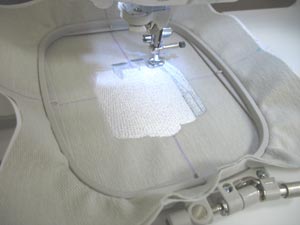
Attach the hoop to the machine and load the design. Move the hoop so that the needle is right over the center point on the fabric. Embroider the design.

Embroider the other pocket fabric just as you did with the first.
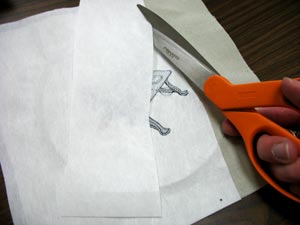
After the designs have finished, unhoop the fabric and trim away the excess stabilizer. Leave about 1/2 inch of stabilizer around the edges of the designs.
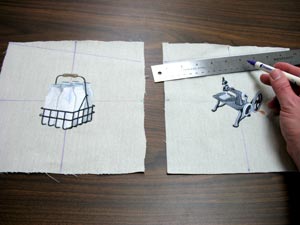
We angled the top edge of the pockets.
To do this, measure 1 1/2 inch down from the inner top corners. Then, draw a line connecting the mark to the top corner on the opposite side of the fabric.
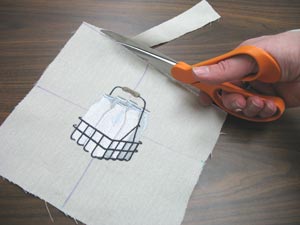
Trim along the lines on each piece of fabric.
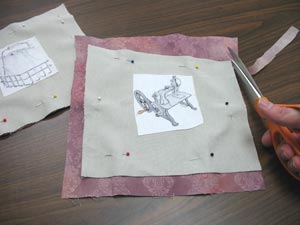
Next, lay the embroidered pocket pieces on top of the print cotton, right sides together, and pin in place. Trim around the shapes.
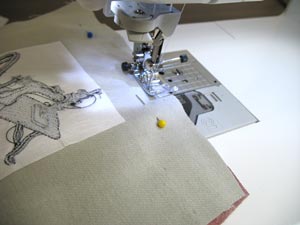
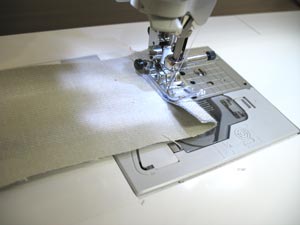
Sew a 1/4 inch seam around the side and top edges, leave the bottoms open for turning.
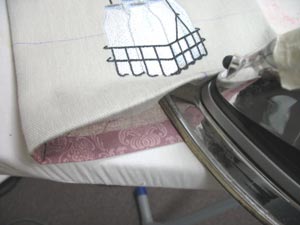
Turn the pockets right side out and press the seams. Also, turn the bottoms in 1/2 inch and press in place.
Top stitch a 1/2 inch seam along the top edges of each pocket.
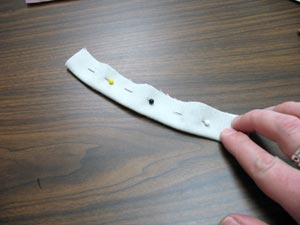
Now we will prepare the notepad and pen loop.
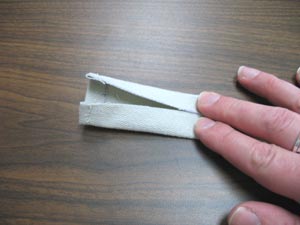
Cut a piece of twill to 7 inches by 2 inches. Fold the fabric with the long sides together with the right sides together. Pin in place.
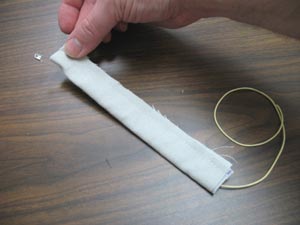
Sew a 1/4 inch seam along the open long side only. Then, tie a small length of string to a small safety pin and work in through the opening of the fabric. Attach the pin to the end of the fabric and pull the fabric turning it right side out.
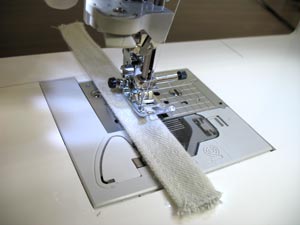
Sew a 1/8 inch seam along both long sides.

Now we will add the pockets and the notepad loop to the main section of the organizer.
Cut a piece of the print cotton to 24 inches by 12 1/2 inches and lay it right side up. Lay the pockets 1 inch from the outer edges and 3/4 inches from the bottom edge. Pin in place.
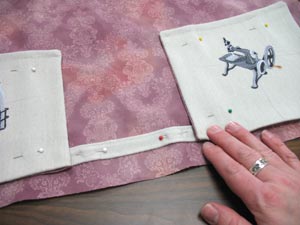
Add the notepad loop by aligning it with the bottom edges of the pockets. Tuck the ends of the loop under the inner bottom corners of the pockets and pin in place.

Sew a 1/2 inch seam around the sides and bottom of each pocket. Do not sew the top edges of the pockets.
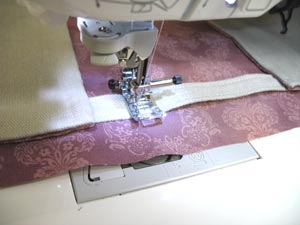
Then, to create a space for a pen, sew a seam on the notepad loop about 1 inch from the inner edge of the left pocket.
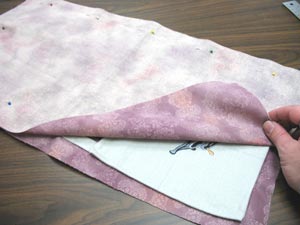
To prepare the back fabric, cut another 24 inch by 12 1/2 inch piece from the print cotton. Lay the front piece (with the pockets) right side up and align the back piece on top with the right sides together. Pin in place and sew a 1/2 inch seam around the top, right side, and bottom edges. Leave the left side open for turning.
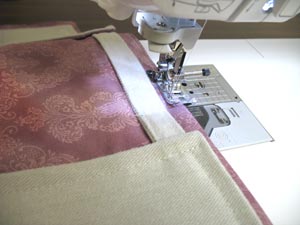
Turn the organizer right side out and press the seams. Also, turn the open left side in 1/2 inch and press in place. Top stitch a 1/4 inch seam around the sides and top edges and sew a 1/8 inch seam along the bottom edge.
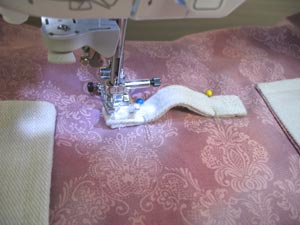
To prepare the scissors loop, cut a 4 1/2 inch by 1 1/2 inch piece of twill. Fold the short ends over 1/2 inch to the wrong side and sew them in place with a 1/4 inch seam.
Then, fold the long sides in to meet in the middle of the wrong side of the fabric. Fold the fabric again bringing the long folded sides together.

Sew a 1/8 inch seam along each long side.
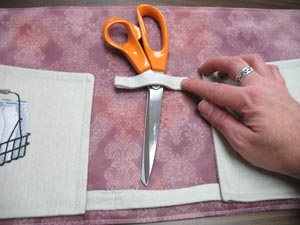
Next, lay the scissors in between the pockets and position it where you want it. Lay the loop over the scissors just below the handles.
Remove the scissors and pin the loop in place. Sew the ends of the loop to the organizer.
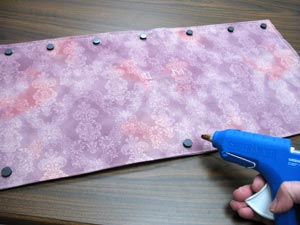
Add the button magnets to the backside of the organizer by hot gluing them in place.
Place a magnet in each corner about 1/2 inch from the edges. Also, place a few more magnets along the top edge and one on the middle bottom edge. If the organizer slips after adding it to your refrigerator, simply add more magnets to strengthen the hold.
If you would like to hang the organizer, you can hand sew plastic or metal rings to the top edge (one on each top corner and one on the middle of the top edge).


