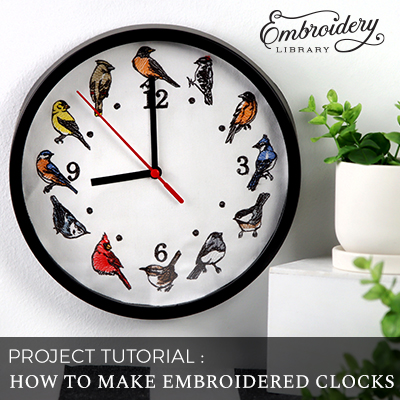
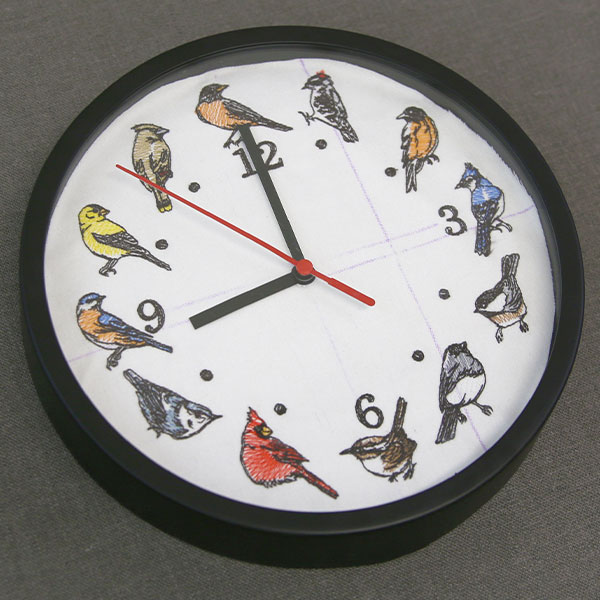
Turn any clock into a beautifully machine embroidered masterpiece with specially digitized designs just for that purpose! This project can be done with nearly any clock imaginable. Our helpful tips and tricks below will walk you through the process for working with both split clock designs and standard clock designs created for clock faces.
Supplies
- Clock
- Light to Medium Weight Fabric
- Medium Weight Cutaway Stabilizer
Tools
- Temporary Spray Adhesive (such as Gunold KK100)
- Permanent Spray Adhesive or Double-Sided Tape
- Scissors or Seam Ripper
- Screwdriver (if needed to disassemble clock)
Designs Used

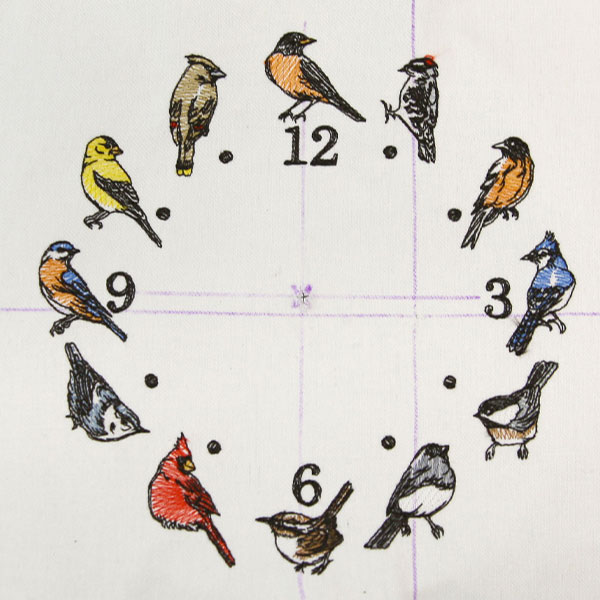
If you want to embroider a large clock face, but your hoop won't accommodate the size of the design, then you can use editing software to split the design, and stitch it in multiple hoopings. Some clock face designs at the Embroidery Library are already split into a right side and a left side. If a clock design is split, the word "split" will be in the design's name (e.g. "Bluebird Clock - Split").
For split designs, dimensions of the left side and the right side are given in the product description and two files specifying the right and left side will be included. Click here to see all of the split clock designs. If a clock does NOT have the word "split" in its name, then the design is not split.
When choosing a clock to embroider, take the largest measurement of the design that you are stitching and add 1/2" - 1" to the measurement. The clock that you choose should have a diameter of that length or larger.
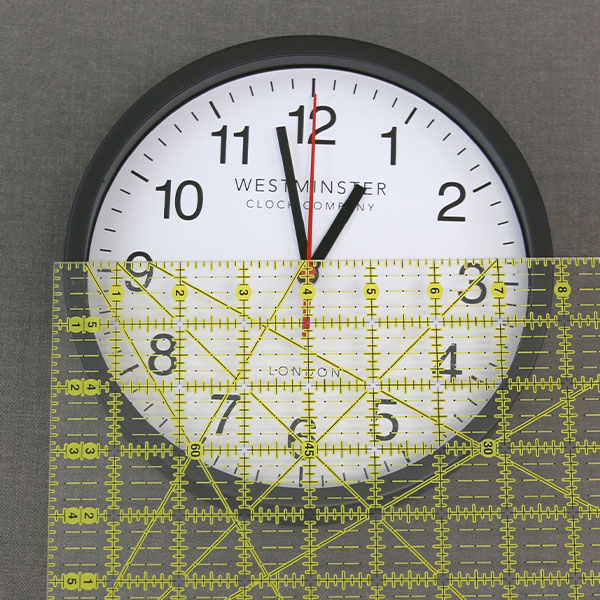
First, measure the face of the clock to determine which size of the design you will need. Ours had an 8" face and required the second largest size of this design.
To start, spray the backside of your fabric and smooth it onto a piece of medium weight cutaway stabilizer.
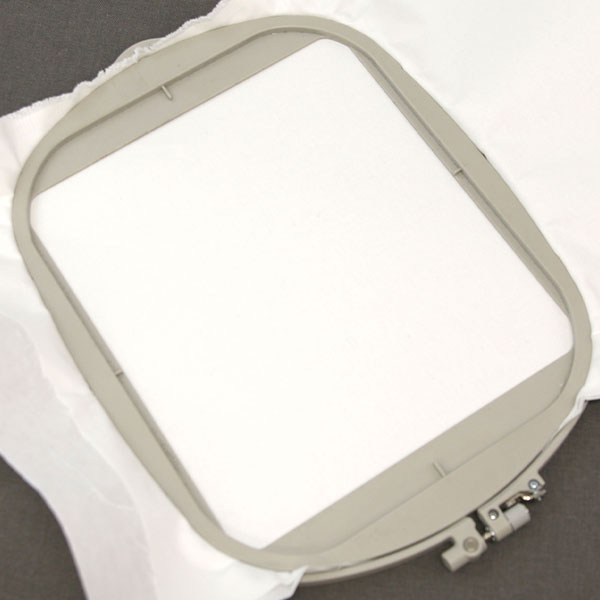
Hoop your fabric and stabilizer firmly. Make sure it is nice and taut with no wrinkles.
If you're working with a clock design that is not split, then embroider the design as usual and skip the next steps labeled 1 to 5. If you are working with a split clock, then follow the next five steps.
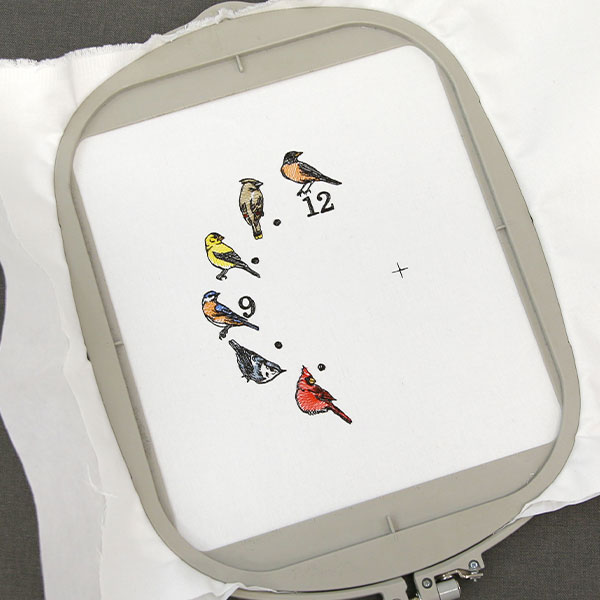
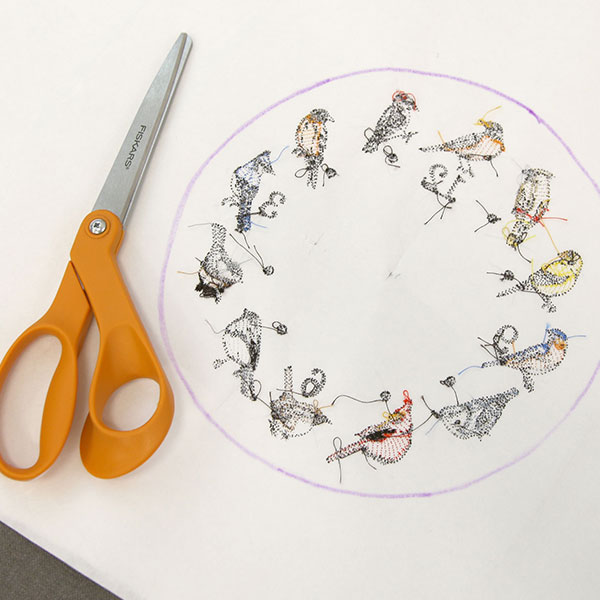
1. Embroider the left side of the design (labeled A). At the end of the design a cross hair will be stitched. This will be used later for aligning the right side of the design.
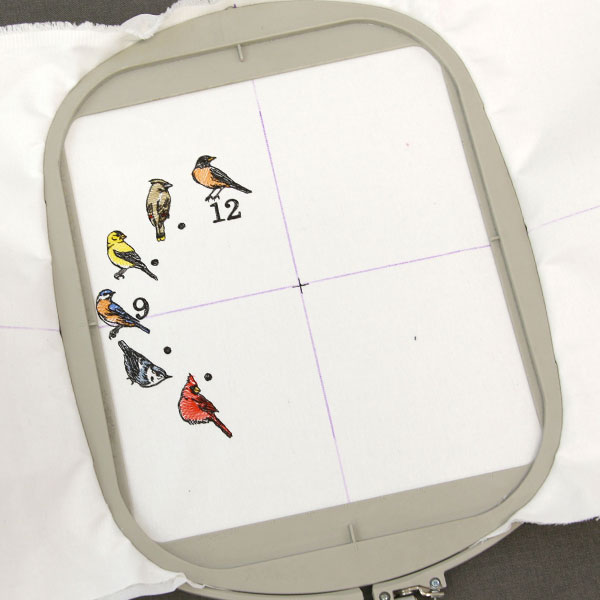
2. Remove the hoop from the machine and fabric and stabilizer from the hoop. Before re-hooping the fabric, extend the crosshairs with an air erase pen to the edges of your fabric. Re-hoop the fabric and stabilizer with crosshairs centered in the hoop, using the extended lines to center the design.
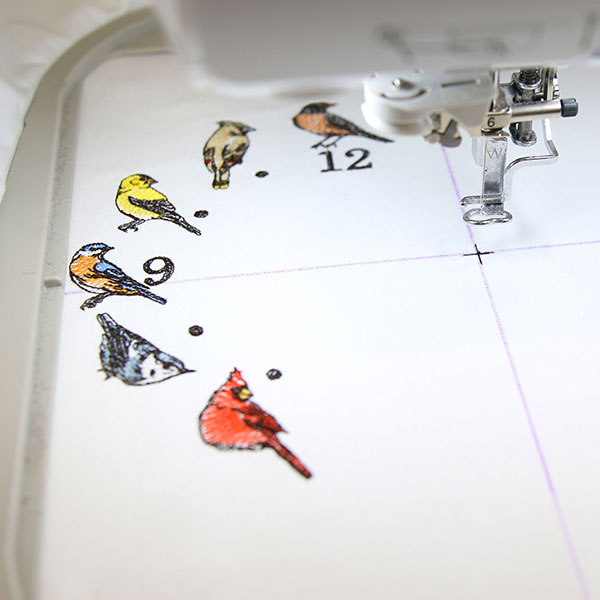
3. Attach the hoop to your machine and load the right side of the design (Labeled B). Ensure that you are centered over the hoop by moving the needle over the center of the crosshair so that it's perfectly aligned.
4. Once the right side of the design has started embroidering, a crosshair will sew directly over the existing crosshair. After this, the rest of the design will finish embroidering as usual.
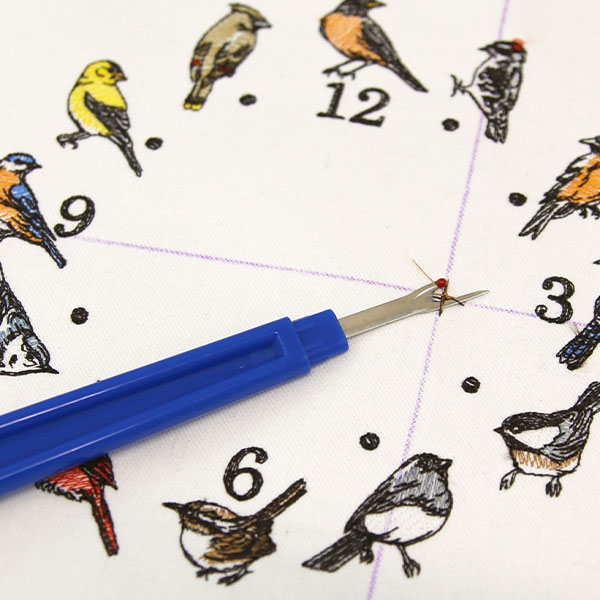
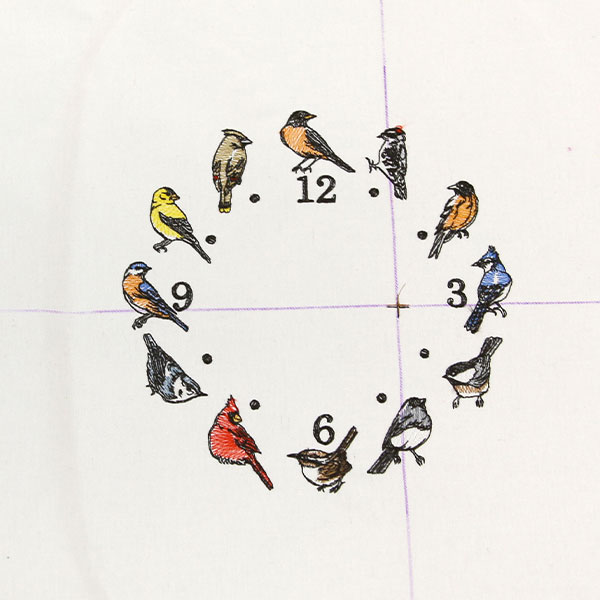
5. Once the embroidery is finished, gently remove the crosshair stitching by cutting away with thread scissors or a seam ripper.
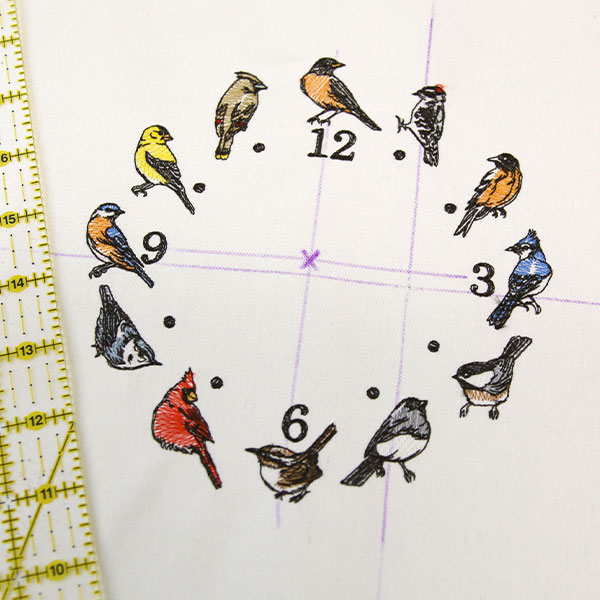
Next, mark the center of design both horizontally and vertically to create a new centered crosshair. Do this by measuring the width of the design, divide by two and make a mark. The center mark shown is made with an X.
Once the new crosshairs are marked with a fabric pen, cut a small hole that will allow the stem of the clock to poke through. Cutting away a small amount of fabric around the hole may be necessary to ensure the clock hands will fit back on the stem of the clock.
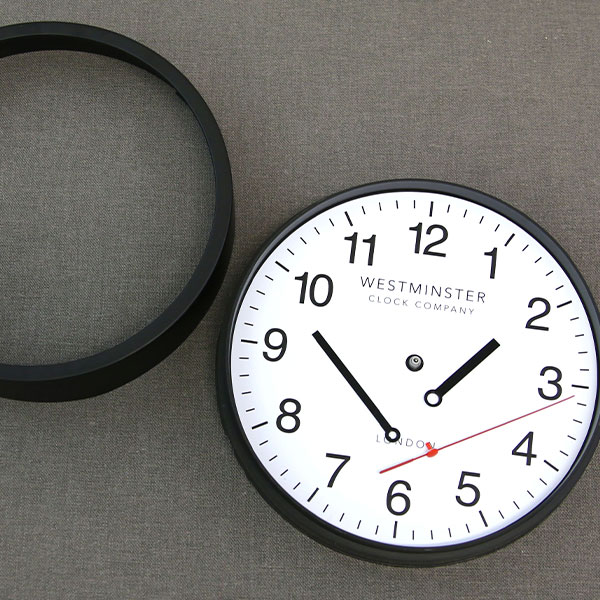
To begin prepping the clock, take the back of the clock out using the tools necessary. Our clock required us to gently push the side frame and glass forward to disassemble.

Once the clock face and glass is separated, gently apply pressure to pull the clock hands straight away from the face being careful not to bend the clock hands.
Align the hole in the fabric, right side up, with the stem of the clock so that the stem pokes through the hole in the fabric.

With the stem still through the hole in the center of the design, flip the clock and fabric over to the back side and trace the shape of the clock face.
Remove the fabric from the clock and cut out the circular shape in the fabric. Each clock is different so more fabric may need to be trimmed and adjusted to fit the face of the clock.
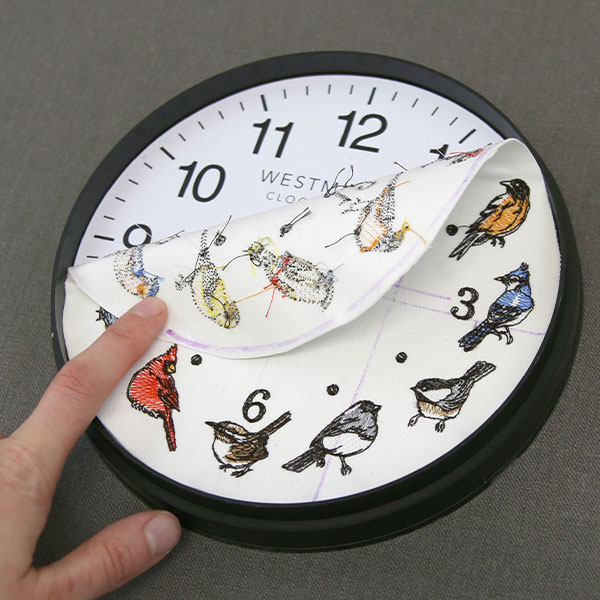
Using double-sided tape or permanent spray adhesive on the back side of the circular embroidered fabric piece, smooth it over the old clock face.
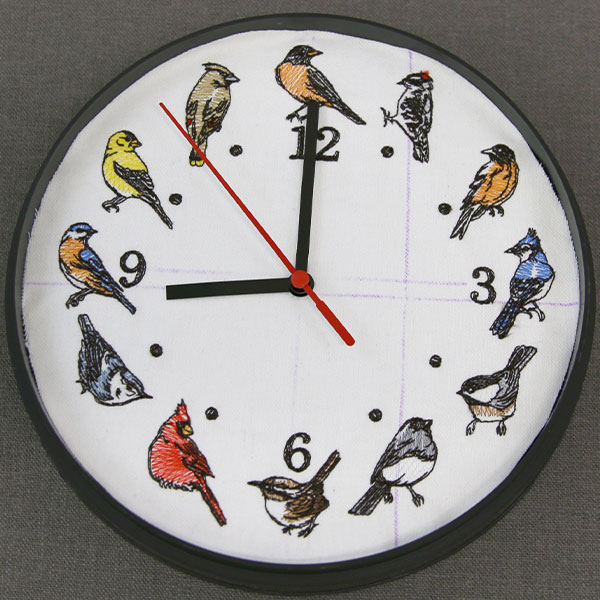
Carefully reattach the hands back onto the clock.
Place the clock face back into the outer frame and securing it back into place.


