SALE EXTENDED! Treat yourself to 70% off Storewide! Click the deals tab for details.
 SALE EXTENDED! Treat yourself to 70% off Storewide! Click the deals tab for details.
Take an ordinary crewneck sweatshirt and convert it to an appealing V-neck shirt. Just a few quick steps and some ribbing from the fabric store make this fashionable conversion a snap! Or, you can use ribbing from another shirt for an even thriftier project.
These instructions are for a man's shirt. The ribbing overlaps left over right. For a women's shirt, ribbing overlaps right over left.
Supplies
Supplies needed:
** Sweatshirt
** Seam ripper
** 1 yard of 2-1/2 inch-wide ribbing
** Medium-weight cut-away stabilizer
** Spray adhesive
** Air-erase pen
** Measuring tape
Design used:
** Classic Steam Engine
Designs Used
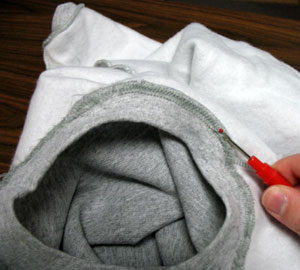
Use a seam ripper to carefully remove the stitching of the existing collar. Then remove the collar.
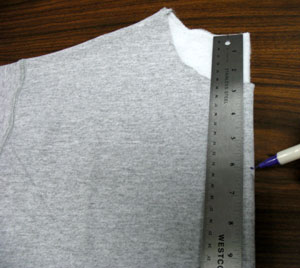
Fold the shirt in half, back sides together. Align the shoulder seams to make sure the fold is even.
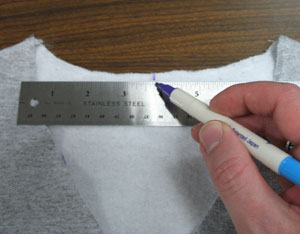
For a woman's shirt, measure 5 inches from the neckline. For a man's shirt, measure 6 inches.
Mark with an air-erase pen.
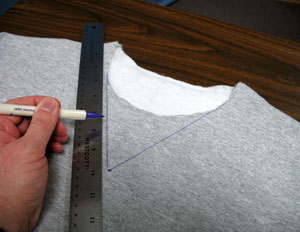
Lay the shirt flat, front-side up. Draw a line from each side of the neckline to the center mark. This creates the "V" shape.
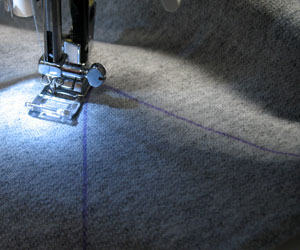
Sew a stay-stitch along both sides of the bottom 2 inches of the "V" shape, stitching
1/2 inch away from the lines of the "V".
These stitches will prevent the fabric from stretching or tearing while finishing the conversion.

Cut out the "V" shape from the shirt.
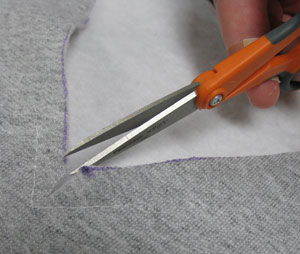
Cut a 1/4 inch slit in the bottom of the "V". This slit allows the seam allowances to fold at the point.
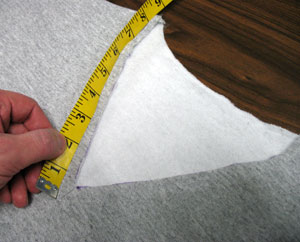
Use a measuring tape to determine how much ribbing is needed for a new collar. Start at the bottom of the "V" and hold the measuring tape up on its edge. Measure around the entire opening including the back of the shirt, and the other side of the "V".
This measurement is the length of the ribbing. Add 2 inches to be certain there is enough ribbing for the entire opening. The opening on our shirt is 27 inches, so our total ribbing is 29 inches.
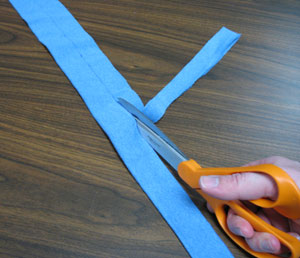
Our ribbing was already folded because we cut it from the bottom edge of another sweatshirt. We cut our folded ribbing to 1-1/4 inches wide.
If you are using new ribbing, lay it flat, measure the desired length and cut a strip that is
2-1/2 inches wide. Fold the ribbing lengthwise and press.
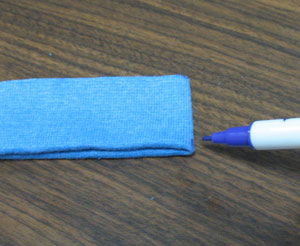
Fold the ribbing widthwise and mark the center. This mark will be used to align the center.
Measure between the top sides of the neckline, and mark the center of the back of the shirt.
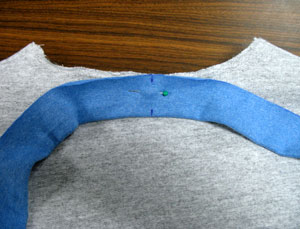
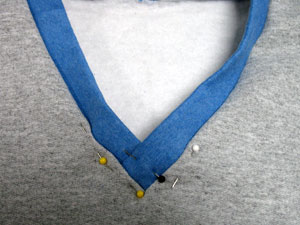
To add the ribbing to the shirts, lay the shirt backside facing up. Align the center mark on the ribbing with the center mark on the back of the shirt, keeping raw edges together. Pin in place.
Working from the center point in the back, pin the ribbing along one side of the opening until it reaches the bottom of the "V".
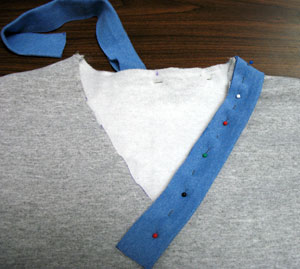
For a man's shirt, pin the ribbing starting on the right side of the opening. For a woman's shirt, pin the ribbing along the left side of the opening.
This will allow the ribbing to overlap properly.
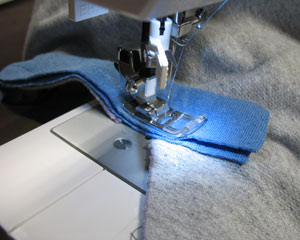
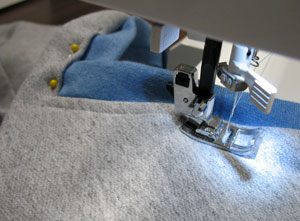
Starting at the back of the shirt, sew a 1/4 inch seam along the edge of the opening until you reach the bottom of the "V".
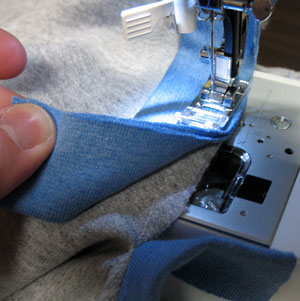
Pin the other half of the ribbing to the other side of the opening. Starting at the back of the shirt, stitch a 1/4 inch seam along the edge of the opening. Stop 1-3/4 inches away from the bottom of the "V". This will allow space for the ribbing to be overlapped.
Lay the second half of the ribbing under the first half. Turn the remaining raw edge of the shirt into the ribbing and pin all in place.
Turn the layer of shirt fabric and ribbing under and press it flat to the shirt. Top stitch on the shirt, around the entire collar, with an 1/8 inch seam.
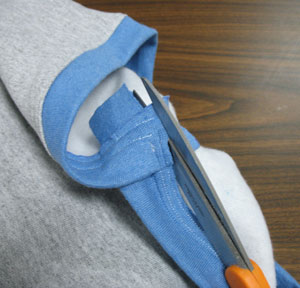
Trim the excess ribbing at the bottom of the "V".
For extra personalization, we are embroidering a design on the left chest.
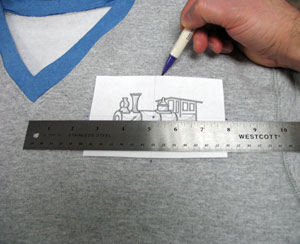
Print a full-size paper template of the design. Trim around it for easier placement. Position the design where you want it (generally 7 to 9 inches down from the shoulder seam). Center the design between the side seam and the collar -- or about 4 to 6 inches away from the bottom of the "V". Poke a hole in the center of the template and mark it on the shirt. Mark the horizontal and vertical axis points as well.
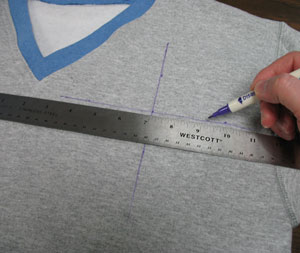
Remove the template and draw lines connecting the marks. Spray a piece of medium weight, cut-away stabilizer with adhesive and hoop it with the shirt. Align the marks on the hoop with the lines on the shirt. Attach the hoop to the machine, load the design, align the needle directly over the center point and embroider the design. When the design is finished embroidering, carefully trim away excess stabilizer.
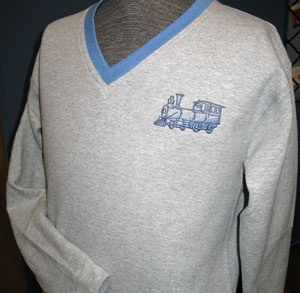
And there you have it! A fresh, new look for a favorite shirt.


