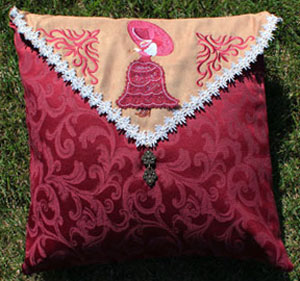
Embroidered pillows are a fun and fabulous way to add color and style to home decor. An envelope pillow does that and more, with the pretty decorative border, the dimension of the clasp, and the pillow cover's interesting shape.
Add embroidery designs you love, and an envelope pillow becomes a conversation piece as well as a lovely addition to home decor.
Read on to learn how to make an elegant envelope pillow!
Supplies
Supplies Needed:
**18" pillow form
**5/8 yard fabric (for back, front flap, and inner lining---I used faux suede)
**5/8 yard fabric (for front, and inner lining--I used home decor fabric)
**Medium weight cutaway stabilizer
**Temporary spray adhesive
**Air-erase pen
Supplies Needed Continued:
**1 yard 3/4" wide decorative trim
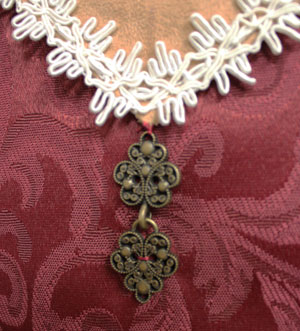
**Decorative metal clasp (I found mine in the button section at Joann's)
**Fabric glue
Designs used:
I used designs from the small size of the Light and Lacy Umbrella Girl Design Pack. See the Light and Lacy Umbrella Girl for more information on how to embroider these designs.
The corner designs are the medium size of the Damask Corner.
Designs from the Intricate Ink Dragons Design Pack or from the Flowers in Flight Design Pack would be beautiful on an envelope pillow as well. Be sure to check the dimensions of your pillow to match the design size.
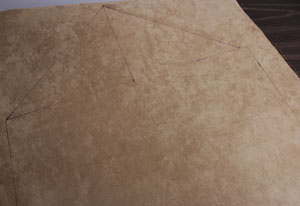
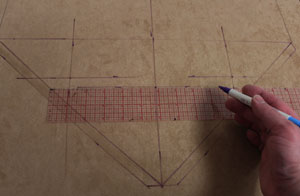
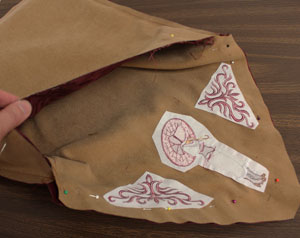
First, to prepare the fabric for the back and front flap of the pillow, using an air-erase pen or other marking tool, first draw a
Draw lines connecting the top of the line down to the top corners of the rectangle shape; the bottom rectangular shape is the back of the pillow, and the top triangular shape is the front flap.
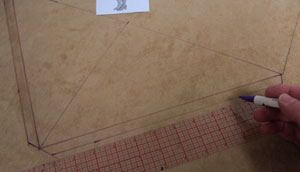
Measure and mark 1/2" out from the side edges of the triangular shape and draw lines connecting the marks.
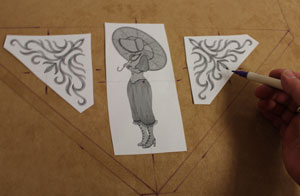
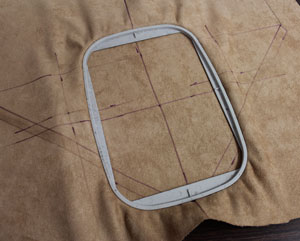
Create paper templates of the designs by printing them at full size using embroidery software. Arrange the templates within the front flap area leaving at least one inch between the outer edges of the designs and the inner lines of the side edges of the shape (the outer edges of the design can butt right up against the top line).
Poke holes in the center of the templates and mark the fabric. Also, mark the horizontal and vertical access points.
Remove the templates and draw lines connecting the marks.
Spray a piece of medium weight cutaway stabilizer with temporary adhesive and smooth the fabric on top. Hoop the fabric and stabilizer by aligning the marks on the hoop with the lines on the fabric. Attach the hoop to the machine and load the first design. Move the hoop so that the needle is aligned with the center point on the fabric and embroider the design.
When the design has finished, trim away the excess stabilizer on the backside of the embroidery. Repeat the hooping and embroidering process for the remaining designs.
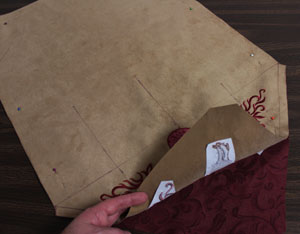
Next, cut out the shape. To prepare the fabric for the large piece of the inner lining, lay the embroidered piece on top of the fabric, pin in place, and cut out the shape.
To prepare the fabric for the front, cut a piece of fabric to
Pin in place and sew a 1/2" seam along the side and bottom edges only. Leave the top edge open. Turn the fabric right side out.

To prepare the remaining fabric inner lining fabric, cut a piece of fabric to
Insert the outer shell section inside the inner lining, right sides together, and align the side seams and the edges of the fabric. Pin in place and sew a 1/2" seam along the entire outer edge of the flap.
Also, sew a 1/2" seam along the top edge of the front piece leaving about
Press the seams with an iron and then turn the fabric of the opening in 1/2" and press. Top stitch a 1/4" seam along the entire outer edges of the flap and the top edge of the front.
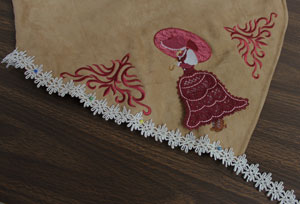
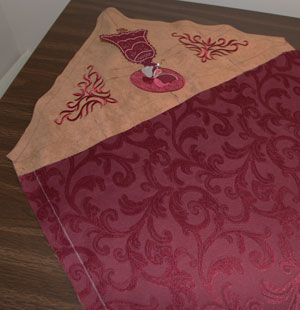
To add the trim, pin the trim in place along the outer edge of the flap. Leave about one inch of excess at each end.
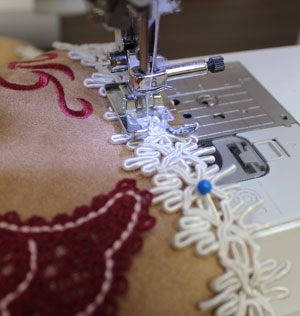
Sew the trim in place, then, tuck the ends of the trim inside the top of the flap and glue in place.
Insert the pillow inside. Fold the flap down at the front of the pillow and sew the metal clasp in place at the bottom point of the flap.


