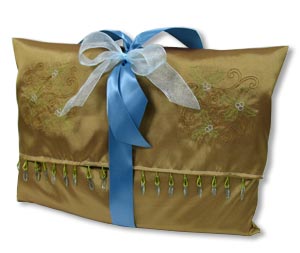
There's no need for a plain old box when you can wrap a gift in a stylish, custom-sized, reusable gift bag! It's wonderful for any occasion and perfect for hard-to-wrap gifts.
For fast work, embellish it with quick-stitching vintage redwork embroidery, and you'll have time to personalize a nifty, gifty bag for everyone on your list!
Supplies
Supplies needed:
- 1/2 yard fabric (size varies according to the size of the gift)
- Tear-away stabilizer
- Masking tape
- Beaded trim
- Ribbon
Designs Used:
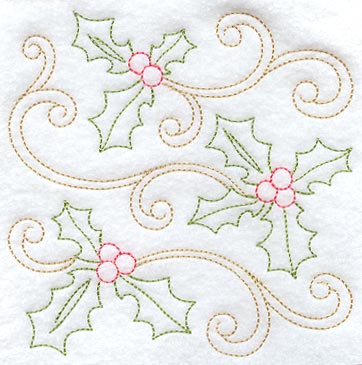
Holly Square (Redwork) - Sm
Designs Used
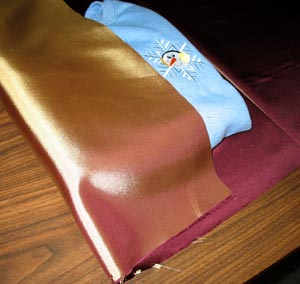
First, lay the fabric wrong side up. Place the gift in a corner of the fabric. Wrap the fabric on top of the gift, covering about two-thirds of it. Also, position the gift about 2-1/2 inches from the bottom edge of the fabric.
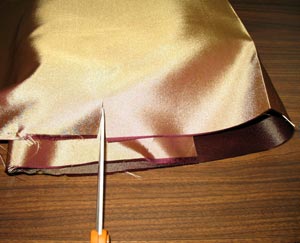
Wrap the other side of the fabric on top of the gift. Make a small cut about 3 inches away from the overlap with the bottom fabric.

Unfold the fabric and lay it flat. Leave the gift in place. Measure and mark 2-1/2 inches from the top of the gift on each side.
Draw a line connecting the marks above the gift. Also, draw a vertical line from the cut in the fabric up to the horizontal line above the gift. Then cut the fabric along the lines.
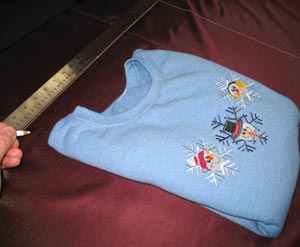
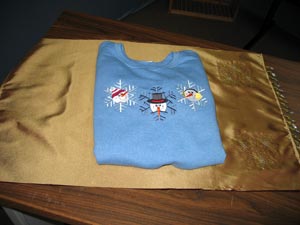
We are wrapping a woman's large size sweatshirt and our fabric measures 17 1/2 x 28 inches.
Fold the fabric over the top of the gift.
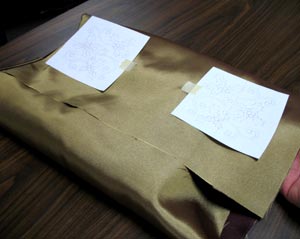
Use embroidery software to print paper templates of the designs at full size. Trim around the templates for easier placement.
Position the designs on the fabric and tape them in place with masking tape.
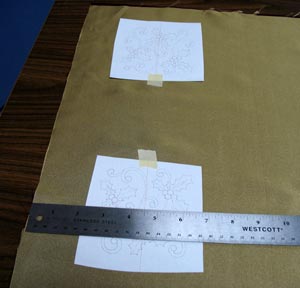
Remove the gift and lay the fabric flat.
For perfect placement of the designs, measure from each edge of the fabric to the center of one of the designs. Then match the measurements to the second design and reposition.
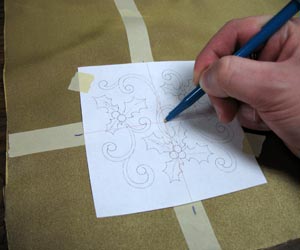
Place a small piece of masking tape right under the center point of each design.
Lay long pieces of tape out from the horizontal and vertical axis lines of each design.
Poke a hole in the center of the paper template and mark the center point on the tape. Mark the horizontal and vertical axis points as well.

Remove the templates and draw lines on the tape by connecting the axis marks. These lines will be used for hooping.
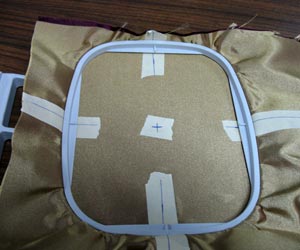
Hoop the fabric with a piece of tear-away stabilizer. Align the marks on the hoop with the lines on the tape.
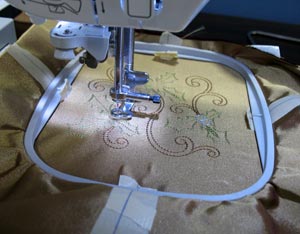
Place the hoop into the machine, load the design, align the needle directly over the center point on the fabric, remove the masking tape, and embroider the design.
Repeat the hooping, aligning, and embroidering process for the second design.
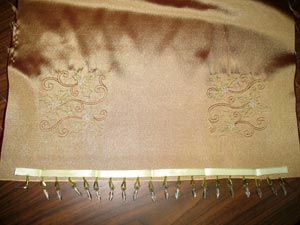
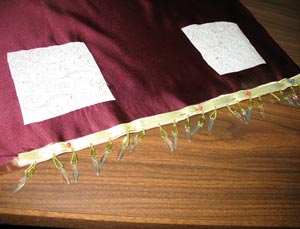
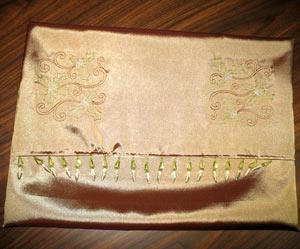
We added beaded trim for extra embellishment. You can add any craft accessory.
To add the beads, cut a length of trim along the end of the fabric. Cut the trim about 1 inch short on each end.
Lay the fabric wrong side up. Fold the end of the fabric over about 1/4 inch. Add the trim to the top of the fold and pin in place.
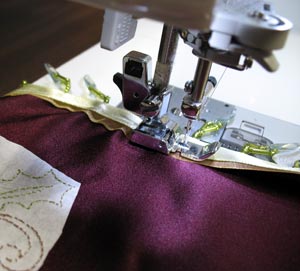
With a zipper foot, sew the trim to the fabric.
Then, fold the other end of the fabric over 1/4 inch and hem in place.
To fold and sew the pouch together, lay the fabric right side up and place the gift in the center of the fabric.
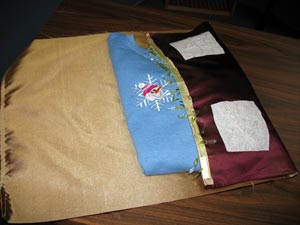
Fold the embroidered/beaded end of the fabric on top of half of the gift.
Fold the other hemmed end of the fabric over the gift. Pin the top two layers in place.
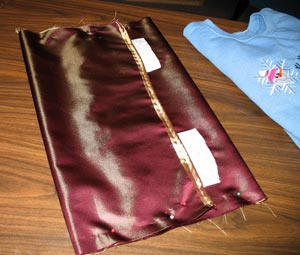
Remove the gift and with the fabric flat, pin each side together.

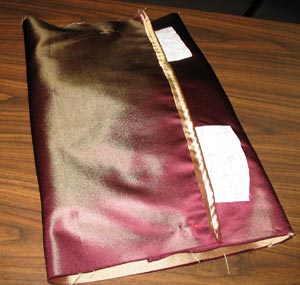
Sew each side closed with a 3/8 inch seam.
Turn the pouch right side out.
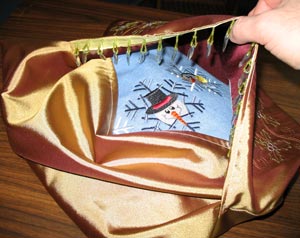
Tuck the gift inside the pouch.

Add a ribbon and bow for a fancy finishing touch and extra closure!


