
Keep the home fires burning throughout winter with this handy Firewood Tote. It's simple, sturdy, and stylish!
This a great gift idea for both women and men. Just choose designs that will match the recipient's interests and decor. Use a durable duck cloth and vinyl to create a customized look personalized for someone special.
The finished size for this project is 23 inches wide by approximately 35 inches high.
Supplies
Supplies needed:
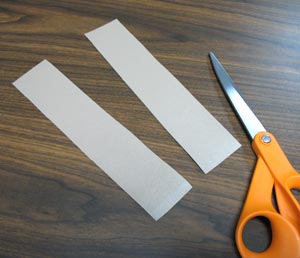
** 1/2 yard light-colored duck cloth
** 3/4 yard dark-colored duck cloth
** 1/2 yard marine vinyl
** 3 yards of 7/8 inch wide quilt binding
** 3 yards of 1 1/2 inch wide cotton or polyester strapping
** Medium weight cut-away stabilizer
** Temporary spray adhesive
** Air-erase pen
** Large piece of paper or tag board
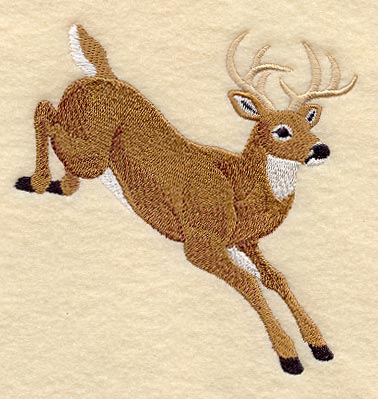
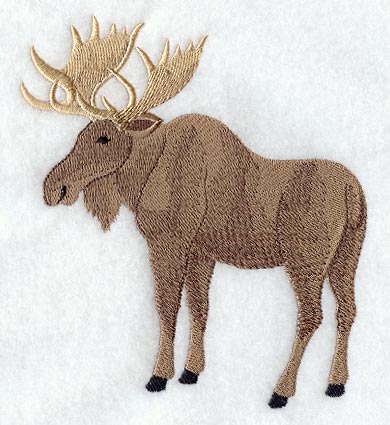
| Designs used: ** Moose Large - also available in Small ** Whitetail Deer - Large - also available in Small | |
| Be sure to pre-wash and dry the cotton fabrics before starting this project |
Designs Used
Preparing the pieces
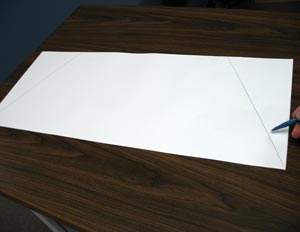
To prepare the pattern shape for the end pieces, cut a piece of the tag board to 24 by 10 inches. Then measure and mark a spot 5 inches in from each corner along one of the long sides. Draw a line from the marks to the corners on the opposite long side.
Cut along the lines to finish the shape.
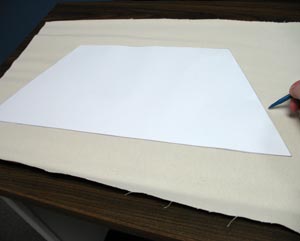
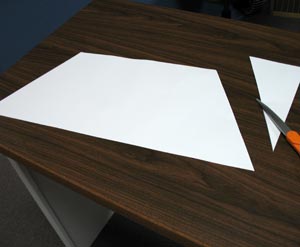
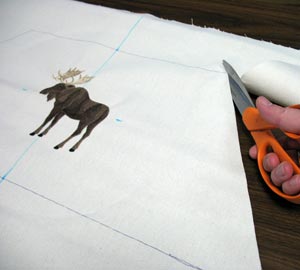
Lay the shape on the light-colored duck cloth, leaving a few inches of excess fabric around the shape. Trace the shape.
To place the designs, mark the center of the top and bottom of the shape (with an air-erase pen) by measuring and dividing by two. Draw a line between these marks.
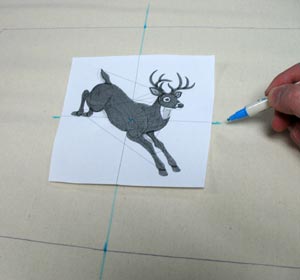
Create templates by printing the designs at full size using embroidery software. Trim around the template to make it manageable.
Lay the template inside the shape -- align the vertical axis line with the center line on the fabric. Make sure there is at least one inch between the edges of the design and the edge of the shape. Measure in between the top and bottom of the shape and divide by two. Position the center of the template at this point, poke a hole in the center of the template and mark the fabric. Mark the horizontal axis points as well.
Remove the template and draw a line connecting the horizontal axis points.

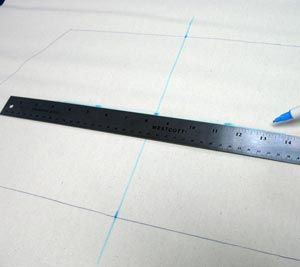
Hoop the fabric with cut-away stabilizer that has been sprayed with temporary adhesive.
Hoop the fabric and stabilizer together by aligning the marks on the hoop with the lines on the fabric.
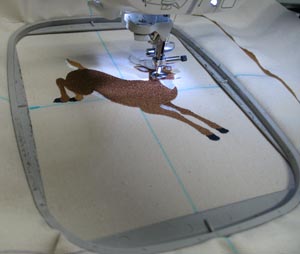
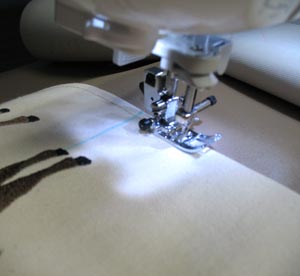
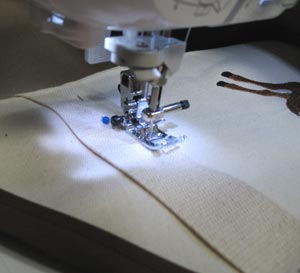
Attach the hoop to the machine and load the design. Align the needle over the center point on the fabric and embroider the design.
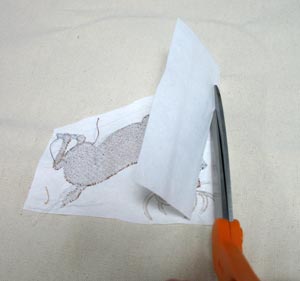
After the design has finished embroidering, trim away the excess stabilizer. Leave about 1/4 inch of excess around the design.
Cut out the shape of the fabric.
For the second end piece, repeat the pattern tracing, design placement, and embroidering process again.
Assembling the tote
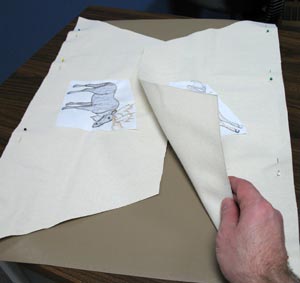
Cut a 23 by 17 inch piece of the vinyl and lay it right side up. This is the bottom of the tote.
Align the long sides of the end pieces with the long sides (23 inches sides) of the vinyl with the right sides down. The points of the end pieces will extend past the edges of the vinyl about 1/2 inches.
Pin in place.
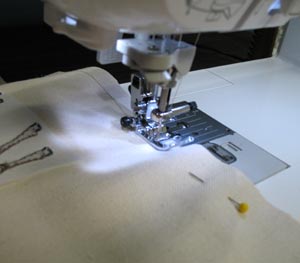
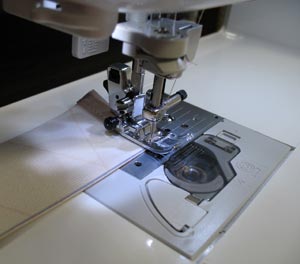
Sew a 1/2 inch seam along the pinned edges.

Lay the assembled piece flat, finger-press the seams, and trim the points.
Top stitch a 1/4 inch seam along the seams on the end piece (duck cloth side).
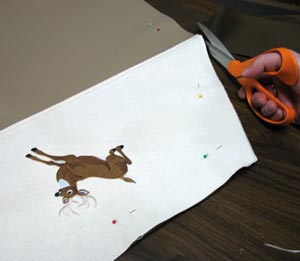
Lay the assembled piece on top of the dark-colored duck cloth and pin in place. Place the pins about 1 1/2 inches from the edge of the fabric.
Cut out the shape.
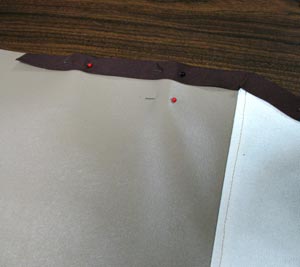
Add the quilt binding by wrapping it around the edge of both layers. Start in the center of one of the sides and work your way around. Pinch and fold at the corners and pin in place.
Sew the binding in place with a 1/8 inch seam (1/8 inch from the inside). When you reach the end, fold the binding over and sew in place.
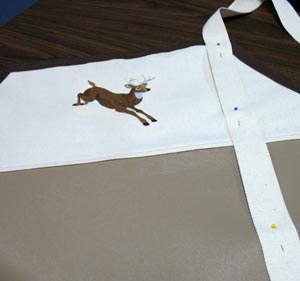
To add the handles, align the edge of the webbing with one of the top corners of an end piece. Align the end of the webbing with the center of the bottom of the tote.
Pin in place.
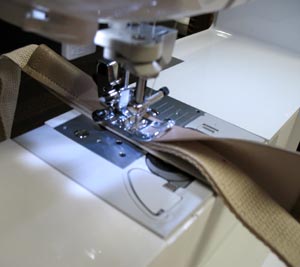
Sew the webbing in place with a 1/8 inch seam along the outer edges.

Then, bring the webbing around the top of the end piece. Leave an 18-inch long handle and align the edge of the webbing with the other top corner. Lay the webbing across the end piece, along the bottom, and across the opposite end piece.
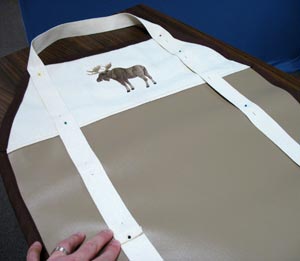
Create another 18-inch long handle and bring the webbing down to meet where you started. Fold the webbing over 1/2 inch and pin in place.
Sew a 1/8 inch seam around the entire outer edges of the webbing.
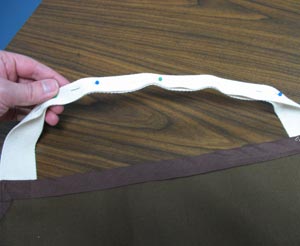
Fold the handles together and pin in place. Leave about
1 1/2 inch open on each end.
Sew a seam along the open edge of the handles.
Optional
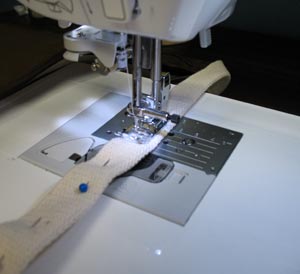
Add vinyl covering to the handles for an added detail and easier carrying.
To do this, cut two pieces of vinyl to 8 inches by 1 3/4 inch.
Fold the short ends over
1/2 inch (to the wrong side) and sew a 1/4 inch seam along the folded edge.
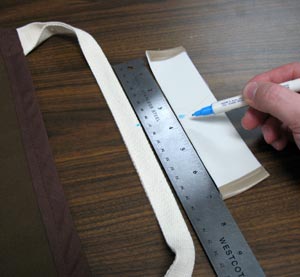
Lay the handles flat. Measure and mark the center of the handles and the center of the vinyl piece (along the long sides) by measuring and dividing by two.
Align the marks together and fold the vinyl around the webbing. Sew a seam along the open edge.
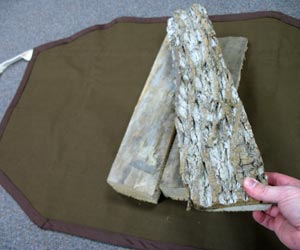
Now the tote is complete!
To load the firewood, lay the tote flat with the embroidered side down, add the wood, and fold it up by bringing the handles together.
Away you go to make a roaring, warm, and welcome fire!

Bring in the firewood fashionably when you use this handy tote!


