Chase the autumn chills away with Sunbonnet Sue and this simple, fast, and fun rag quilt. The front layer is made of durable yet soft denim, and the back layer is warm and cozy flannel.
You'll be delighted to see just how quickly this hearty and attractive lap quilt comes together. The finished size is
40 x 50 inches -- perfect for keeping warm at bonfire parties, football games or just snuggling on the couch.
Supplies
Supplies needed:
**2 yards cotton flannel
**1 yard tan denim
**1 yard dark denim
**1/2 yard light-colored denim
**1/2 yard brown denim
**1/2 yard light blue denim
**Medium-weight cutaway stabilizer
**Spray adhesive
**Rotary cutter
**Quilter's cutting mat
**Ruler
**T-square
**Spring action scissors (or rag quilt snips)
**Air-erase pen
**Monofilament thread
**Cotton thread
**Graph paper
**Colored pencils
Designs Used:
Seasons Sunbonnet Sue - Autumn (Redwork) - Sm
Seasons Sunbonnet Sue - Winter (Redwork) - Sm
Seasons Sunbonnet Sue - Spring (Redwork) - Sm
Seasons Sunbonnet Sue - Summer (Redwork) - Sm
Rose and Tulip Stipple -- Md
Sunbeam Stipple -- Md
Oak Leaf Stipple -- Md
Snowflake Quilt Stipple -- Md
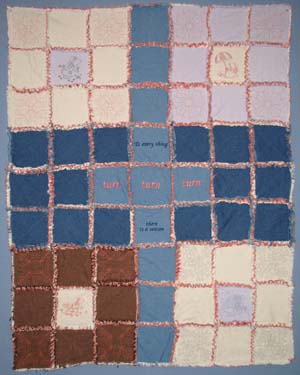
The quilt that we designed is divided into five sections. Spring is in the top left, summer is in the top right, autumn is in the lower left, and winter in the lower right. In the center of the quilt is a phrase made with the Chancery alphabet: To every thing there is a season, turn, turn, turn.
Each quadrant is a "nine-patch" block, with Sunbonnet Sue in the center, and the seasonal stipples on each corner.
Designs Used
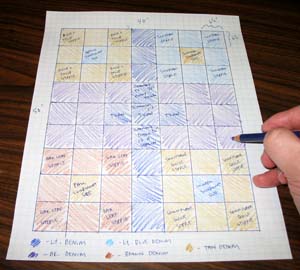
Begin by planning your quilt design. We find that graph paper works great to plot out the embroidered blocks, fabric colors and thread colors. You will have a perfect guide throughout your project.
You can see with the graph on the left that we're planning a quilt that is 9 blocks vertical, and 7 blocks horizontal. 25 of the blocks will be embroidered, and 38 will not be embroidered.
(Note from Kenny: If 63 blocks sounds overwhelming, have no fear! Once I fell into a rhythm, I was able to cut all the blocks in less than an hour.)

Pre-wash all of the fabric before you begin.
Prepare the fabric for the embroidery. Using a ruler and t-square, mark out nine 6 1/2 x 6 1/2 inch blocks on the tan denim. We'll embroider five of the blocks, and leave four blank.
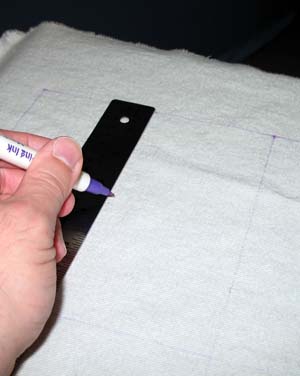
Find the center point of the five blocks that will be embroidered. To do this, measure the width of one block and divide by two; measure the height of the block and divide by two, and make a mark at the center point.
We're using an air-erase pen to mark the lines; you can use masking tape and a pen, chalk, soap, or other marking tools.

Draw a vertical line through the center points of all five blocks. This line will be used when hooping the fabric to make sure that the designs are embroidered evenly.
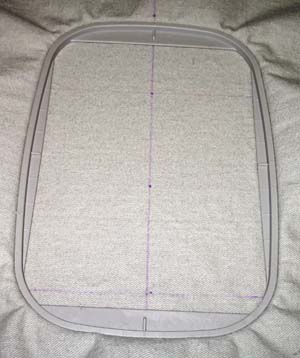
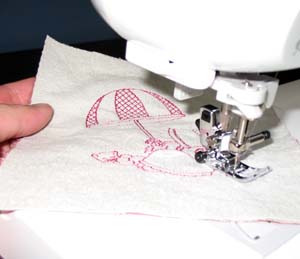
Cut a piece of cutaway stabilizer. Give the stabilizer a quick shot of spray adhesive, and smooth the fabric on top. Hoop the fabric tightly, aligning the marks on the hoop with the center line on the fabric.

Embroider a design, rehoop the fabric and stabilizer to embroider the others. We're embroidering five blocks, but you can embroider as many as you'd like. Let your imagination run wild!
We chose to embroider the Sunbonnet Sue designs and the stipple designs onto the tan, light blue and brown denim. We also embroidered text on the light colored denim, creating a fun saying for the center of the quilt.
Now that we've embroidered the blocks for one quadrant, we'll embroider the other sections, too. For each quadrant, mark out nine 6 1/2 x 6 1/2 inch blocks on the other denim fabrics, and embroider the blocks as you did previously.
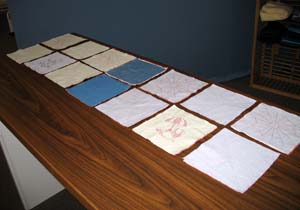
Now it's time to cut out the blocks. There will be a total of 63 blocks for the front of the quilt and 63 blocks for the back.
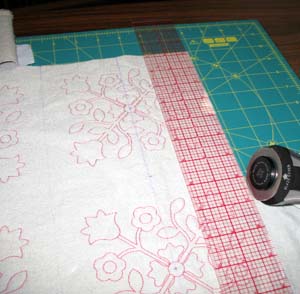
Lay the fabric onto the cutting mat, and using a ruler and a rotary cutter, cut out all of the blocks, including the blank ones.
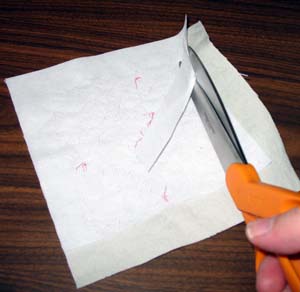
After you have cut all of the blocks, cut the excess stabilizer from the back of the embroidered blocks. We do this to lighten the block, and to allow the seam allowances to fray.
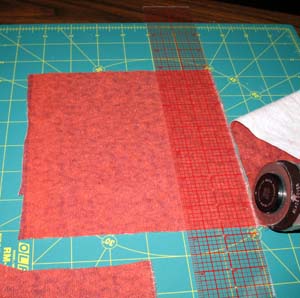
Now, cut eighteen 6 1/2 x 6 1/2 inch blocks from the dark colored denim. This fabric is more blank squares for the front of the quilt.
Then, cut sixty-three 6 1/2 x 6 1/2 inch blocks for the flannel on the back of the quilt.
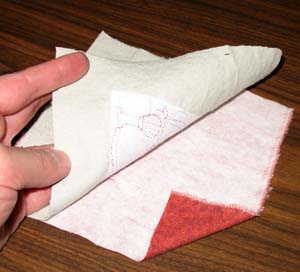
Pair each top block with a flannel block. Lay the blocks wrong sides together.
All of the pairs of blocks will be quilted together. Thread your machine with monofilament thread.
We are using this transparent thread because we want the block to be quilted together, but we do not want the top thread to show. In the same respect, wind a bobbin with cotton thread that matches the color of the flannel.
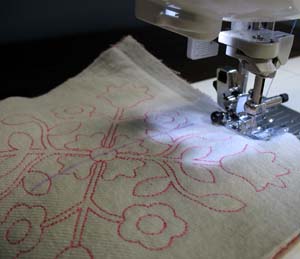
Quilt the blocks as desired (free motion embroidery). We chose to quilt with a simple "X", sewing from corner to corner. Always sew with the top block facing up so that the monofilament will be on top, and the colored bobbin on the bottom.
Now that all of the pairs of blocks are quilted together, it's time to assemble them. Lay out the top two rows of blocks, top (denim) fabric facing up.
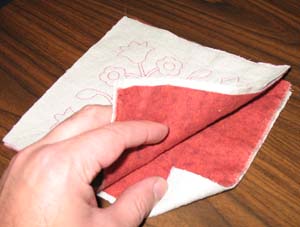
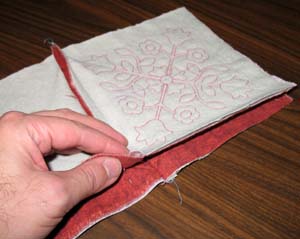
Pair the first block from the top row with the first block from the second row. Place the flannel sides together. The block from the second row should be upside-down.
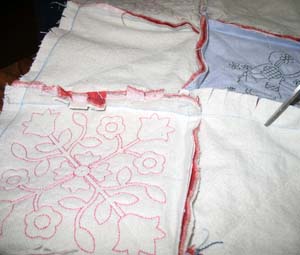
Sew a straight stitch with a 1/2 inch seam along one side - the side that is the bottom edge of the top block and the top edge of the second block.
This will result in the seam allowance sticking up on what will be the front of the quilt.
Sew each of the top row and second row blocks together.
After all the top row and second row blocks are sewn together, lay the first set of sewn blocks on the second set of sewn blocks, flannel sides together. Again, the second row should be upside-down.
Press the bottom seam allowance to one side and the top to the other side and sew a 1/2 inch seam.
Start on one end of the row and work your way to the other end, connecting all of the blocks for the top and second row.

Repeat these steps for each row. Since there is an odd number of rows, I combined the blocks for the 7th, 8th, and 9th row all at the same time.
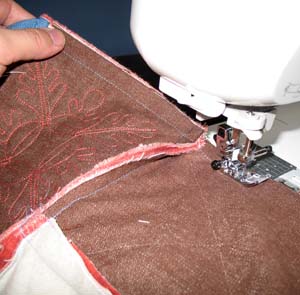
After all of the rows are combined, attach the row sections together by laying them flannel sides together.
Sew a 1/2 inch seam all along the row, turning the bottom seam allowance one way and the top the next as you did before.
After all the rows are sewn together, sew a 1/2 inch seam around the entire outside edge of the quilt. Sew this seam twice for added strength.
Now we will clip the seam allowances, which allows the fabric to fray. Make a small cut about every 1/2 inch along all of the seam allowances including the outer edge.
Be careful not to cut any of the seams. If you do accidentally cut a seam, simply sew it back in on your machine.
We prefer to use sharp, spring action scissors to cut the allowances. It makes it much easier on your hard-working hands! There are special rag quilt snips available on the market. Fiskars, for example, manufactures the special shears. They can be found at most fabric or craft stores.
Lastly, machine wash the quilt. The agitation will fray the seams, giving a fuzzy and cozy look.
After washing the quilt, take it outside and give it a good shake. This will lessen some of the lint and fabric waste that will end up in your dryer. Next, machine dry your quilt. It is possible that a lot of fabric waste will come off in the dryer, so be sure to empty the lint trap about every 15 to 20 minutes during the drying cycle. There you have it -- a warm and comfy quick quilt, as functional as it is charming!
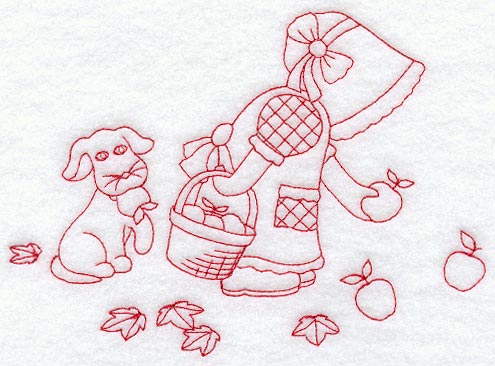
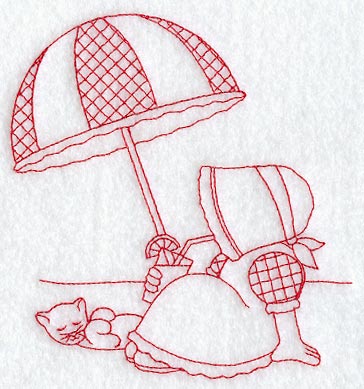
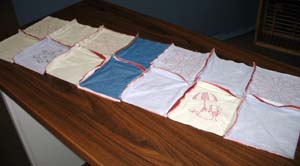
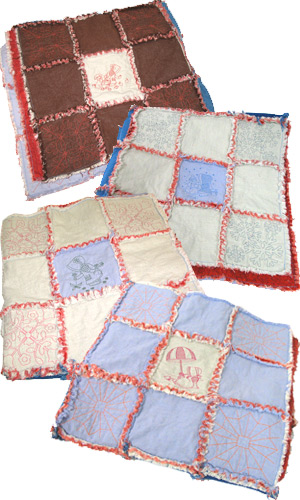
Top: Autumn Quadrant with Autumn Sunbonnet Sue and leaf stipple designs.
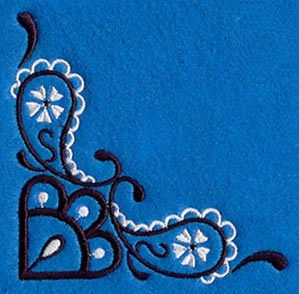
Upper Middle: Winter Quadrant with Winter Sunbonnet Sue and snowflake stipple designs.
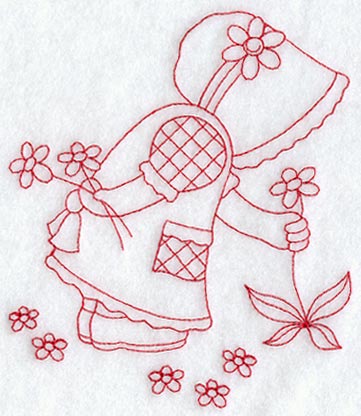
Lower Middle: Spring Quadrant with Spring Sunbonnet Sue and floral stipple designs.
Bottom: Summer Quadrant with Summer Sunbonnet Sue and sunshine stipple designs.


