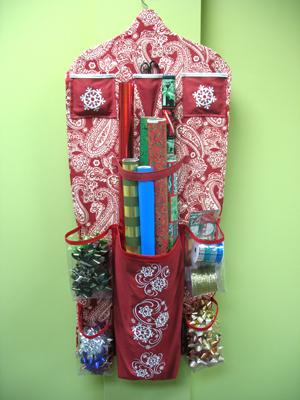
Keep all your gift wrap essentials in one place with this Hanging Holiday Helper!
Made with large pockets for wrapping paper, bows, ribbon, tape, and scissors, this handy-dandy caddy hangs neatly in a closet. Keep your Christmas and holiday wrap organized and easy to access!
Read below for these free project instructions!
Supplies
Supplies Needed:
**Coat hanger - (plastic or wood works best)
**1 1/2 yards lightweight print canvas
**3/4 yard solid-colored lightweight canvas
**3/4 yard clear vinyl (four 16 inch wide by 14 inch high pieces, we used 16 gauge vinyl)
**6 yards - double fold bias tape quilt binding
**3 yards - extra wide double fold bias tape
**Medium weight cutaway stabilizer
**Temporary spray adhesive
**Air-erase pen (or other marking tool)
**Permanent marker
Designs used:
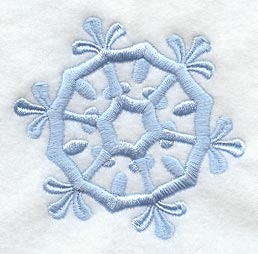
Simply Snowflakes Oval - Lg
Simply Snowflakes Circle - Lg
Simply Snowflakes Accessory
These designs are also available in the following design packs:
A Simply Snowflakes Design Pack - XL
A Simply Snowflakes Design Pack - Lg
A Simply Snowflakes Design Pack - Md
A Simply Snowflakes Design Pack - Sm
Finished size:
22 inches wide by 48 inches high
Designs Used


To begin, prepare the large gift wrap pocket.
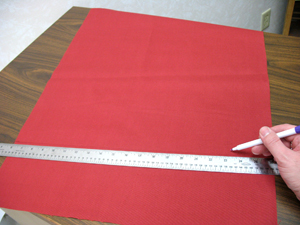
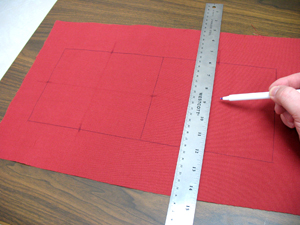
Cut a piece of the solid-colored canvas 20 inches wide by 26 inches high. Using an air erase pen (or other marking tool), measure and mark 5 1/2 inches up on both the right and left sides starting from the bottom corners. Draw a line across the fabric to connect the marks. The area above the line will become the front and sides of the pocket and the area below the line will become the bottom of the pocket.
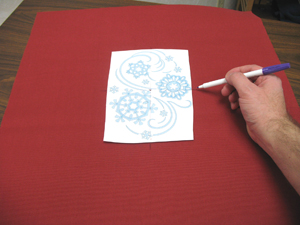
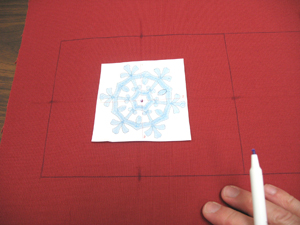
If you have embroidery software, print a template of the designs to use for placement. If you don't have embroidery software, you can cut a piece of paper the shape and dimensions of the designs to help with placement and centering. Trim around the design to make it easy to place.
We are placing the first design in the center front of the pocket. Poke a hole in the center of the template and align it with the center point on the fabric. Make sure the design fits well within the shape. There should be at least one inch of space between the edges of the design and the outer edges of the shape. Then, mark the horizontal axis points.
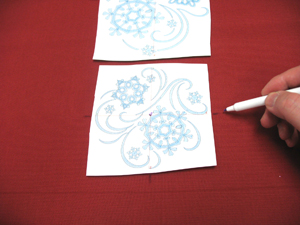
Align the other templates about one inch above and below the first template. Poke a hole in the center of the templates and mark the fabric. Also, mark the horizontal and vertical axis points.

Remove the templates and draw lines connecting the axis points. These lines will be used for hooping.
Spray a piece of cutaway stabilizer with temporary adhesive. Smooth the stabilizer over the backside of the area to be embroidered (we are embroidering the center design first). Hoop the fabric and stabilizer together by aligning the marks on the hoop with the lines on the fabric.
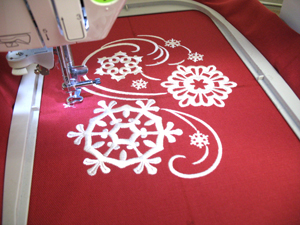
Attach the hoop to the machine and load the first design. Move the hoop so that the needle is directly over the center point on the fabric.
Embroider the design.
After the first design has sewn, re-hoop the fabric for the second design and begin embroidering. Repeat the hooping and embroidering process for all the designs.
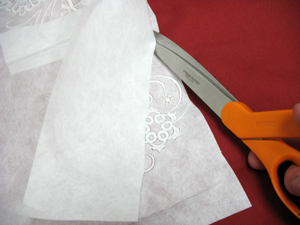
After all the designs have sewn, trim away the excess stabilizer on the backside of the embroidery.
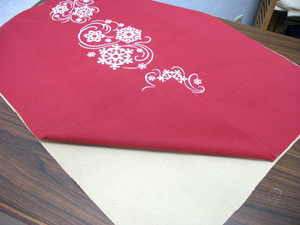
Prepare the lining of the pocket by cutting another piece of the solid-colored canvas 20 inches wide by 26 inches high. Align the embroidered piece on top, wrong sides together.
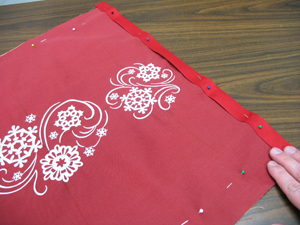
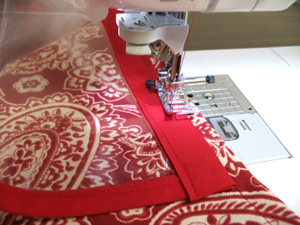
Cut a piece of the quilt binding a bit longer than the width of the top edge of the fabric. Wrap the binding around the top edge the fabric (both layers) and pin in place. Also, pin the fabric layers together along the sides and bottom.
Sew a seam along the inside edge of the binding and also sew a 1/4 inch seam along the sides and bottom of the fabric.
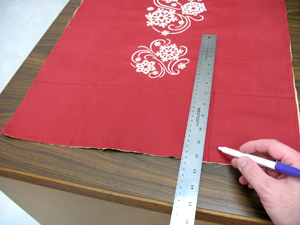
Mark 5 1/2 inches in along the bottom edge starting at both bottom corners and along the existing line starting at the side edges. Draw lines connecting these marks, doing this will create a 5 1/2 inch by 5 1/2 inch square in each bottom corner. These lines will be used to fold the fabric and create the bottom of the pocket.
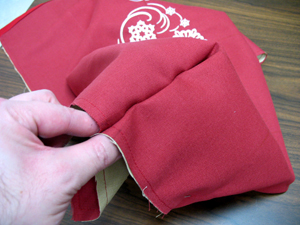
Create the corners on the bottom of the pocket by aligning the lines together on the fabric.
Pin the corners in place on the lining side.
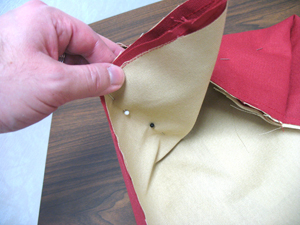
Lay the excess fabric flat on top of the short end (align the straight edges together). Pin in place.
Sew a 1/4 inch seam along the straight outer edge.
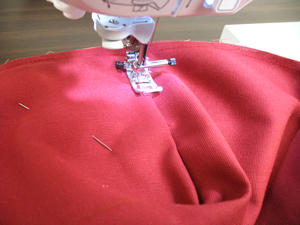
Then, sew a 1/8 inch seam along the folds on the outside of the pocket.
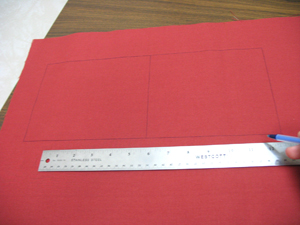
Now we will prepare the fabric for the small pockets. On the solid-colored canvas, draw two 7 inch wide by 6 inch high rectangles. Leave a couple of inches of excess fabric around the shapes.
Mark the center of each side of the shapes by measuring and dividing by two. Draw lines connecting the marks. Where the lines meet is the exact center.
Poke a hole in the center of the template and align it with the center point on the fabric. Make sure the design fits well within the shape. There should be at least one inch of space between the edges of the design and the edges of the shapes.

Hoop the fabric and stabilizer together as you did earlier.
Embroider the designs.
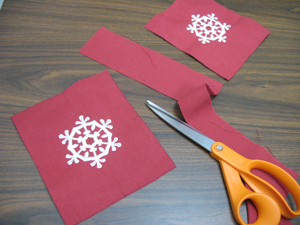
After the designs have finished, trim away the excess stabilizer on the backside of the embroidery. Then, cut out the shapes.
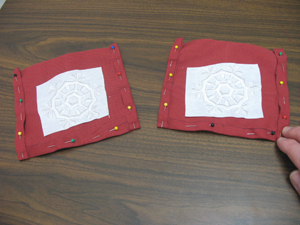
Fold the bottom edges of the pockets over to the wrong side 1/2 inch, press with your finger, and pin in place. Then, fold the side edges over 1/2 inch, press, and pin in place. Sew a 1/4 inch seam along the side and bottom edges.

Cut two pieces of the bias tape a bit longer than the top edges of the pockets. Fold the ends of the tape in and wrap the tape around the top edges of the pockets and pin in place. Sew a seam along the inner edge of the tape.
Now create the main "body" of the organizer.
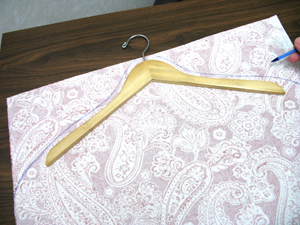
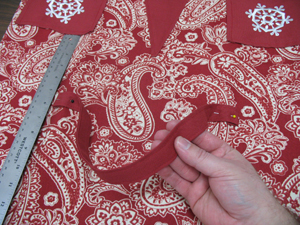
Cut two pieces of the print canvas to 23 inches wide by 50 inches high. Align the two pieces together with the right sides facing. Then, lay the coat hanger with the top edge about 1/2 inch from the top edge of the fabric. Trace the shape of the hanger about 1/2 inch from the top edge (continue the shape to the edges of the fabric).
Pin the fabric together along the inner edge of the shape and along the side edges of the fabric.
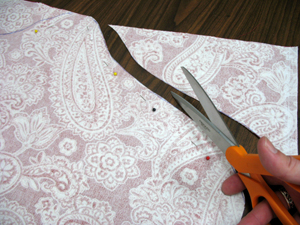
Cut out the shape at the top of the fabric (cut through both layers).
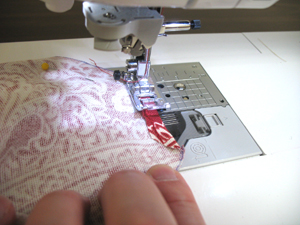
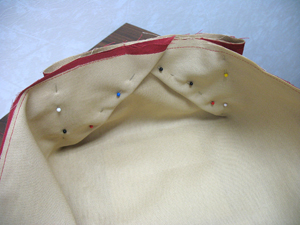
Turn the top point of the fabric over 1/4 inch on both sides and sew them in place with a 1/8 inch seam (sew each layer one at a time being careful to not sew the two layers together)

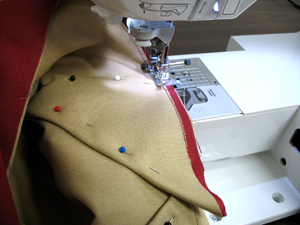
Sew a 1/2 inch seam along the sides of the fabric only. Leave the bottom open for turning and about one inch open at the top point.

Turn the fabric right side out and press the seams with an iron. Insert the hanger inside the organizer. Sew a few stitches through both layers of fabric right below the center top of the hanger to keep it in place.
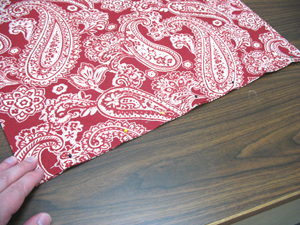
Fold the bottom edges of the fabric in 1/2 inch, press, and pin in place. Sew a 1/4 inch seam along the bottom edge.
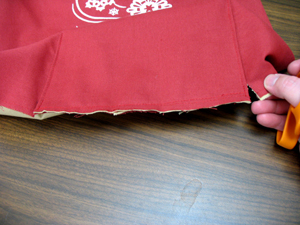
Now we will attach the large pocket to the body of the organizer. On the large pocket, cut a 3/4 inch slit at each back bottom corner. This will create tabs along the bottom and sides so that the pocket can be attached to the body.
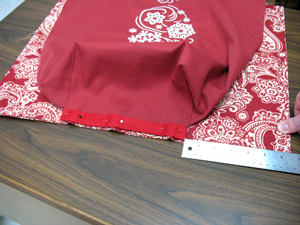
Lay the body of the organizer flat with the right side facing up. Lay the large pocket on top with the bottom tab aligned with the bottom edge of the body. Measure equal distances between the bottom corners of the pocket and the outer edges of the body to center the pocket. Then, cut a piece of quilt binding a bit longer than the bottom tab of the pocket. Turn the ends of the binding in and wrap the binding around the bottom tab. Pin the tab in place.
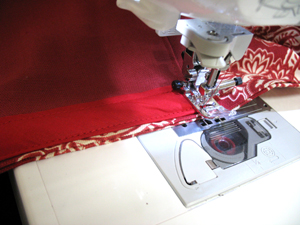
Sew a seam along the outer edges of the binding. Add more quilt binding to each side of the pocket as you did on the bottom. Measure equal distances between the sides of the pocket and the outer edges of the body to align the sides. Pin the sides in place but do not sew the binding in place just yet.
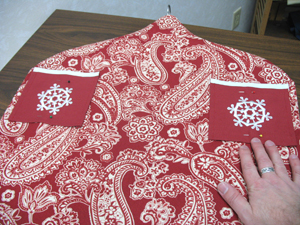
Now add the small pockets. Add the pockets to the top of the body about 1 1/2 inch from the bottom of the hanger and about 1/2 inch from the outer edges. Pin in place and sew a 1/4 inch seam around the side and bottom edges only.
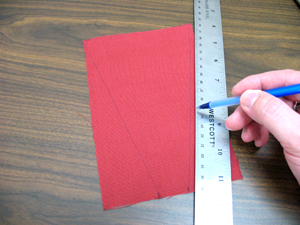
Now we will prepare the scissor pocket. Cut a piece of canvas 5 inches wide by 7 1/2 inches high. Measure and mark 2 1/2 inches in from each bottom corner. Draw lines from the bottom marks up to the top corners forming a cone shape.
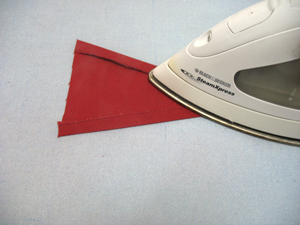
Cut out the shape along the lines you just drew. Fold the side edges over 1/2 inch and press in place.
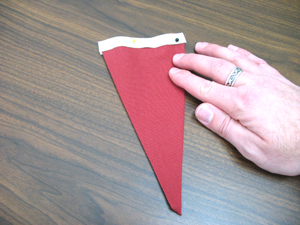
Wrap bias tape along the top edge, pin in place, and sew a seam along the inner edge of the tape.
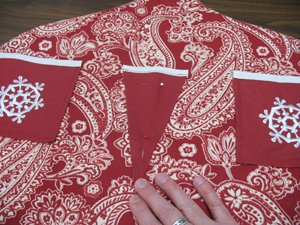
Align the top of the pocket with the small pockets and center it by measuring equal distances between the top corners and the inner top corners of the small pocket. Pin the pocket in place and sew 1/4 inch seam along the sides only.
Now we will create the strap that will be placed above the large pocket. This strap will support the tops of the rolls of wrapping paper.
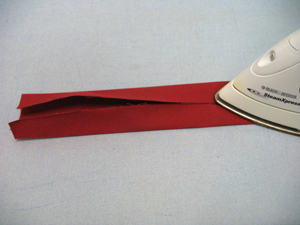
Cut a piece of canvas 4 inches wide by 20 inches long. Fold the long edges to meet in the center and press.
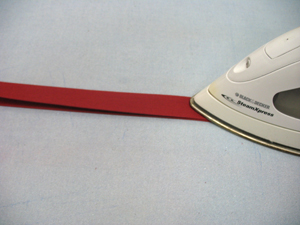
Fold the long folded edges together and press.
Fold each end of the strap over 1/2 inch and align the ends about 7 inches from the bottom inner corners of the small pockets.
Pin in place and sew the ends of the strap in place.
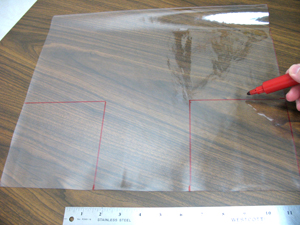
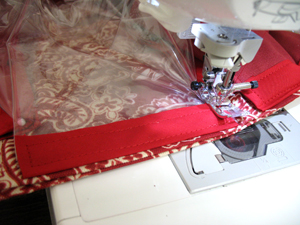
Finally, we will prepare the four side pockets. Cut four pieces of the clear vinyl 16 inches wide by 14 inches high. Using a permanent marker (we used red so that it coordinates with the fabric) mark 5 1/2 inches in from each bottom corner. Then, mark 5 1/2 inches up from each bottom corner. Draw lines to connect these marks creating a 5 1/2 inch by 5 1/2 inch square in each bottom corner.
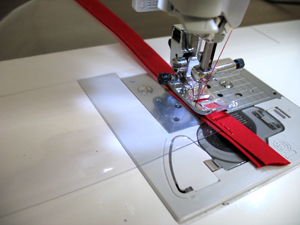
Wrap bias tape along the top edge of the vinyl and sew a seam along the inner edge of the tape.
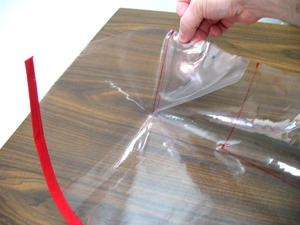
Create the corners on the bottom of the pocket by aligning the lines together (on each side) just as you did on the large pocket. Trim about one inch from the point on each fold. Pin the folds in place about one inch from the center bottom. Then, cut a 3/4 inch slit at each back bottom corner. Once again, this creates tabs on the sides and bottom of the pockets.
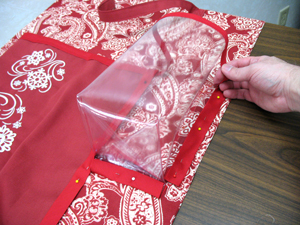
Align the top edge of the first pocket with the top edge of the large pocket. Remove the pins from the side of the large pocket enough to tuck the side of the vinyl pocket underneath (be careful to not move the side of the large pocket). Re-pin the side of the large pocket in place.
Cut lengths of quilt binding for the bottom and remaining side of the vinyl pocket. Wrap the binding around the tabs, align the side of the pocket with the side of the body, and pin in place.
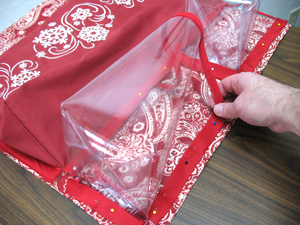
Add the second pocket underneath the first by aligning the bottom of the pocket with the bottom of the large pocket. Add quilt binding to the tabs and pin in place.
Sew a seam along the edges of the binding starting at the bottom of the pockets.
Sew a seam along the edges of all of the remaining binding.
To finish the project, add the remaining two pockets to the other side of the organizer just as you did the others.


