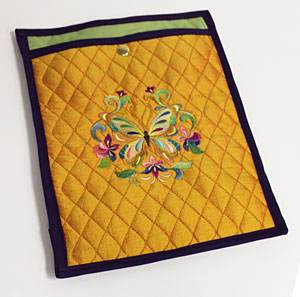
With an iPad sleeve, you can take your tablet with you everywhere you go in style!
Stitch an iPad sleeve embellished with one of your favorite embroidery designs, and you'll have a beautiful and distinctive way to carry your tablet with you.
Read on for project instructions for creating your own unique iPad cover!
Supplies
Supplies Needed:
**1/3 yard quilted cotton fabric (for front and back)
**1/3 yard fabric (for inner lining; I used quilter's cotton)
**Temporary spray adhesive
**Air-erase pen
**Extra-wide double fold bias tape
**Snap and snap tool
Special Project Notes:
Designs used:
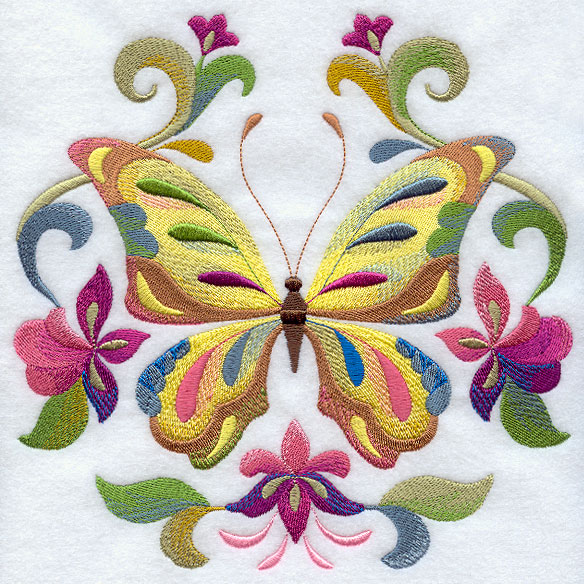
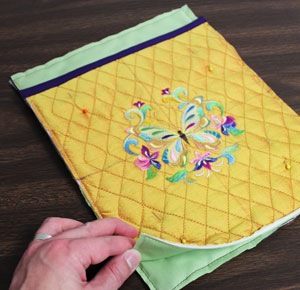
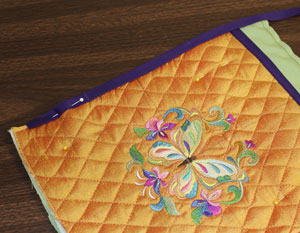
For my iPad cover, I used the small size of the Spring into Color Butterfly Circle. Designs from the Blooming with Kanji Design Pack or any of the Intricate Ink designs would be lovely as well. Choose a design you love!
Finished size: 8 3/4" wide by 12 1/2" high (perfect size for all iPads)
Designs Used
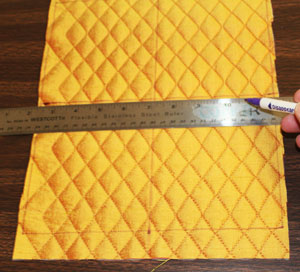
First, to prepare the front fabric piece, draw an 8 3/4" wide by
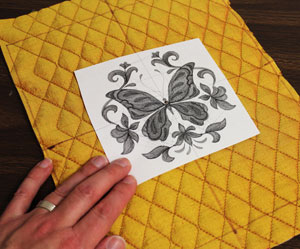
Create a paper template of the design by printing it at full size. Poke a hole in the center of the template and align it with the center point on the fabric. Make sure the design fits well within the shape. There should be at least one inch of space between the outer edges of the design and the edges of the shape.
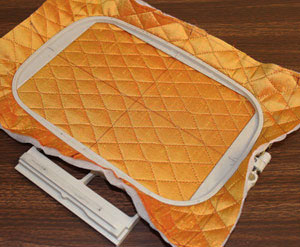
Spray a piece of cutaway stabilizer with temporary adhesive and smooth the fabric on top. Hoop the fabric and stabilizer together by aligning the marks on the hoop with the lines on the fabric. Attach the hoop to the machine and load the design. Move the hoop so that the needle is directly over the center point on the fabric. Embroider the design.
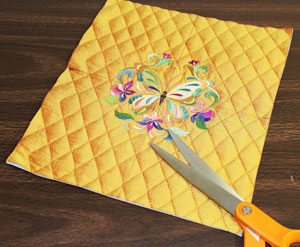
When the design has finished, unhoop the fabric and cut out the shape. I left the stabilizer on the backside of the fabric to give the sleeve more support.
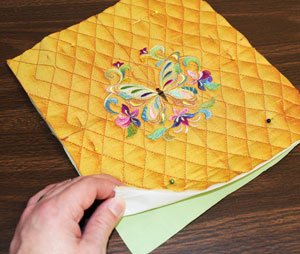
To prepare the inner lining for the front fabric piece, lay the embroidered front fabric piece on top of the inner lining fabric (I used quilter's cotton), wrong sides together, pin in place, and cut out the shape. Tack the pieces together by sewing a 1/8" seam along the entire outer edge.

Wrap bias tape along the top edge of the front piece, pin in place, and sew a seam along the inner edge of the tape. Also, trim the excess tape along each side of the fabric.
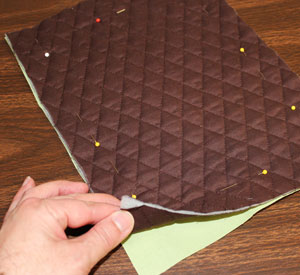
To prepare the back piece, cut an 8 3/4" wide by 12 1/2" high piece of quilted cotton. Lay the quilted cotton piece over the inner lining fabric, wrong sides together, pin in place, and cut out the shape. Tack the pieces together by sewing a 1/8" seam along the entire outer edge.
Lay the back piece flat with the inner lining facing up. Align the front piece on top of the back piece, inner linings together, with the bottom edges aligned. Pin in place.
Wrap bias tape around the outer edges, starting just above one of the bottom corners along the side edge. Pin the raw end of the tape in place and sew the tape in place by sewing a seam along the inner edge of the tape. Pinch and fold the tape at the corners as you sew.
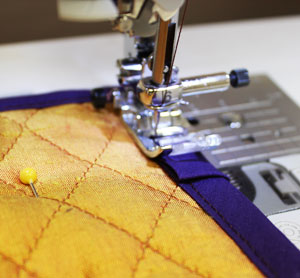
When you reach the starting point, trim the end of tape leaving about 1/2" excess. Fold the end over to the wrong side, wrap the end over the start of the tape, and sew in place.
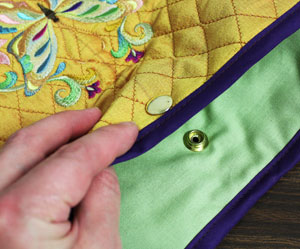
To add the snap closure, measure and mark the center point of the top edge of the front by measuring and dividing by two. Then transfer the mark directly underneath onto the inner lining of the back piece. Add the top button portion of the snap to the top mark and then add the bottom portion of the snap to the inner mark.
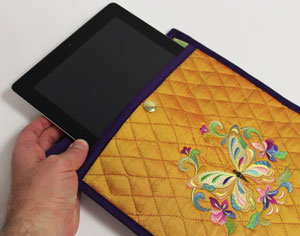
And now your iPad sleeve is complete! Insert the iPad inside the sleeve, snap it shut, and away you go!


