Stitch a welcome surprise of detail to the inside of jacket and shirt cuffs! Our step-by-step tutorial will show you how without the need for awkward hoopings or removing of seams.
Supplies
- Temporary spray adhesive
- Measuring tape
- Ruler
- Marking utensil
- Hand sewing needle
- Pins or clips
Tools
- Jean jacket or shirt with cuffs
- Fabric
- Embroidery thread
- Cutaway stabilizer
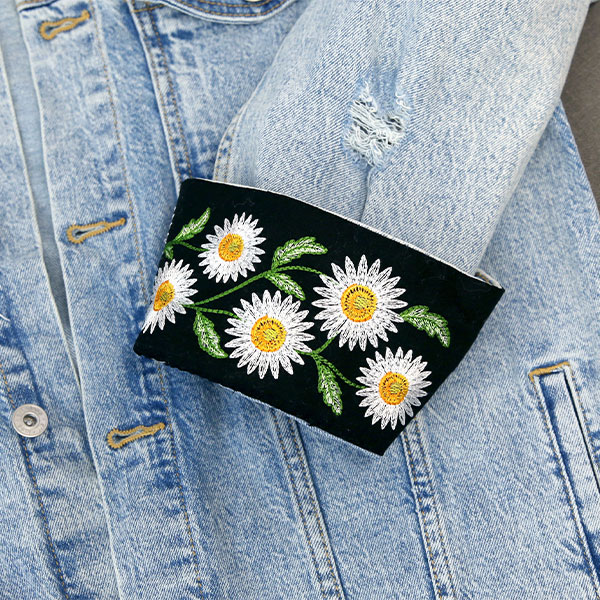
In this tutorial, we'll show you a simple process for adding machine embroidery as a lining to the cuff of a jacket.
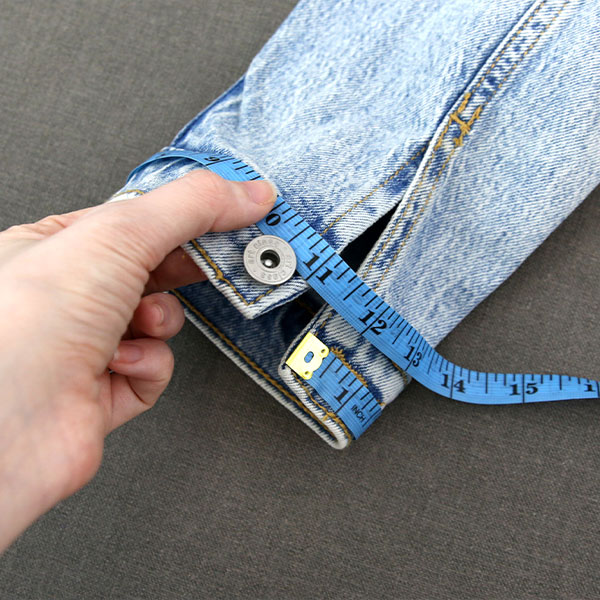
To start, measure the length around the cuff of your jacket. This will help determine the size of the embroidery file you'd like to use. In this example, the cuff is about 11" long. To match that length, we used the 6x10 size of the Wild Charms Tall Daisy Border design.
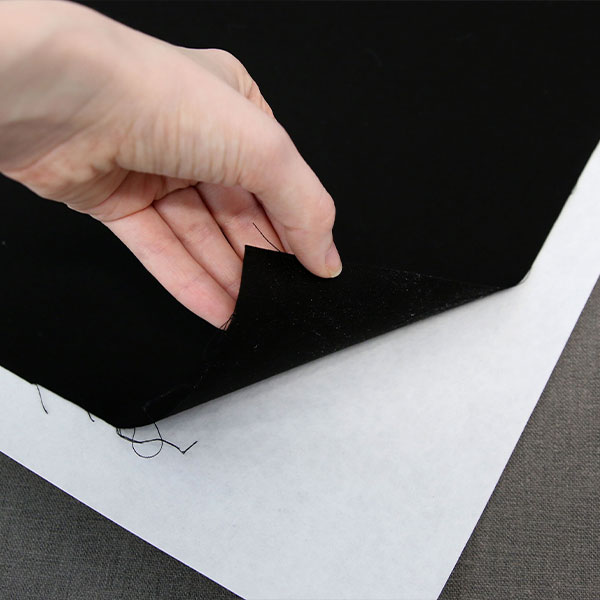
Spray the backside of your fabric with temporary spray adhesive, then smooth your fabric over cutaway stabilizer.
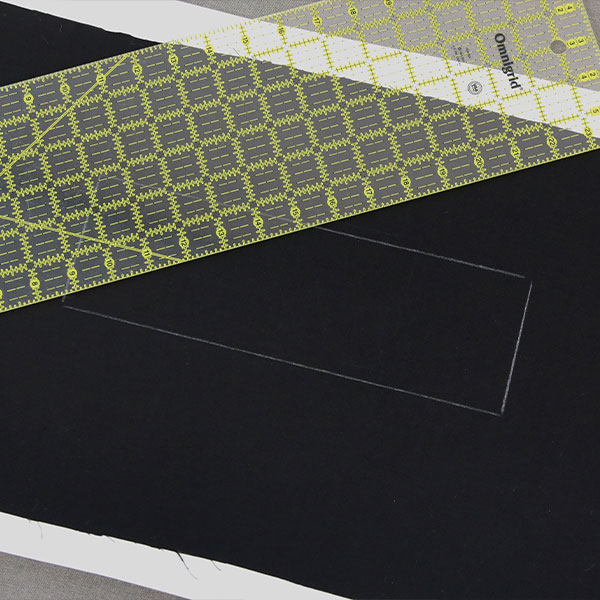
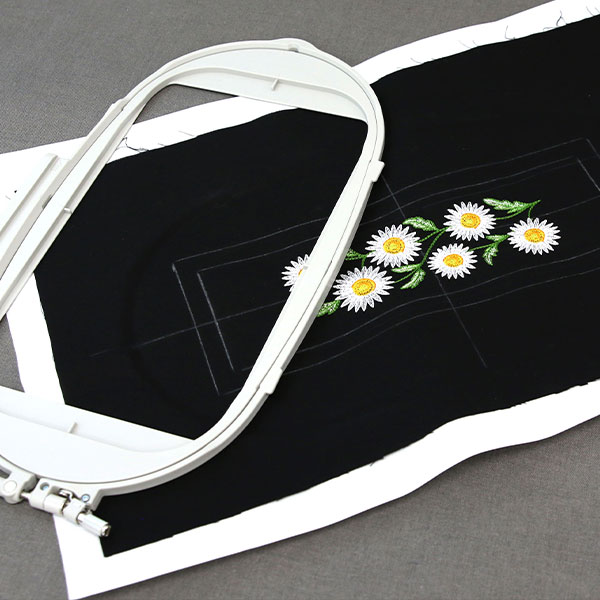
Draw a rectangle that matches the measurements of the jacket cuff you are using.
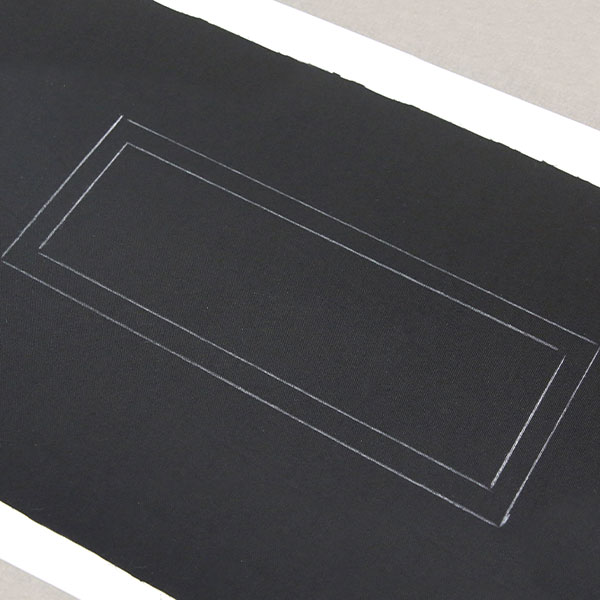
Next, draw a slightly larger rectangle around the first. This will be the seam allowance for the cuff. In this example we used 1/2", but you may use what you're comfortable with.
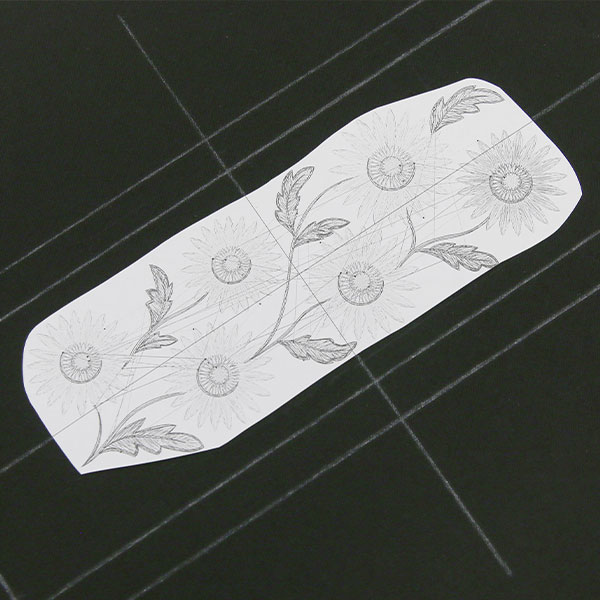
Create a template using embroidery software to center the design within the drawn rectangle. Learn more about creating a template by watching our helpful how-to video.
Use the point on your template where the 'x' axis and the 'y' axis intersect to find your center.
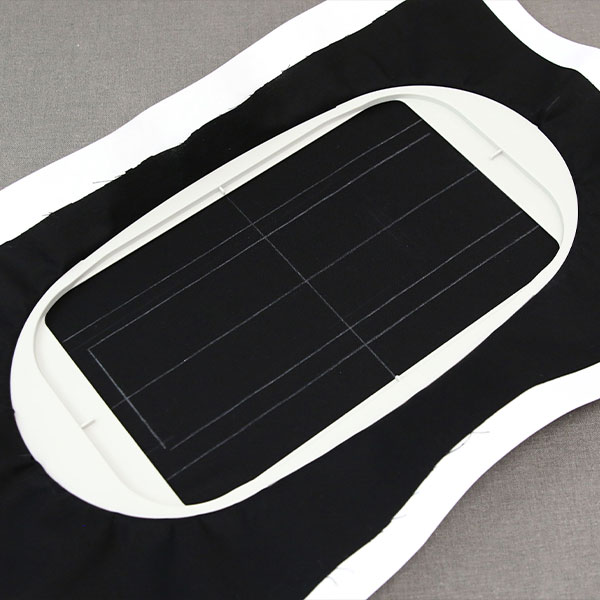
Hoop the fabric and stabilizer. Use the previously drawn markings to center your fabric in the hoop.
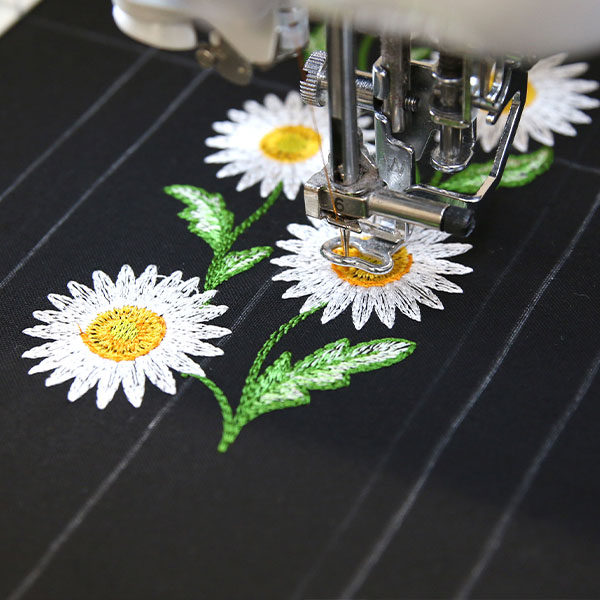
Stitch out your chosen design.
Unhoop the design.
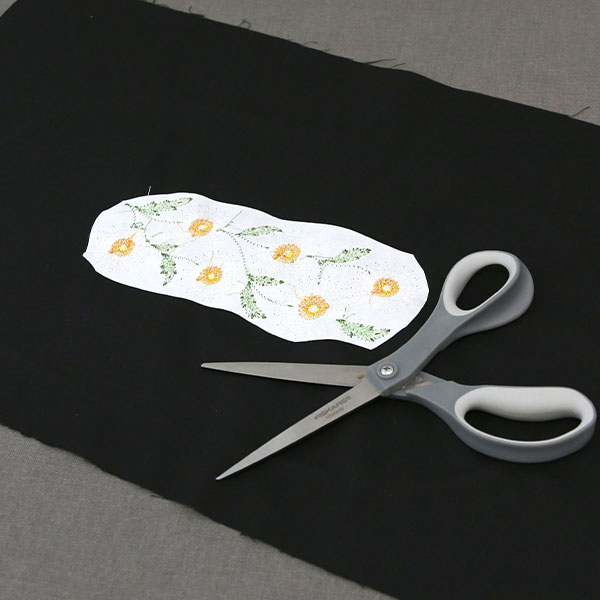
Remove the extra stabilizer as close as possible to the design.
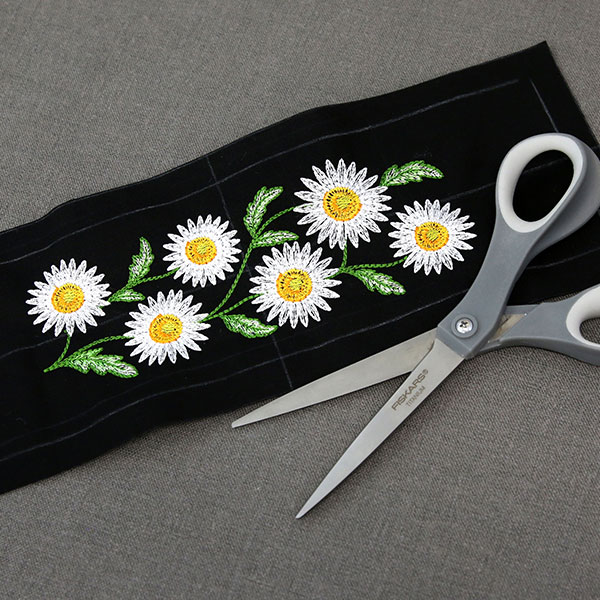
Cut out the rectangle around the line denoting seam allowance.
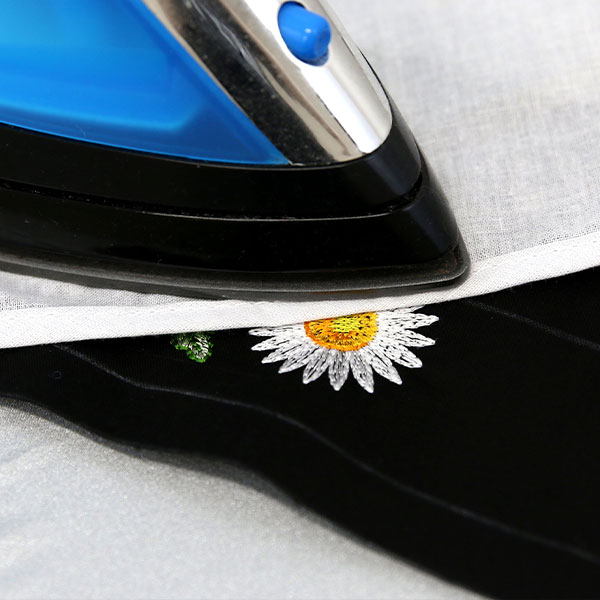
Use an iron and pressing cloth to press the design flat.
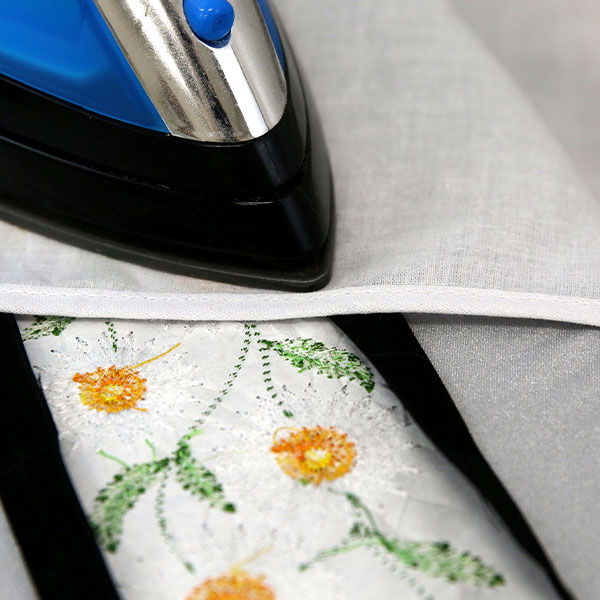
Next, fold over your seam allowance and press.
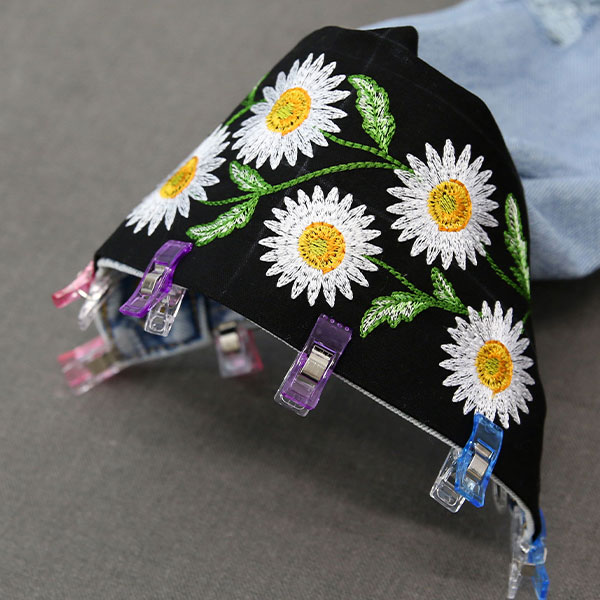
Turn the jacket inside out then line the folded pressed edge of the cuff up with the jacket. Pin or clip it in place with wrong sides together to prepare for hand sewing the wrong sides together.
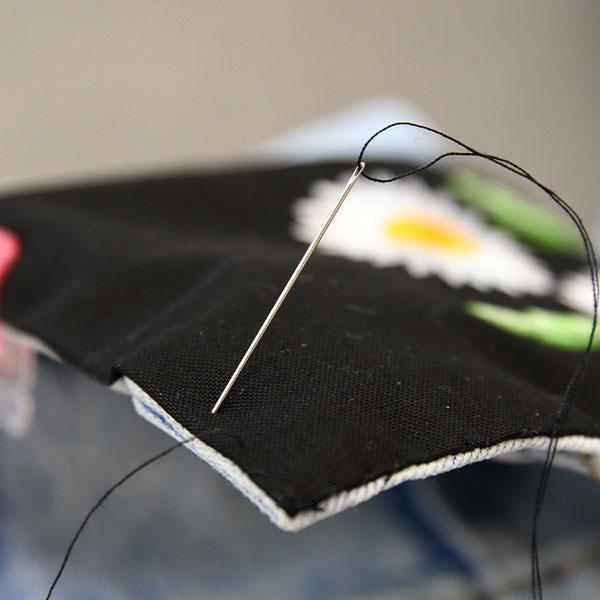
Using a hand sewing needle and thread, stitch the rectangle to the cuff of your chosen jacket
Note: Once the embroidered rectangle is attached to the jacket cuff, you can also add a slit to open the button hole and stitch around the opening with thread or embroidery floss for a finished look.


