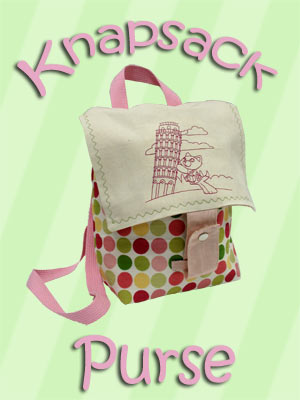
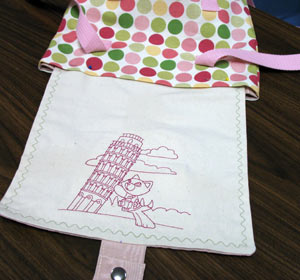
A stylish Knapsack Purse is just what you need to run errands around town or jet to fun travel destinations!
You will stay organized and keep your hands free for shopping, going to the park, or biking with your family.
It is the perfect size to use as a purse for grown ups, or as an overnight bag for kids of all ages. Just change the design and fabric to suit, and you have a wonderful, handmade gift for someone special!
A snap and drawstring closure will keep your things safe inside.
The finished size for this project is 9 (w) x 10 1/2 (h) x 7 (d) inches.
Supplies
Supplies needed:
** 1/2 yard solid-colored cotton canvas fabric
** 1/2 yard light-weight print canvas
** 1 yard moir� fabric for lining
** 2 1/2 yards belting strap
** 36 inch drawstring cord
** Safety pin
** Snaps and snap tool or snap pliers
** One drawstring cord stop
** Needle and thread for hand sewing
** Medium weight, cut-away stabilizer
** Air-erase pen
** Temporary spray adhesive
Designs Used:
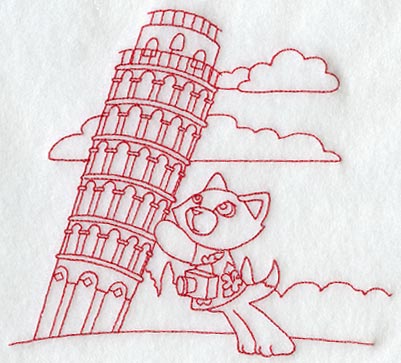
** Kitty in Pisa (Redwork) - Large also available in Small
Designs Used
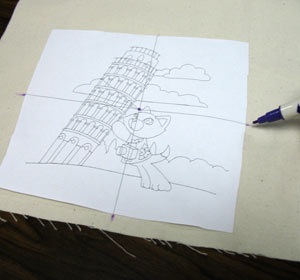
Cut an 11 x 11 1/2 inch piece of the solid-colored canvas fabric.
With your embroidery software, create paper templates of the design by printing it at full size. Cut around the design to make it manageable.
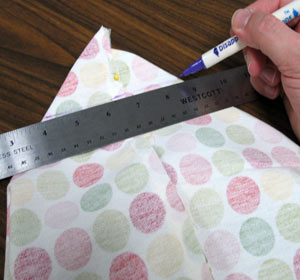
Measure 5 1/2 inches from each side to the center of the template and about 2 inches from the bottom edge of the fabric. Using an air-erase pen, poke a hole in the center of the template and mark the fabric. Also, mark the horizontal and vertical axis points on the fabric.
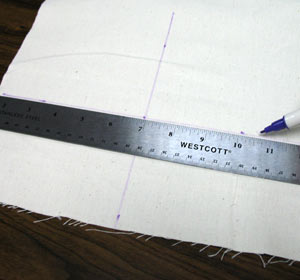
Remove the template and draw lines connecting the vertical axis points.
These lines will be used for hooping.
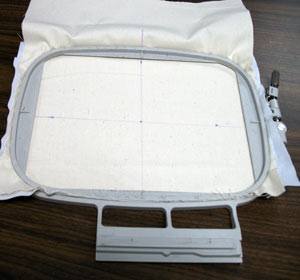
Spray the stabilizer with temporary adhesive and smooth the fabric over the stabilizer.
Hoop the fabric and stabilizer together by aligning the marks on the hoop with the lines on the fabric.
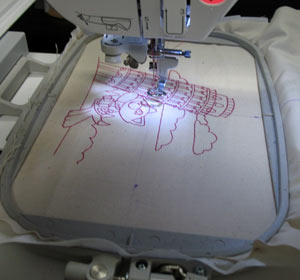
Attach the hoop to the machine, load the design, align the needle directly over the center point on the fabric, and embroider the design.
Once the design has been embroidered, carefully trim away the excess stabilizer.
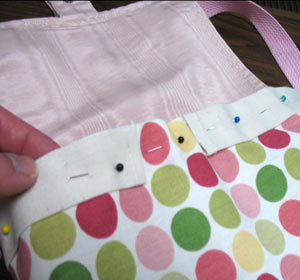
Cut a 4 x 8 3/4 inch piece of moire fabric for the snap for the front flap closure.
Fold the fabric in half lengthwise, right sides together, and pin in place.
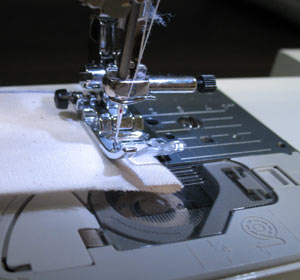
Sew a 1/4 inch seam along the open side edge and one of the ends, leaving the other end open for turning.
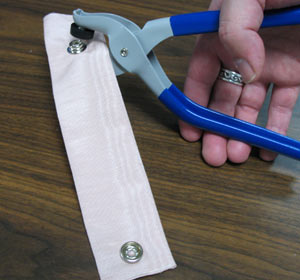
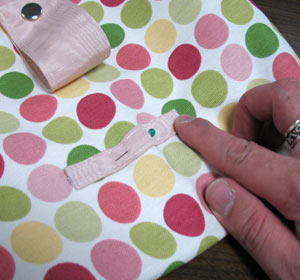
Turn the fabric right side out and press the seams flat. Add the outer (button) snap to the finished end of the fabric about 3/4 inch from the bottom with the button facing down.
Add the other snap about 1 1/4 inch from the unfinished edge with the snap facing up.
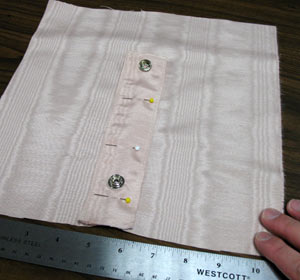
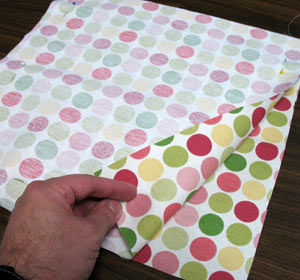
For the inside lining of the flap, cut a piece of moire fabric to 11 x 11 1/2 inches.
Place the snap fabric piece in the center of the fabric along the bottom edge. Pin the closure in place. Make sure the pins are at least 1 inch from the bottom edge.
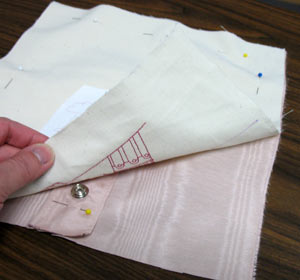
Lay the embroidered fabric on top of the moire fabric, right side down. The bottom of the design will match up with the closure. Pin in place.
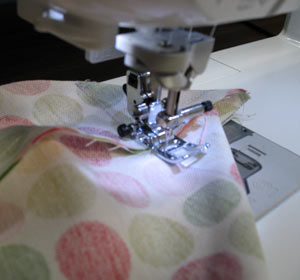
Sew a 1/2 inch seam along the sides and bottom edges only, leaving the the top open for turning.
Turn the flap right side out and press the seams.
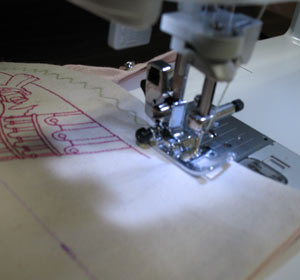
Top stitch a 1/2 inch seam around the sides and bottom edges.
Note: We added a decorative stitch in a new thread color to add interest to the flap.
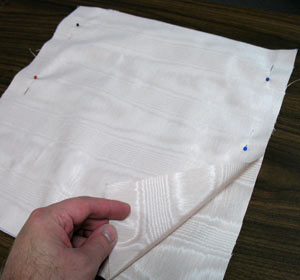
For the outer shell of the bag, cut two pieces of the print canvas to 13 1/2 x 14 1/2 inches.
Lay the pieces right sides together and pin in place. Sew a 1/2 inch seam around the sides edges and bottom edge only.
With the fabric still wrong side out, square off the corners. On each of the bottom corners, align the bottom seam over the side seam, creating a triangle. Pin in place and measure in 2 1/2 inches from the outer point of the triangle, and draw a line on the fabric.
Sew a seam along the line on both corners.
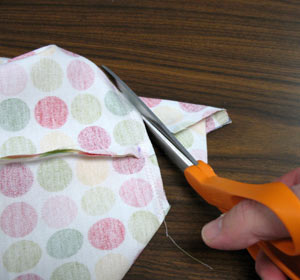
Trim off the corners about 1/2 inch out from the seam.
For the inner shell, cut two pieces of the moire fabric to 13 1/4 x 14 1/4 inches.
Lay the pieces right sides together and pin in place. Sew the inner shell together, as you did the outer shell, and create the squared corners.
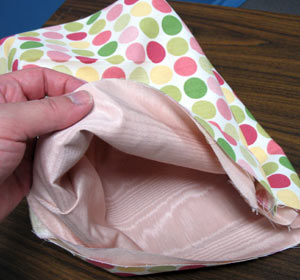
Turn the outer shell right side out and insert the inner shell, aligning the squared corners together.
Pin the layers together around the middle of the outer shell. Tack the corners of the outer and inner shells together with a needle and thread.

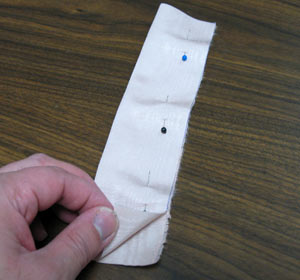
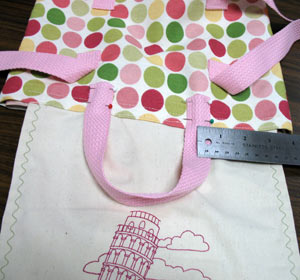
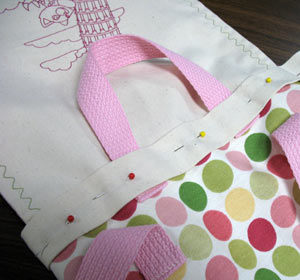
Cut two 33 inch lengths of the belting. (Or make these shorter, depending on the wearer). Add to the back of the bag as shown.
Mark and measure 3 inches from the top of the bag, 7 1/2 inches from the bottom seam, and about 3 inches in from the side seams.
Wrap the raw ends under and pin the straps in place. Be sure to pin the straps through the back layers only.
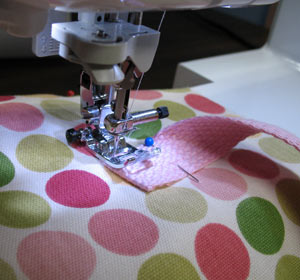
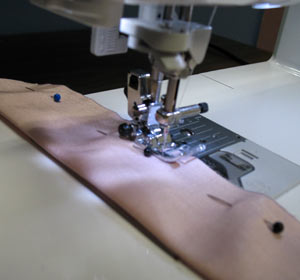
Sew the four ends of the strap by sewing a 1 inch square with an "x" through it.
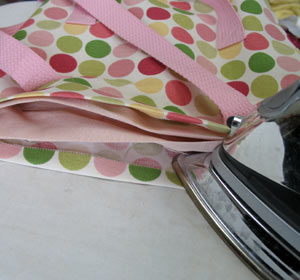
Turn the top edges of the outer and inner shell inside 1/2 inch and press in place.
Add the flap by laying the bag strap side up and inserting 1 inch of the unfinished edge in between the outer and inner shells. Pin in place.
Sew the flap in place by sewing a seam right along the top edge of the outer shell.
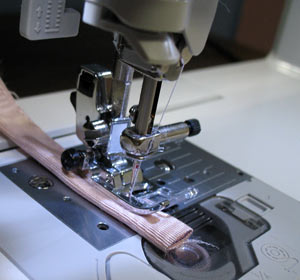
Add the handle to the back side of the bag by cutting a 13 inch length of the belt strap.
Turn the ends of the strap under 1/2 inch and pin the ends about 4 inches from each of the side seams and 1 inch from the top edge of the outer shell. Pin the ends of the strap in place and sew a 1 inch square with an "x" through it.
To prepare a "pocket" for the drawstring, cut a piece of the canvas to 23 1/2 x 2 inches.
Turn the ends over 1/2 inch and sew a 1/4 inch seam to finish the ends.
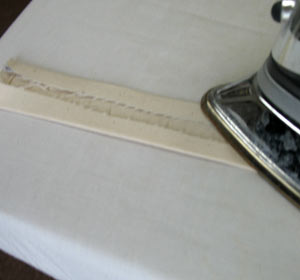
Turn the long side over 1/2 inch on each side, and press in place.
Add the pocket, pressed edges down, around the upper edges of the bag, starting and stopping about 1 inch from the center of the front. Pin in place.
Continue to pin in place around the back of the bag, covering the bag's handle.
Sew a seam along the top and bottom of the pocket.

Pin one end of the drawstring to a safety pin and thread the cord through the pocket.
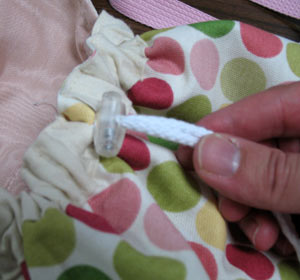
Remove the safety pin and thread the ends through the cord stop. Pull the cords to close the top of the knapsack.
Cut a 3 1/2 inch x 2 inch piece of the moire fabric for the loop portion of the snap closure.
First fold the long edges together lengthwise and then fold in half lengthwise again. Sew a seam along the sides of both long edges.
Lay the hoop horizontally on the front of the knapsack about 2 1/2 inches from the bottom center. Pin in place. Fold the ends of the loop under 1/4 inch and sew the ends of the loop in place.

It's a snap! This Knapsack Purse ready for anything, so take it wherever you may roam!


