
Celebrate the reason for the season with this creative Nativity Wall Hanging.
With squares featuring cute characters portraying each role in the Christmas Pageant and pockets that can be filled with colorful greenery, floral stems, and festive berries, this little wall hanging is a delight for all ages.
Make one for yourself and another for a friend, family member, or for your church. Brighten the season for everyone you know.
The finished size for this project is 29 1/2 inches wide by approximately 21 inches high.
Supplies
Supplies needed:
** 1/2 yard light weight canvas
** 1/2 yard print quilter's cotton
** 15 inch x 20 inch piece of solid quilter's cotton
** 30 1/2 inch x 28 inch piece of polyester felt (for the back)
** Medium weight cut-away stabilizer
** Temporary spray adhesive
** Air-erase pen
** 28 inch curtain rod
** Floral water tubes
** Needle and thread for some hand sewing
** Fresh or artificial pine sprigs
** Decorative floral stems
Designs used:
** A First Noel Design Pack - Lg, Md, or Sm
Designs Used


Preparing the Squares
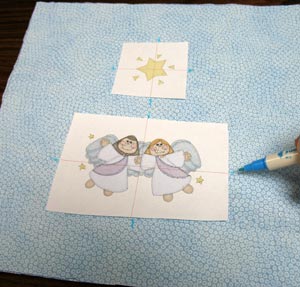
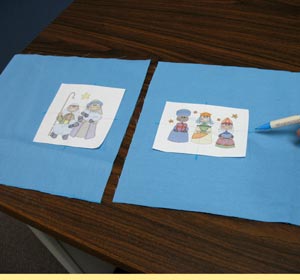
Create a paper template of each design to be embroidered by printing it at full size using embroidery software. Trim around each design for easy placement.
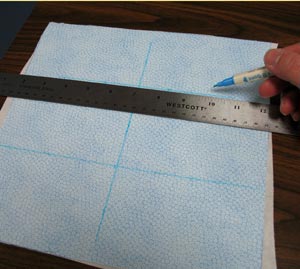
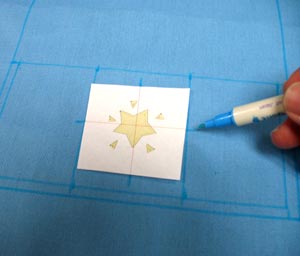
For the bottom middle square, draw a 10 1/2 inch by 10 1/2 inch square on the solid quilter's cotton using an air-erase marker.
Find the center by measuring and marking each side and dividing by two. Then, draw lines connecting the marks. Where the lines meet is the exact center.
Poke a hole in the center of the design and align it with the center point of the square. Make sure that the design fits well within the shape. There should be at least one inch of space between the design and the edge of the square.
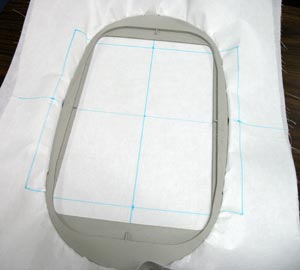
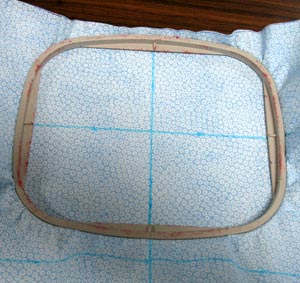
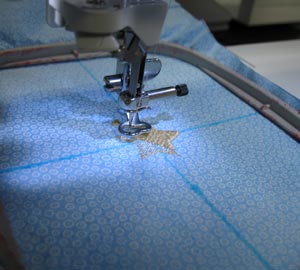
Hoop the fabric with cut-away stabilizer that has been sprayed with adhesive. Hoop the fabric and stabilizer together by aligning the marks on the hoop with the lines on the fabric.
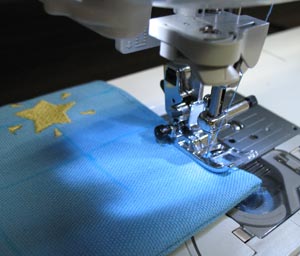
Attach the hoop to the machine and load the design. Align the needle over the center point on the fabric and embroider the design.
After the design has been embroidered, unhoop the fabric and cut out the shape. Note: Quilter�s cotton is quite thin, so when it is a light-colored solid, we don�t trim away the stabilizer. (This is a way to avoid an unsightly �ring� that could show through around the design.)
Cut three 10 1/2 inch by 10 1/2 inch squares from the print quilter�s cotton.
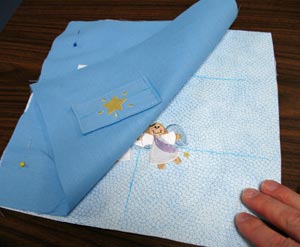
For the top middle square, place the star design 3 1/2 inches from the top edge of the fabric to the center of the design. Place the angel design 3 1/2 inches from the bottom edge of the fabric to the center of the design. Both designs are centered horizontally (from side to side) on the square.
Poke a hole in the center of the templates and mark the fabric. Also, mark the horizontal and vertical axis points.
Remove the templates and draw lines connecting the axis points. These lines will be used for hooping.
Hoop the fabric with cut-away stabilizer that has been sprayed with adhesive. Hoop the fabric and stabilizer together by aligning the marks on the hoop with the lines on the fabric.
Attach the hoop to the machine and load the first design. Align the needle over the center point on the fabric and embroider the design. After the design has finished, re-hoop the fabric over the other center point, load the second design, align the needle over the center point, and embroider the design.
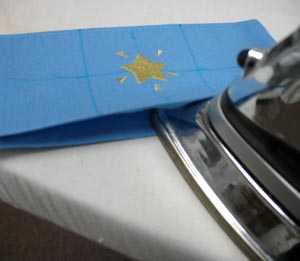
After you have embroidered both designs, you can trim away the excess stabilizer.
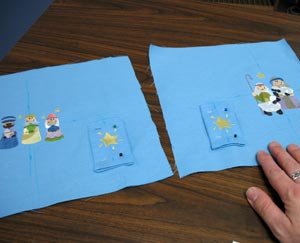
To prepare the top right and left squares, cut two 10 1/2 inch by 10 1/2 inch squares from the light weight canvas. On one of the squares, place the shepherd design 3 inches from the right edge of the fabric to the center of the design. On the other square, place the wise men design 3 1/2 inches from the left edge of the fabric to the center of the design. The designs are centered vertically in the square (from top to bottom). Mark the centers and axis points.
Remove the templates and draw lines as you did before. Hoop the fabric with cut-away stabilizer, embroider the designs and trim the stabilizer.
Preparing the Pockets
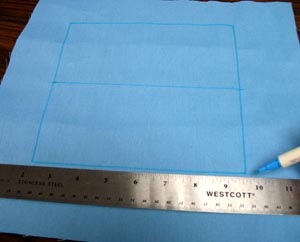
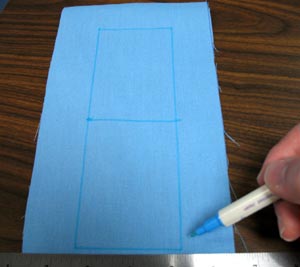
To create the larger pockets for the lower right and left squares, mark two 7 1/2 inch by 7 1/2 inch squares on the lightweight canvas. Find and mark the center of the sides by measuring and dividing by two. Draw a line between the top marks (the fabric will be folded on this line).
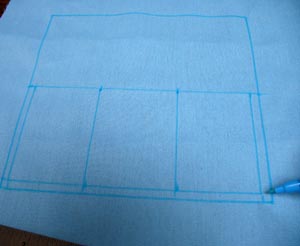
Measure and mark a 1/4 inch seam allowance around the sides and bottom edges of the lower half of the square. Also, mark 2 1/4 inches in from each side along the middle line and along the bottom (starting from the inside of the seam allowance). Draw vertical lines connecting these marks. These lines will be used as guides for sewing the seams that will separate the pockets.
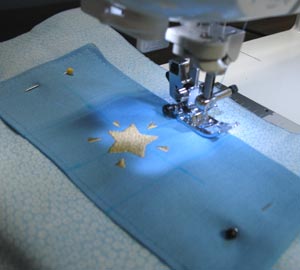
Place the star design in the center of the middle pocket and mark the center and axis points. Remove the template and draw lines connecting the axis points. Hoop the fabric with cut-away stabilizer. Embroider the design.

When the design has finished embroidering, cut out the shape.
Repeat this for both pockets.
To create the small pockets for the upper right and left squares, mark two 2 1/2 inch x 7 1/2 inch squares on the light weight canvas. Find and mark the center of the sides by measuring and dividing by two. Draw a line between the top marks (the fabric will be folded on this line).

Next, measure and mark a 1/4 inch seam allowance around the sides and bottom edges of the lower half of the square Place the star design in the center of the lower half and mark the center and axis points. Remove the template and draw lines connecting the axis points.
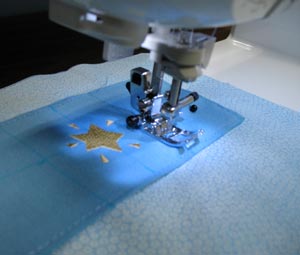
Hoop the fabric with cut-away stabilizer. Embroider the design. Repeat for the second pocket.
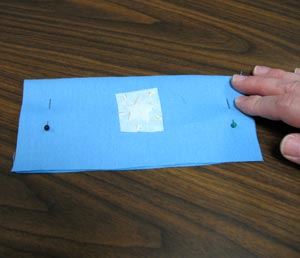
To assemble the pockets, fold the fabric along the centerline with the right sides together. Pin in place.
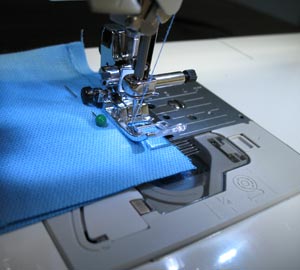
Sew a 1/4 inch seam along the left and right sides only.
Turn the pockets right side out and sew a 1/8 inch seam along the folded edge.
Turn the bottom edges of the fabric in 1/4 inch and press.

To place the large pockets on the lower right and left squares, position them 1 1/4 inch from the bottom of the square to the bottom of the pocket. Also, measure equal distances from the side of the fabric to the sides of the pocket. Pin in place.
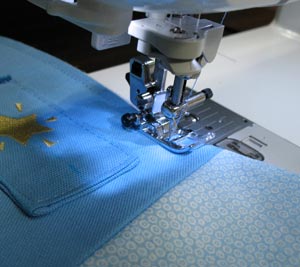
Sew a 1/8 inch top-stitch along the sides and the bottom.
Then, stitch along the two lines separating the sections of the pockets.
To place the small pockets on the upper right and left squares, position them 1 1/4 inch from the bottom of the squares to the bottom of the pocket. Also, measure equal distances from the side of the pocket to the edge of the design and from the side of the pocket and the edge of the square. Pin in place. Sew a 1/8 inch topstitch along the sides and the bottom of the pocket.
Assembling the Wall Hanging
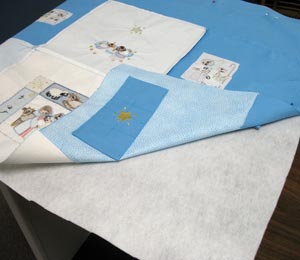
First, we will assemble the top squares. Align the top left square on top of the top middle square with the right sides together. Pin along the left side and sew a 1/4 inch seam along the left side.
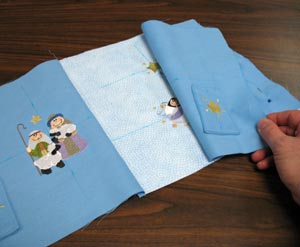
Align the top right square on top of the top middle square, right sides together, and pin along the right side. Sew a 1/4 inch seam along the right side. Press the seams flat on the back of the squares.
To assemble the bottom squares, align the bottom left square on top of the bottom middle square, right sides together, and pin along the left side. Sew a 1/4 inch seam along the left side.
Align the right bottom square on top of the bottom middle square and pin along the right side. Sew a 1/4 inch seam along the right side. Press the seams.
Align the top squares on top of the bottom squares and pin along the top edge. Sew a 1/4 inch seam along the top edge.
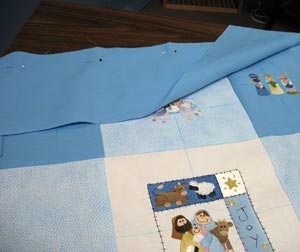
To create the top edge of the hanger, cut a 30 1/4 inch by 7 1/2 inch piece of the light weight canvas. Align the piece with the top edge of the squares and pin in place along the top edge. Sew a 1/4 inch seam along the top edge. Press the seams.
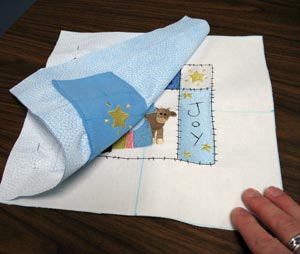
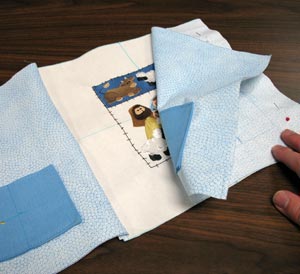
Next, to add the back fabric, lay the assembled front on top of the felt and cut out the shape. Lay the front on top of the felt with the right sides together. Pin in place. Sew a 1/4 inch seam along the sides and top only -- leave the bottom open for turning.
Turn the open edges in 1/4 inch and press. Top stitch a 1/4 inch seam around the entire outer edge.

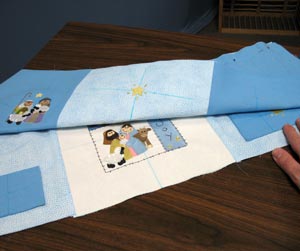
Next, fold the top edge over 3 1/2 inches so that the top edge is about 1/2 inch down from the top square/top section seam. Pin in place.

Sew a 1/4 inch seam along the top square/top section seam.
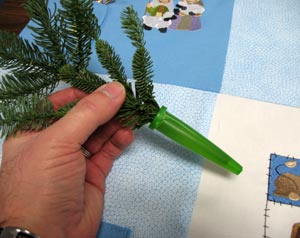
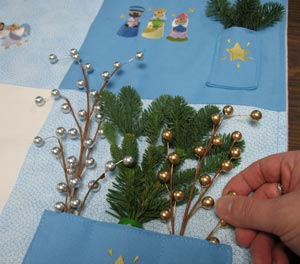
Now, you can add artificial or fresh pine boughs to this wall hanging. To keep evergreen sprigs fresh, insert them into floral water tubes and then insert the tubes into the pockets. We trimmed the bottom point off the tubes so that they will fit nicely in the pockets. Floral water tubes (or aqua tubes as they are sometimes called) are available in many craft stores and floral supply stores.
Add the curtain rod and hang it on your wall!
If gravity causes any of the boughs or decorations to droop or lean forward after hanging, simply hand sew them to the hanger with a couple of stitches using needle and thread.

A nativity wall hanging will brighten any room in your home or church!


