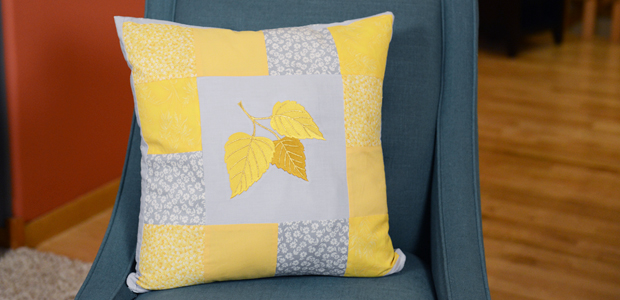
Combine classic quilting techniques with machine embroidery. The result is a creative way to showcase your favorite embroidery designs! A contemporary color scheme of grey and yellow adds a contemporary look to this project.
Supplies
Project Needs & Notes
- 18" x 18" pillow form
- 1/2 yard solid-colored quilter's cotton
- Twelve 5" x 5" pieces of quilter's cotton
- 3/4 yard print quilter's cotton
- Medium weight (2.5 ounce) cutaway stabilizer
- Temporary spray adhesive (like Gunold KK100)
- Air-erase pen
- 18" all-purpose zipper or invisible zipper
When selecting quilter's cotton, choose a good quality, such as Kona cotton.
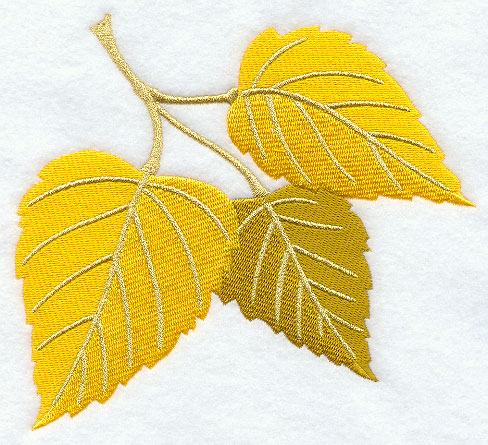
For this tutorial I used E6627, the 6.39" x 5.84" size of the Birch Leaf Trio design. Find even more seasonal designs in the Seasons category here.
Finished size: 18" x 18"
This project was featured in the following:
Pillow Party Lookbook
Pillow Party Trunk Show 3 Video
Designs Used
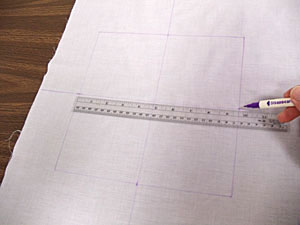
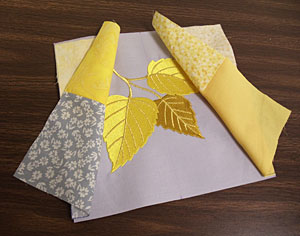
First, prepare the fabric for the front center square.
Using an air-erase pen, draw a 9 1/2" x 9 1/2" square on the solid-colored cotton fabric.
Leave a few inches of excess fabric around the shape.
Mark the center of each side of the square and draw lines connecting the marks. These lines will be used for hooping.
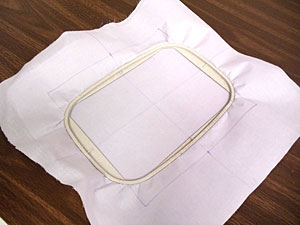
Spray a piece of cutaway stabilizer with temporary adhesive and smooth the fabric on top. Hoop the fabric and stabilizer; embroider the design.
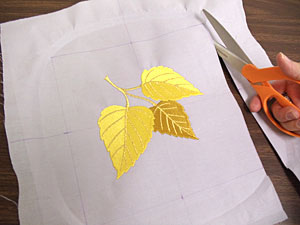
After the design has finished, cut out the shape.
There is no need to cut the excess stabilizer away. Leave it covering the entire back of the square to avoid the edges of the stabilizer from forming a ridge under the cotton.
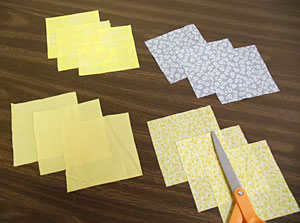
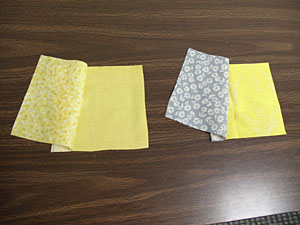
To prepare the outer squares for the front of the pillow, cut twelve pieces of quilter's cotton to 5" x 5". This example shows square from four different print and solid fabrics.
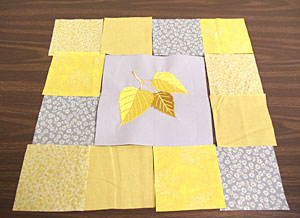
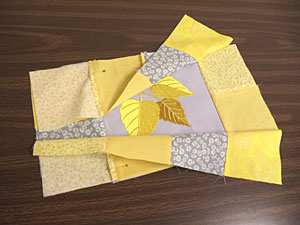
Arrange the center embroidered piece and the squares as you wish to have them in the pillow.
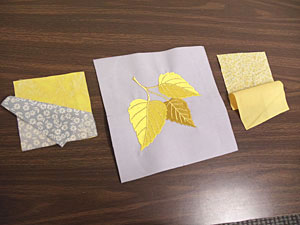
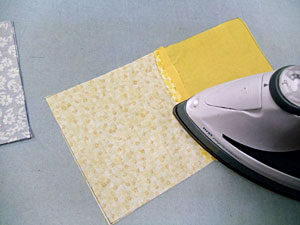
Align the side squares (the squares that are just to the right and left sides of the center square) together. Place the right sides together and pin in place.
Sew a 1/4" seam along the pinned edge only.
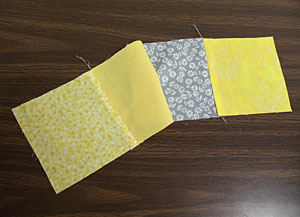
Press the back seam open.
Align the assembled side squares on top of the embroidered center square, right sides together, and pin in place.
Sew a 1/4" seam along the pinned edges only and then press the back seams open.
Align the top outer squares together, in pairs of two, with the right sides together.
Pin in place, sew a 1/4" seam along the pinned edge.
Press the seams.
Align the inner edges of the center squares of each pair together, right sides together.
Pin in place, sew a 1/4" seam, and press. Repeat this process for the row of bottom outer squares, too.
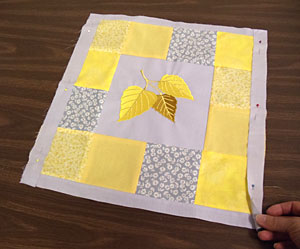
Align the assembled top and bottom outer squares with the assembled center/side portion, right sides together. Pin in place and sew a 1/4" seam along the pinned edges only. Then, press the back seams.
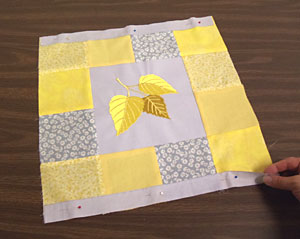
To prepare the top and bottom front borders, cut two pieces of fabric to 17 1/2" x 1 1/4".
Align the pieces with the top and bottom edges of the assembled front piece, right sides together.
Pin in place, sew a 1/4" seam along the pinned edges, and press.
To prepare the side front borders, cut two pieces of fabric to 19" x 1 1/4".
Align the pieces with the sides of the assembled front piece, right sides together. Pin in place, sew a 1/4" seam along the pinned edges, and press.
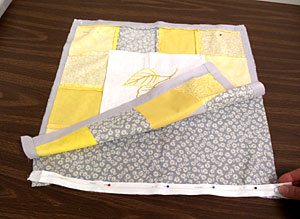
When preparing the back fabric piece, lay the assembled front piece on top of the print fabric and cut out the shape. Align the pieces together, right sides together, and pin in place at the top and sides.
Align the bottom edge of the zipper with the bottom edge of the back fabric with the right sides together. Pin in place.
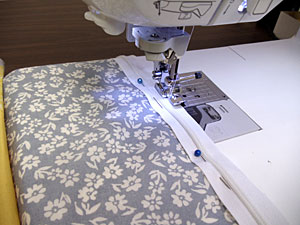
Using a zipper foot on your machine, sew a seam along the bottom edge of the zipper.
Align the opposite edge of the zipper with the bottom edge of the front fabric, right sides together.
Pin in place and sew a seam along the outer edge of the zipper.
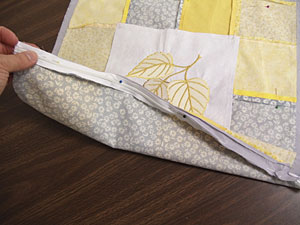
Unzip the zipper and sew a 1/2" seam along the side and top edges of the pillow. Turn the fabric right side out, insert the pillow inside, and zip it up.
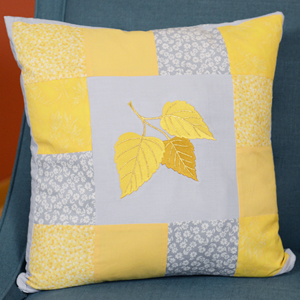
Yellow and grey fabric brings a contemporary look to this pillow. Experiment with different colors of fabric, and different embroidery designs, to make this project uniquely yours!


