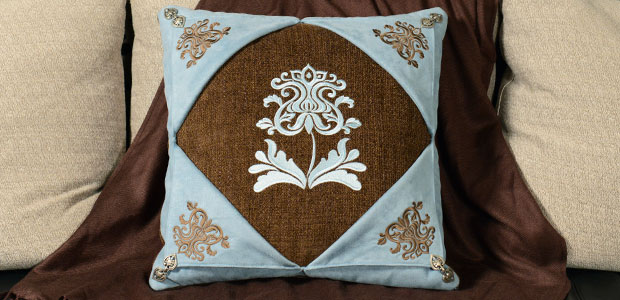
This pillow uses faux suede and chenille to add excellent texture to your home decor. And, the "color play" of blue thread on brown, and brown thread on blue, results in a contemporary effect. Picture window panels frame the design beautifully!
Supplies
Project Needs & Notes
- 16" x 16" pillow form
- 1/2 yard home decor fabric (I used faux suede)
- 1/2 yard home decor fabric (I used chenille)
- Medium-weight (2.5 ounce) cutaway stabilizer
- Temporary spray adhesive (like Gunold KK100)
- Air-erase pen
- 16" all-purpose zipper
- 4 decorative metal clasps.
(The ones in this tutorial were found at JoAnn Fabrics in the buttons section)
- Rotary cutter and craft pad
- Thread and needle for hand sewing
For this tutorial, I used D5158, the 5.86" x 6.93" size of the Dainty Damask Flower design. The corners feature D5162, the 3.26" x 2.45" size of the Dainty Damask Accent design. Find even more damask designs in the Damask department.
Finished Size: 16" x 16"
This project was featured in the following:
Designs Used


Begin by preparing the faux suede fabric for the front panel.
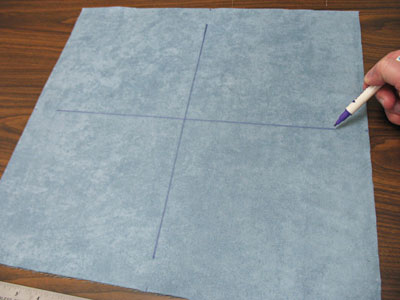
From the 1/2 yard of faux suede, cut a piece that is 17" x 17". Be sure to cut this piece from the end of your fabric, as you'll be needing a second 17" x 17" piece later.
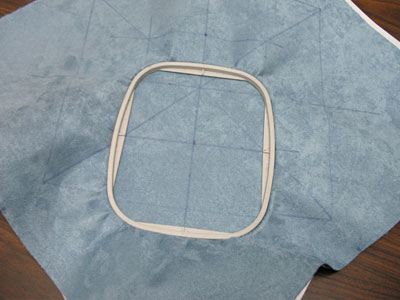
Use an air-erase pen and draw horizontal and vertical axis lines through the center of the fabric square. Start and stop the lines
1 1/2" from the edges of the fabric as shown left.
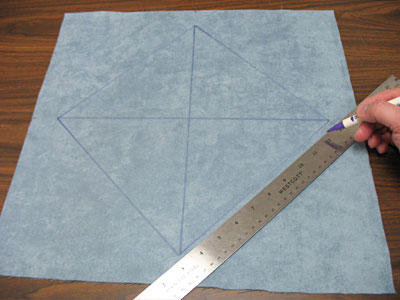
Draw lines to connect the points, creating a diamond shape.
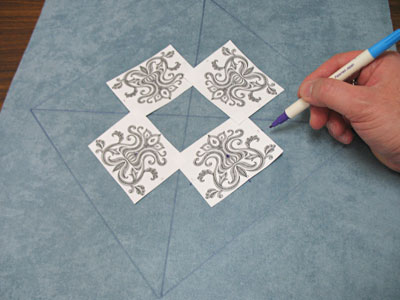
Print four templates of the Damask accent design from embroidery software.
If you don't have software, Wilcom's TrueSizer is a free program that can print templates
Place the templates with the top of the designs facing the center of the square. Position them one inch from each other, as shown.
Mark the center points of each design, as well as the vertical and horizontal axis lines.
Spray the cutaway stabilizer with temporary adhesive. Smooth the fabric on top.
Hoop the fabric and stabilizer together. Then embroider the first Damask accent, then the second, then the third, then the last.
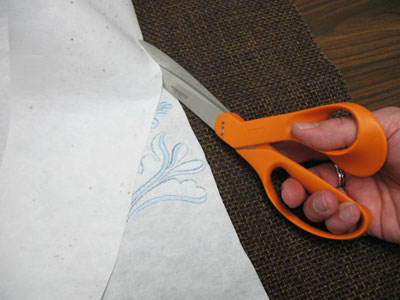
Trim the excess stabilizer away from the back of the fabric.
Next, prepare the chenille fabric for the inner front panel.
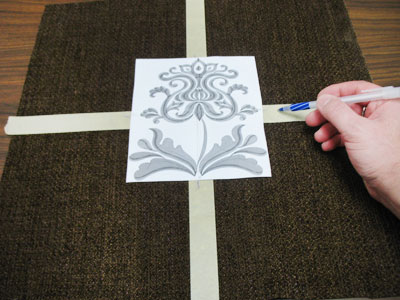
Cut a piece of chenille fabric 17" x 17." Draw the horizontal and vertical axis lines through the center of the fabric, as you did with the faux suede above.
In this example, dark brown fabric is used, and marks from air-erase pens do not show up easily. Masking tape is on the fabric, and marks are being made on the tape, to aid in marking.
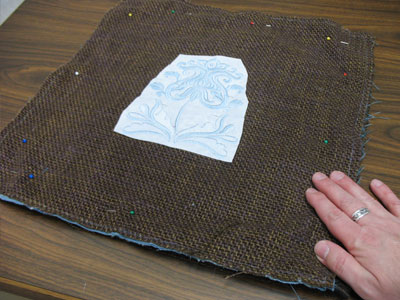
Print a template of the Damask flower for the center. Position it on the fabric so the center of the flower will be in the center of the fabric.
Make sure the design fits well within the shape. There should be at least 5 1/2" to 6" of space between the edges of the design and the edges of the fabric.
Spray cutaway stabilizer with temporary adhesive, and smooth the chenille on top. Hoop the two together. Remove the tape if you've used it.
Embroider the design. After embroidering, trim the excess stabilizer away from the back.

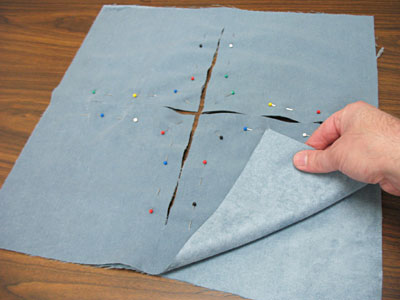
Place the embroidered faux suede panels on top of a second 17" x 17" piece of faux suede.
Pin in place around the outer edges of the drawn square shape on the top piece of fabric and above each design, just next to the center point.
Lay the fabric on top of a cutting pad. Using a rotary cutter, cut around the outer shape of the embroidered piece, cutting through both layers of faux suede.
Now cut through both layers of fabric along horizontal and vertical lines on the fabric, between the designs. Stop cutting 1 1/2" from the edges of the fabric, as shown left. These cuts will be used to create the triangle flaps.
Remove the pins and align the two layers of fabric together, right sides together.
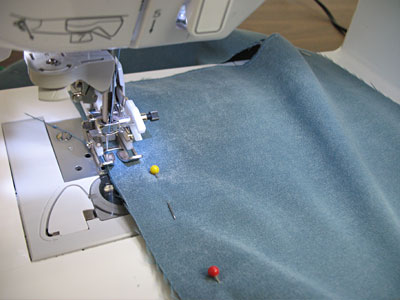
Sew a 1/8" seam along the inner cuts (the horizontal and vertical cuts near the embroidered designs). Be careful not to sew any part of the embroidery in these seams.
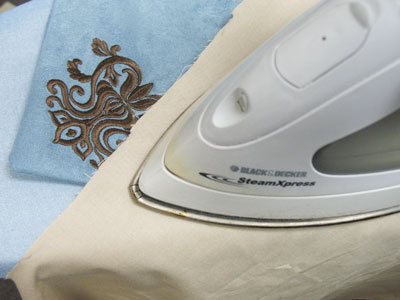
Turn the fabric right side out and press the seams with an iron.
Use a pressing cloth to prevent scorching of the faux suede or the embroidery stitches.
Top stitch a 1/8" seam around the inner shapes.
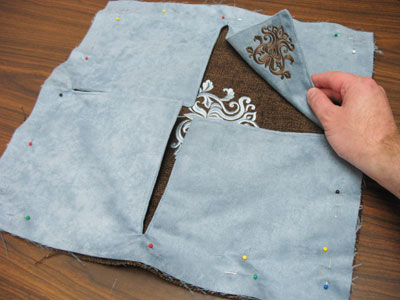
Lay the inner front panel (chenille fabric) with the right side facing up. Align the outer front panel (faux suede) on top with the right sides facing (embroidered sides together).
Pin in place along the outer edges and at the top of each triangle shape.
Sew a 1/4" seam around the entire outer edge.

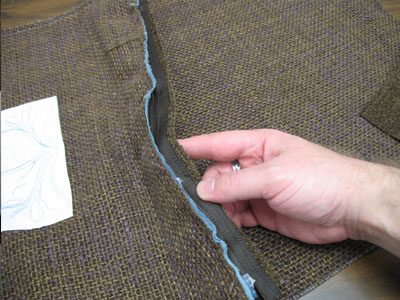
Align the zipper, wrong side down, along the bottom edge of the front panel. Make sure the inner panel design is facing upright.
Allow about 1/4" of the front panel to extend down past the bottom edge of the zipper. Pin in place.
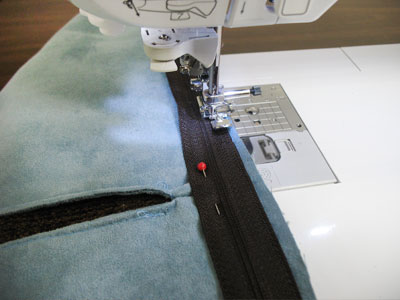
Using a zipper foot, sew a 1/2" seam along the bottom edge of the front panel along the bottom edge of the zipper.
To prepare the back panel fabric, cut the remaining chenille to 17" x 17".
Align one edge of the back panel fabric with the opposite edge of the zipper, right sides facing. Again, allow about 1/4" of fabric to extend past the edge of the zipper.
Sew the zipper in place by sewing a 1/2" seam along the bottom edge of the back panel.
Unzip the zipper halfway. Align the front and back panels right sides facing, and pin in place.
Sew a 1/2" seam along the side and top edges only.

Turn the pillow right side out and remove the pins. Fold the triangular flaps back on the front panel.
Add the metal clasps by hand, sewing one end to the points of the triangle shapes and the other end to the corners of the pillow.
You may also use Velcro, snaps, or buttons on the flaps -- it's up to you!

Experiment with different designs and color combinations to find a look that's uniquely yours!


