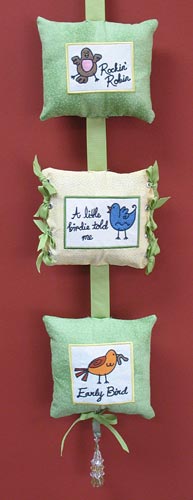
A dash of cozy, a sprinkle of country, and three cups of cute is the perfect recipe for this charming Sweet Tweet Wall Hanging.
Three colorful bird designs are tucked neatly onto a tiny pillow. The bird designs are "in-the-hoop" magnet designs; we'll show you how to use that kind of design to stitch right onto fabric for this project.
Decorative beads and ribbon add texture and interest; and potpourri makes this project fresh and fragrant.
The finished size of this wall hanging is 6 inches wide by 30 inches high, and can be easily made longer by adding more "pillows" to the ribbon.
Read on for free project instructions!
Supplies
Supplies Needed:
**1/2 yard cotton fabric (two colors, 1/4 yard each)
**Small pieces of fabric for applique
**Medium-weight cutaway stabilizer
**Temporary spray adhesive
**Air-erase pen (or other marking tool)
**Polyester fiberfil
**1 inch wide ribbon
**3/8 inch wide ribbon
**One "D" ring
**Craft knife
**1/4 inch grommets/eyelets and eyelet tool
**Hammer
**Needle and thread for some hand sewing
**Decorative beads (optional)
**14 inch x 14 inch organza and potpourri (optional)
**Sweet Tweet Design Pack (Large or Small)

First we'll mark the fabric for the embroidery.
Cut three 9 inch x 9 inch pieces from the cotton fabric. This fabric will be for the front
of the "pillows."
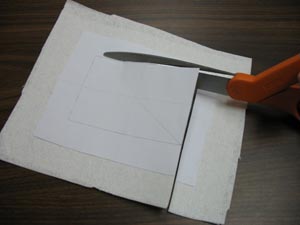
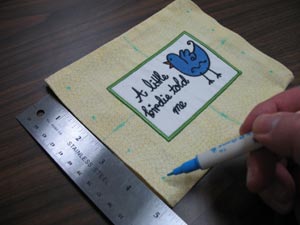
If you have embroidery software, create paper templates of the designs. Place a template in the center of the fabric piece. Poke a hole in the center of the template, and mark the fabric with an air-erase pen.
Mark the horizontal and vertical axis lines. Then, measure out
1 and 3/4 inches from the edges of the design, and mark the fabric.
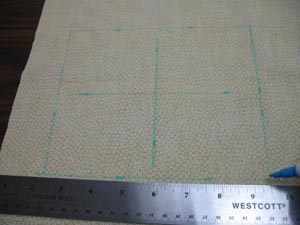
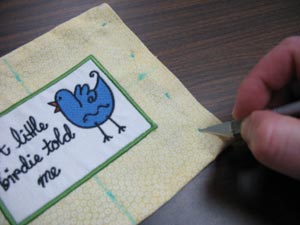
Draw a line connecting the outer marks. This is where the shape of the fabric will eventually be cut.
Also, draw lines connecting the axis points. These lines will be used for hooping.
Repeat this process and mark the a design on each of the three pieces of fabric
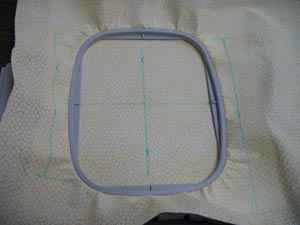
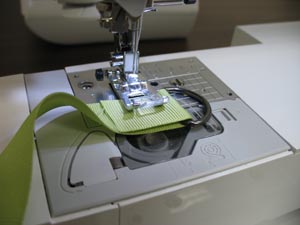
Spray a piece of cutaway stabilizer with temporary adhesive (we use KK100) and smooth the fabric on top.
Slide the bottom of the hoop under the stabilizer and place the top hoop on top, lining the horizontal and vertical axis lines with the marks on the hoop.
Press the hoop together, hooping the fabric with the stabilizer.
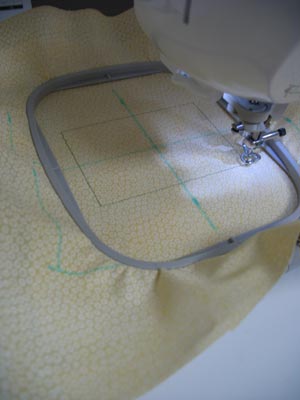
Attach the hoop to the machine and select the magnet design -- that's the file that begins with the numbers "24."
Embroider the design. The first thing to sew will be a dieline -- a running stitch outline that shows where to place another piece of fabric.
Open the front dieline file in your embroidery software -- that's the file that begins with the letters "DLFront." Print it at full size.
Take a piece of fabric that you've selected for applique. Spray a piece of cutaway stabilizer with temporary adhesive, and smooth the fabric on top.
Place the dieline printout on top of the fabric and stabilizer, and cut out the shape.
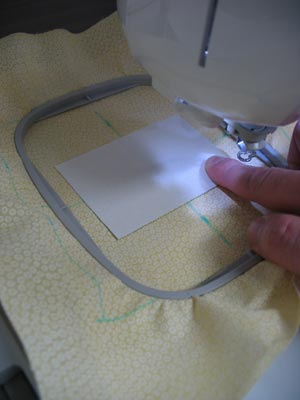
Spray the backside of that piece with a bit of temporary adhesive. Then, place that fabric and stabilizer on top of the hooped fabric, right inside the shape from the dieline.
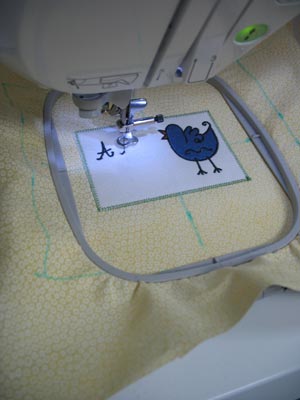
Continue embroidering the design. A tackdown or zig zag stitch will sew next, and this binds the applique fabric and stabilizer to the hooped fabric and stabilizer.
Other elements of the design will sew, including a second tackdown stitch and a satin stitch border.
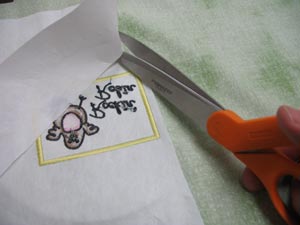
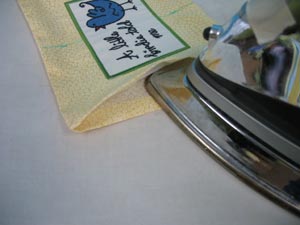
After the design has finished, unhoop the fabric and trim the excess stabilizer away. We leave about 1/4 inch around the design on the backside.
Repeat this process for the other two "pillows."
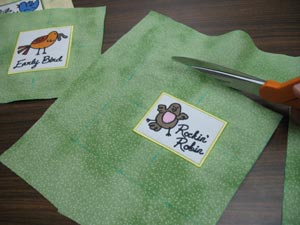
After all the designs have sewn, cut the shapes along the lines that you marked earlier.
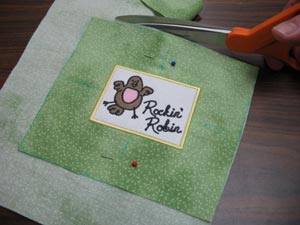
Next we'll cut the fabric for the back of the pillows.
Pin the front pieces to the back fabric, and cut the back fabric to match the front.
We'll demonstrate two different ways to finish the pillows.
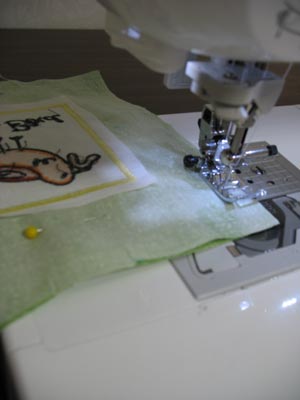
First, a stitch-and-turn pillow.
Place the front and back pieces right sides together, and pin in place. Sew a 1/4 inch seam around the bottom, sides, and top, leaving a 2" gap on the bottom seam in the center.
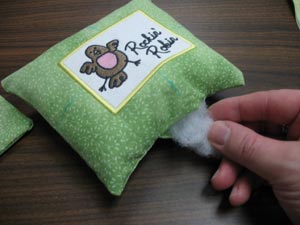
Turn the pillow right side out and fill it with fiberfil.
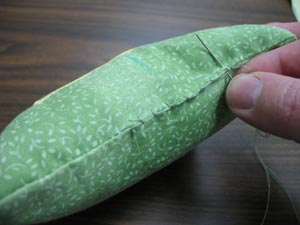
Hand stitch the opening closed.
The second version is a pillow sealed with grommets.
Place the front and back pieces right sides together, and sew a 1/4" seam along the top and bottom.
Turn the pillow right side out and fold the sides in 1/4 inch. Press in place.

Sew a 1/8 inch seam around the folded edges of each side -- but don't sew the sides shut.
Mark 3/4 inch down and 1/2 inch in from each corner. Then, mark 1 1/4 inch increments in-between these marks (four marks total on each side).
Use a craft knife to cut small slits at each mark. Cut through both layers of fabric.
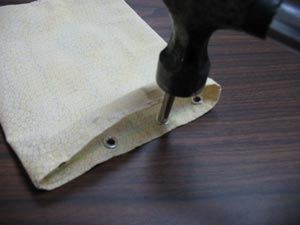
Add a grommet/eyelit to each slit (16 in all on the front and back) using a grommet/eyelet tool and hammer.
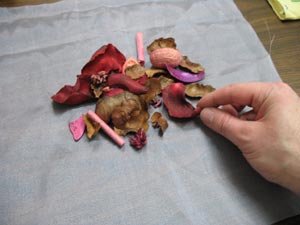
To create a sachet for potpourri, cut a piece of organza to 14 x 14 inches. Lay it flat, and place a small amount of potpourri on top.
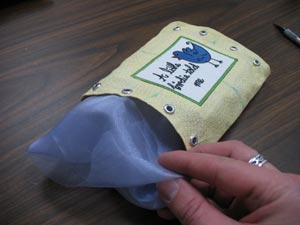
Fold the organza to make a pouch, and insert it into the pillow.
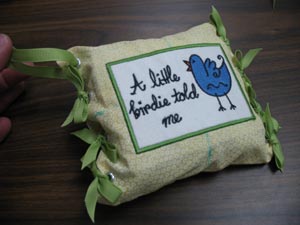
Thread 3/8 inch wide ribbon through each set of grommets/ eyelets (front and back) and tie small bows.
Next we'll add the ribbon so that the pillow can be hung.
Wrap the end of the 1 inch wide ribbon around the D ring, and sew it in place.
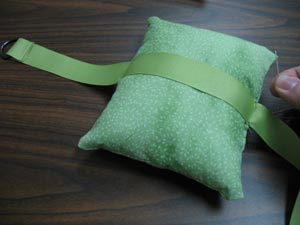
Center the ribbon with the center back of the first pillow (make sure the top of the pillow faces the D ring). Leave about 5 1/2 inches of excess ribbon from the top of the pillow to the end of the D ring.
Hand stitch the ribbon to the top and bottom seams of the pillow.
Add the other two pillows, leaving about 2 1/2 inches between each pillow.
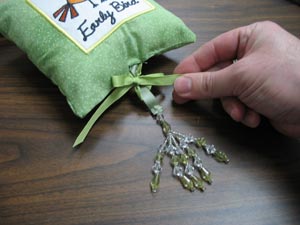
Trim the ribbon at the bottom of the last pillow, leaving about 1 1/2 inches of excess. Add the decorative beads -- tie them to the end of the ribbon by cutting a six inch length of the 3/8 inch ribbon and tying a bow.

Sweet and sassy birds are ready to warm up your home in this cozy project!


