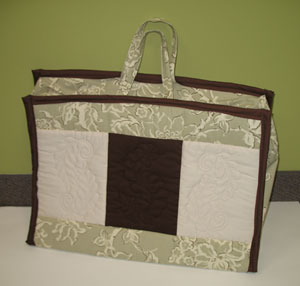
Carry your quilting supplies in style with this Quilter's Caddy!
Features include a zipper closure, quilted shell, handles (or shoulder straps), inside loops for fabric, and inside pockets. This unique tote can also hold a 18 inch wide by 12 inch high cutting pad/rotary mat!
Read below for these free project instructions.
Supplies
Supplies Needed:
**1 1/2 yards lightweight print canvas (home decor fabric)
**1 yard dark colored quilter's cotton
**1 yard light colored quilter's cotton
**Two 15 inch wide by 22 1/4 inch high pieces of heavy weight fusible interfacing
**9 inch by 9 inch piece of clear vinyl
**Temporary spray adhesive
**Extra-loft batting
**Air-erase pen, dress maker's pencil or other marking tool
**6 1/2 inch wide by 20 inch high piece of foam board or thick cardboard
Supplies Continued:
**30 inch sport zipper
**9 inch all-purpose zipper
**Extra wide - double fold bias tape
**4 yards - 7/8 inch wide double fold quilt binding
**Rotary cutter and mat
**All-purpose cotton sewing thread
**Nylon monofilament thread
**Needle and thread for some hand sewing
Designs used:
Feather Quilting Curled Feather Pair (Single Run) - XL
Feather Quilting Wavy Leaf (Single Run) - XL
These designs are available in the following design packs:
A Feather Quilting Design Pack - XXL
A Feather Quilting Design Pack - XL
A Feather Quilting Design Pack - Lg
A Feather Quilting Design Pack - Md
A Feather Quilting Design Pack - Sm
Finished Size:
22 inches wide by 15 inches high by 7 inches deep
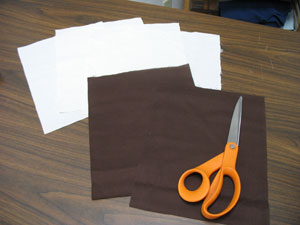
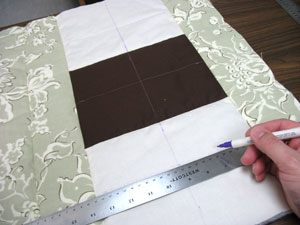
To begin we will prepare the fabric for the front and back of the outer shell. Cut two pieces of the dark colored quilter's cotton 8 inches wide by 10 inches high. Then, cut four pieces of the light colored quilter's cotton 8 inches wide by 10 inches high.
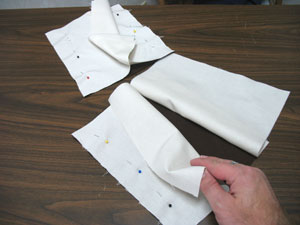
Lay the dark colored fabric flat and align the long edges of the light colored fabric along the left and right edges of the dark fabric with the right sides facing (creating two separate panels). Pin in place and sew a 1/4 inch seam along the pinned edges.
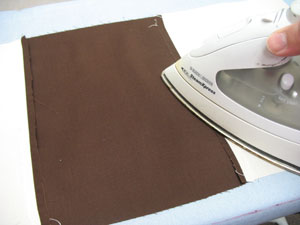
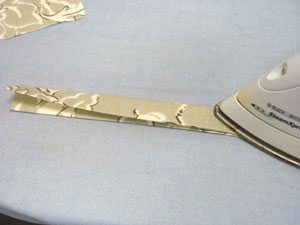
Lay the panels wrong side up and press the back seams open with an iron (without steam).
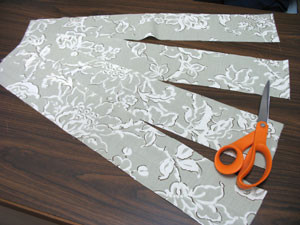
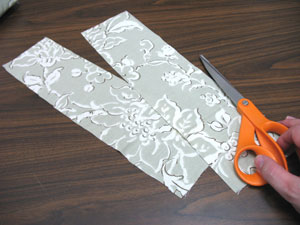
Cut four pieces of the print canvas 22 1/2 inches wide by 4 inches high.
Lay the assembled panels flat with the right side up. Then, align the long edges of the canvas with the top and bottom edges of the panels, right sides together. Pin in place and sew a 1/4 inch seam along the pinned edges. Then, press the back seams open.

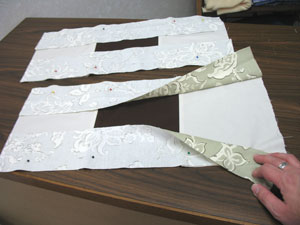
To prepare the fabric for the bottom of the outer shell, cut a piece of the print canvas 22 1/2 inches wide by 9 inches high. Lay one of the assembled panels flat and align one of the long edges of the bottom pieces with one of the long edges of the panel, right sides together. Pin in place, sew a 1/4 inch seam along the pinned edge, and press the back seam.
Lay the panel/back piece section flat and align the one of the long edges from the remaining panel with the open long edge of the bottom piece, right sides together. Pin in place, sew a 1/4 inch seam along the pinned edge, and press the back seam.
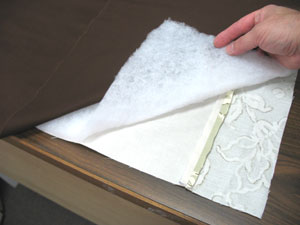
Lay the fabric flat and spray it with a bit of temporary adhesive. Smooth the extra-loft batting on top. Then, spray the batting with adhesive and smooth a piece of quilter's cotton on top. Trim the excess batting and quilter's cotton around the shape of the assembled fabric piece.
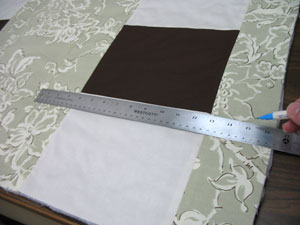
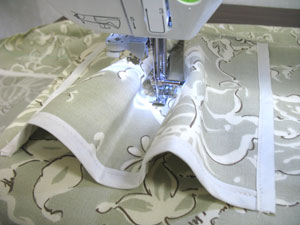
Now we will quilt the outer shell! Using an air-erase pen (or other marking tool), draw lines extending out onto the top and bottom canvas sections from the seams in between the cotton panels.
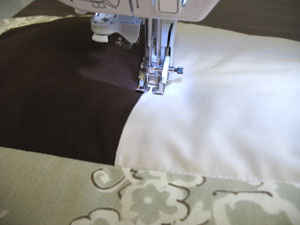
Using nylon monofilament thread in the top, sew a seam along each existing seam in the outer shell - this is called "stitching in the ditch."
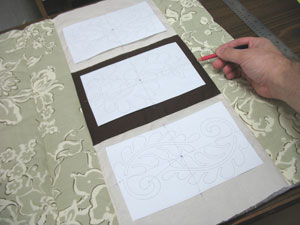
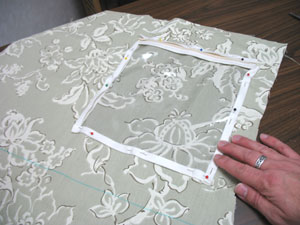
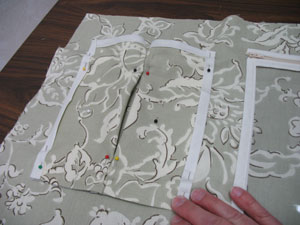
Create paper templates of the designs by printing them at full size using embroidery software. If you don't have embroidery software, you can cut a piece of paper the shape and dimensions of the designs to help with placement and centering.
Arrange the templates inside the cotton panels. We placed a design in the center of the middle panel and the remaining designs about 3/4 inches from the edges to the inner seams. Using an air-erase pen, dress makers pencil, or other marking tool, poke holes in the centers of the templates and mark the fabric. Also, mark the horizontal and vertical axis points.
Remove the templates and draw lines connecting the marks. These marks will be used for hooping.
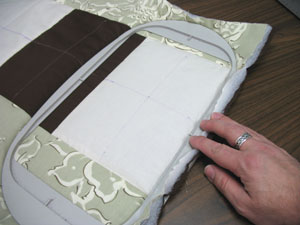
Hoop the three layers together (quilter's cotton, batting, and quilter's cotton) by aligning the marks on the hoop with the lines on the fabric. No stabilizer is needed when embroidering feather quilting designs onto the quilter's cotton/batting "sandwich."
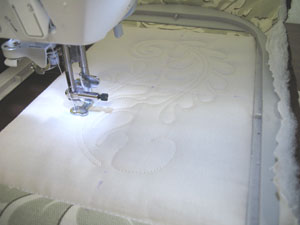
Attach the hoop to the machine and load the first design. Move the hoop so that the needle is directly over the center point on the hoop. Embroider the design. We are embroidering with all-purpose cotton sewing thread in the top and the bobbin.
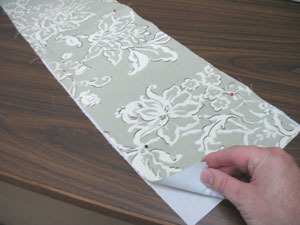
Repeat the hooping and embroidering process for each of the six cotton panels.
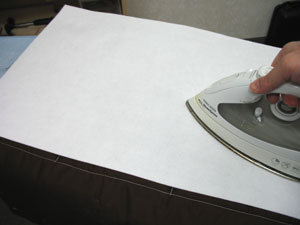
Cut two pieces of heavy weight fusible interfacing 15 inches wide by 22 1/4 inches high. Align the interfacing on the backside of the quilted panels and press in place with an iron (refer to the interfacing instructions).
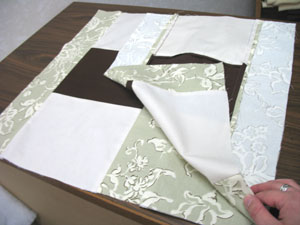
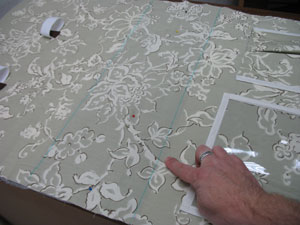
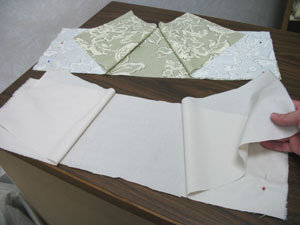
Now we will prepare the fabric for the inner lining. Lay the assembled outer shell on top of the print canvas, trace and cut out the shape. Then, lay the outer shell flat with the wrong side facing up. Align the inner lining fabric on top, wrong sides together. Mark the seams of the bottom piece of the outer shell onto the inner lining fabric. Then, draw lines across the inner lining fabric to connect the marks.
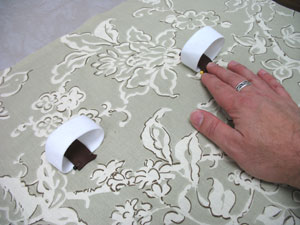
Now we will prepare the inside fabric loops and the inside pockets. To create the fabric loops, cut strips of 1 inch wide elastic 7 inches long (we added two loops, but you can add as many as you like). Then, for each loop, cut a piece of quilt binding 3 inches long. Fold the ends of the binding in 1/2 inch and press. Then, create a loop with the elastic by bringing the ends together. Place the loops along the center of one of the sides of the inner lining. Overlap the ends of the loops about 1/2 inch, add the quilt binding on top of the ends, pin in place, and sew a 1/8 inch seam around the edges of the binding to secure the loops in place.
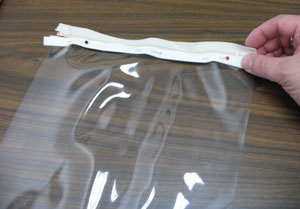
To create the nylon zipper pocket, cut a piece of clear vinyl 9 inches wide by 9 inches high. Then, cut a piece of bias tape the width of the zipper. Wrap the tape around the bottom edge of the zipper and align it with one of the edges of the vinyl. Pin in place and sew a seam along the inside edge of the tape using a zipper foot on the machine.
Lay the pocket on the open side of the inner lining (the opposite side to the loops). Place the pocket about 2 inches from the right side and about 3 inches from the top of the lining. Cut strips of bias tape and wrap them around the sides and bottom of the pocket. Also, cut and wrap tape around the top of the zipper. Pin in place and sew a seam along the inside edge of the tape to secure the pocket in place.
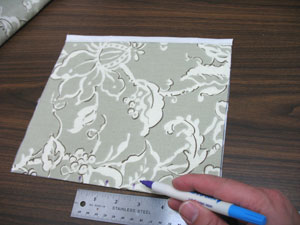
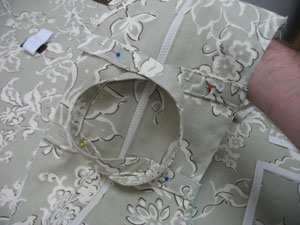
Now we will prepare the fabric pocket. Cut a piece of print canvas 10 inches wide by 18 inches high. Fold the fabric with the short ends together and press - the folded edge is the bottom of the pocket. Then, cut and wrap a piece of bias tape along the top edges (the raw edges) and sew it in place. Measure and mark the center of the bottom of the pocket by measuring and dividing by two. Next, measure and mark out 1 1/4 inch from the center mark.
Pinch and fold the bottom of the pocket by bringing the outer marks in to meet the center mark. Lay the pocket about 2 inches from the zipper pocket and pin it in place. Cut and wrap bias tape around the side edges of the pocket. Sew a seam along the inside edges of the tape and also sew a 1/4 inch seam along the bottom of the pocket to secure it in place.
Remove the pins and sew a seam up the center of the pocket (this creates two compartments in the pocket)
Align the inner lining on top of the outer shell, wrong sides together, and pin in place. Then, sew seams along the lines on the outer shell - these lines create the bottom section of the caddy.
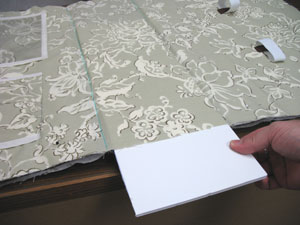
Cut a piece of foam board or thick cardboard 6 1/2 inches wide by 20 inches high. Insert the board in between the inner lining and the outer shell fabric. Then, sew a 1/2 inch seam around the entire outer edges of the outer shell/inner lining piece.
To prepare the fabric for handles, cut two pieces of canvas 16 inches high by 4 inches wide. If you would like to create shoulder straps instead of handles, cut two pieces of canvas 42 inches high by 4 inches wide.
Fold the fabric with the long edges together, wrong sides facing, and press. Then, fold the fabric again with the long folded sides together and press. Sew a 1/8 inch seam along both long edges.
Now we will prepare the fabric for the middle section of the caddy (the top and sides). Cut three pieces of the print canvas: two pieces 8 inches wide by 17 inches high and one piece 8 inches wide by 23 1/2 inches high. Also, cut three pieces of the quilters cotton: two pieces 8 inches wide by 17 inches high and one piece 8 inches wide by 23 1/2 inches high. Lay the large pieces flat and align the short ends of the smaller pieces with the short ends of the large piece, right sides together. Pin and sew a 1/2 inch seam along the pinned edges only. Then, press the back seams.
Align the assembled pieces together, wrong sides facing, pin in place, and sew a 1/4 inch seam around the entire outer edge.

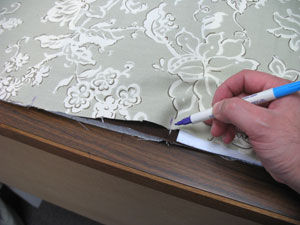
Now we will add the zipper. Lay the assembled middle section flat with the canvas side facing up. Place the zipper in the center of the fabric with the ends extending equal distances past the seams. Then, mark the ends of the zipper onto the fabric.
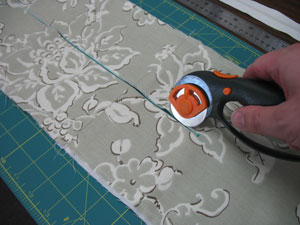
Remove the zipper and draw a line connecting the marks. Then, cut along the line cutting through both layers of fabric (a rotary cutter works great for this).

Cut 1/4 inch slits perpendicular to the ends of the cut you just made. Then, turn the raw edges of the canvas in 1/4 inch and press. Also, turn the edges of the cotton over 1/4 inch and press.
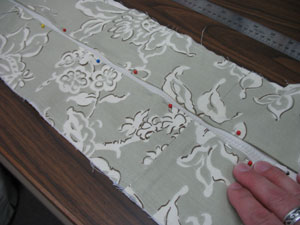
Insert the zipper in between the layers of fabric, pin in place, and sew a 1/8 inch seam along the inner edge of the folds.
Now we will add the handles/straps. Measure and mark the center of each long edge of the middle section. To make handles, measure and mark out about 2 inches from each center mark. For straps, measure and mark out about 6 inches from each center mark. Align the ends of the handles or straps with the outer marks (with the handles or straps lying to the inside of the middle section) and pin in place. Tack the ends of the handles/straps in place by sewing a 1/2 inch seam along each end. Next, cut 1/2 inch slits at each seam and diagonally at each corner of the middle section.
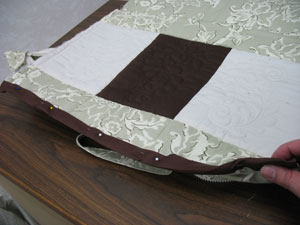
It's time to add the middle section to the outer shell/inner lining piece! With the zipper open on the middle section, align top edges of the outer shell with the sides of the middle section (the area in between the seams) with the wrong sides together. Pin in place about 2 inches from the top edge of the outer shell. Then, cut strips of quilt binding and wrap it around the top edges of the outer shell. Pin in place and sew a seam along the inner edge of the binding. This finishes off the edges of the caddy and also binds the outer shell with the middle section.
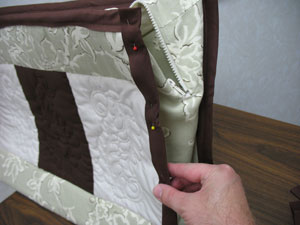
Align the four side edges of the outer shell with the middle section, pin in place, add the quilt binding, and sew in place. Add the two bottom edges by first pinning the fabric in place, then wrapping the binding around the edges, and hand sewing the binding in place (this section is too tight to machine sew).
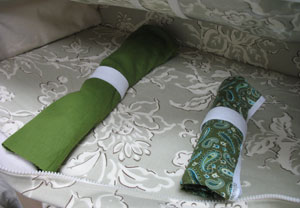
And now your caddy is complete! Roll up pieces of fabric and tuck them into the elastic loops.
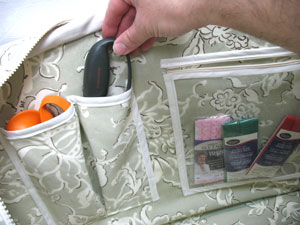
Add all your quilting odds and ends to the inside pockets. Also, the caddy can hold a cutting pad up to 18 inches wide by 12 inches high!


